
Mornings are a sprint, aren’t they? When the alarm clock yells and you only have a few minutes before the real chaos starts, you need breakfast ideas that actually deliver comfort without demanding half an hour of your time. That’s why I’m so excited to share this easy French toast recipe with you. It’s the one I developed for Bring Dish—my way of bringing those grounding, wonderful lessons from my grandma’s kitchen into your busy weekday routine. If you want to know more about the philosophy behind these practical recipes, check out my story on Bring Dish!
Forget thin, sad slices! This method guarantees a French toast that is perfectly golden on the outside and delightfully custardy in the center. It’s seriously reliable, and honestly, it’s ready faster than you can decide what shirt to wear!
- Why This is the Best Easy French Toast Recipe for Busy Mornings (15-Minute Breakfast)
- Gathering Ingredients for Your Easy French Toast
- Creating the Classic French Toast Batter
- Step-by-Step Stovetop French Toast Instructions
- Tips for the Best Homemade French Toast Success
- Variations for Your Easy French Toast Morning
- Serving Suggestions for Your Cinnamon French Toast Recipe
- Storage and Reheating Instructions for Quick French Toast Recipe
- Frequently Asked Questions About Making Easy French Toast
- Estimated Nutritional Information
- Share Your Easy French Toast Creations
Why This is the Best Easy French Toast Recipe for Busy Mornings (15-Minute Breakfast)
I get it. When you need a good breakfast fast, you can’t afford complicated steps. That’s the whole point of this recipe! We are clocking in at only 15 minutes total, making this the perfect 15 Minute Breakfast solution. Seriously, it’s faster than waiting in the drive-thru line!
The beauty of this easy French toast isn’t just the speed; it’s the texture we lock in. We bypass the risk of soggy bread because we use the perfect balance of egg and milk for a deeply satisfying, yet not overly wet, interior. It’s one of my top Simple Breakfast Ideas because it proves you don’t need complexity for comfort.
For me, developing this recipe meant finding the sweet spot. It had to be quick enough for those 7 a.m. scrambles but delicious enough to feel like a treat. The secret is efficient cooking—hot pan, quick dip, and perfectly cooked slices. You truly get that glorious golden exterior and fluffy middle every single time.
Gathering Ingredients for Your Easy French Toast
Okay, let’s talk ingredients because that’s where the magic starts for this easy French toast. The great thing is, you probably have almost everything sitting in your fridge or pantry right now. We are keeping this list super straightforward for those quick mornings!
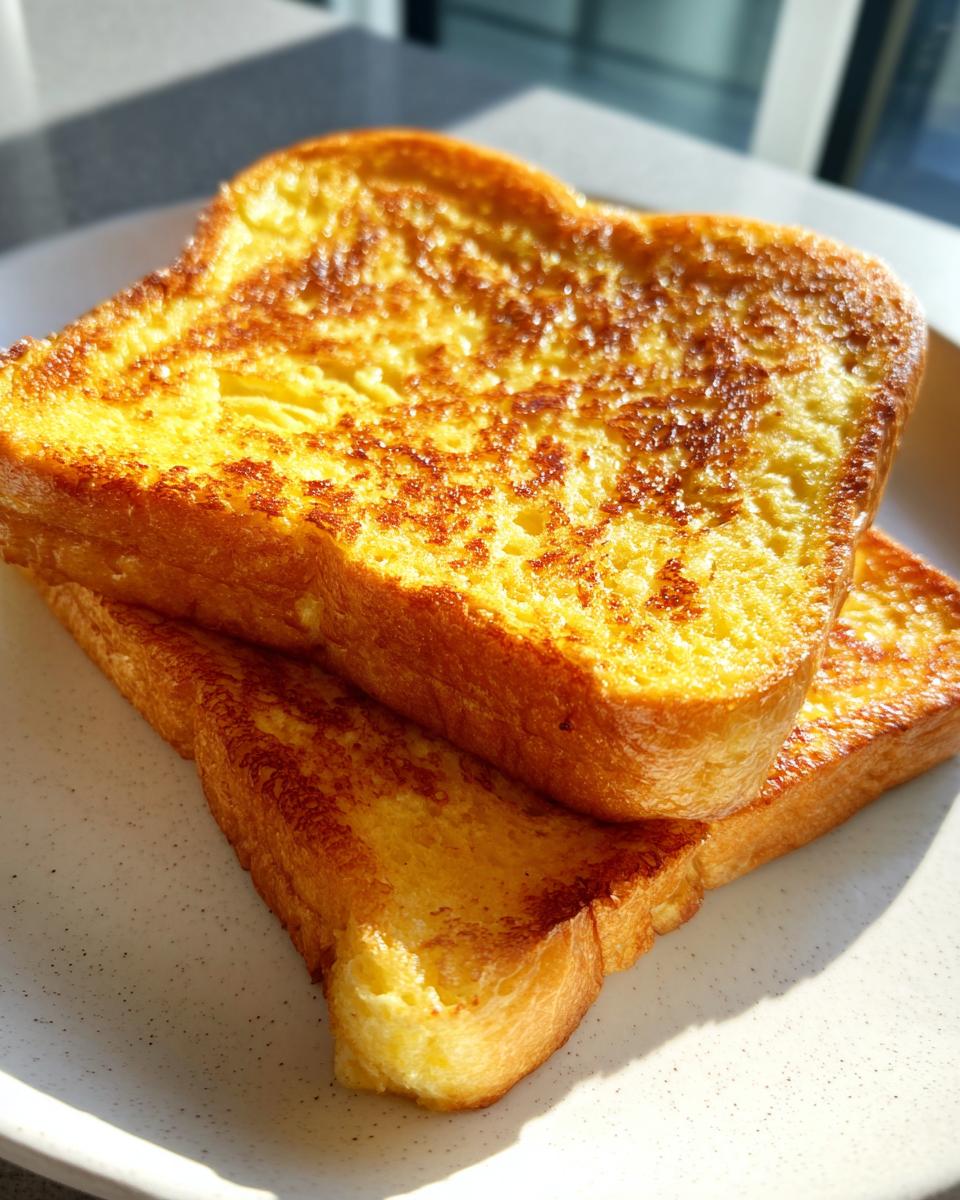
For the bread, grab eight slices. We aren’t messing around with thin slices here—they simply can’t hold up to the custard we make! You’ll need three large eggs, a half cup of milk—and trust me, whole milk gives the absolute best texture here—one teaspoon of vanilla, a half teaspoon of cinnamon, and just one tablespoon of sugar for the batter. Don’t forget the butter for the skillet; that’s non-negotiable for the flavor!
Bread Choice Matters for Custardy French Toast
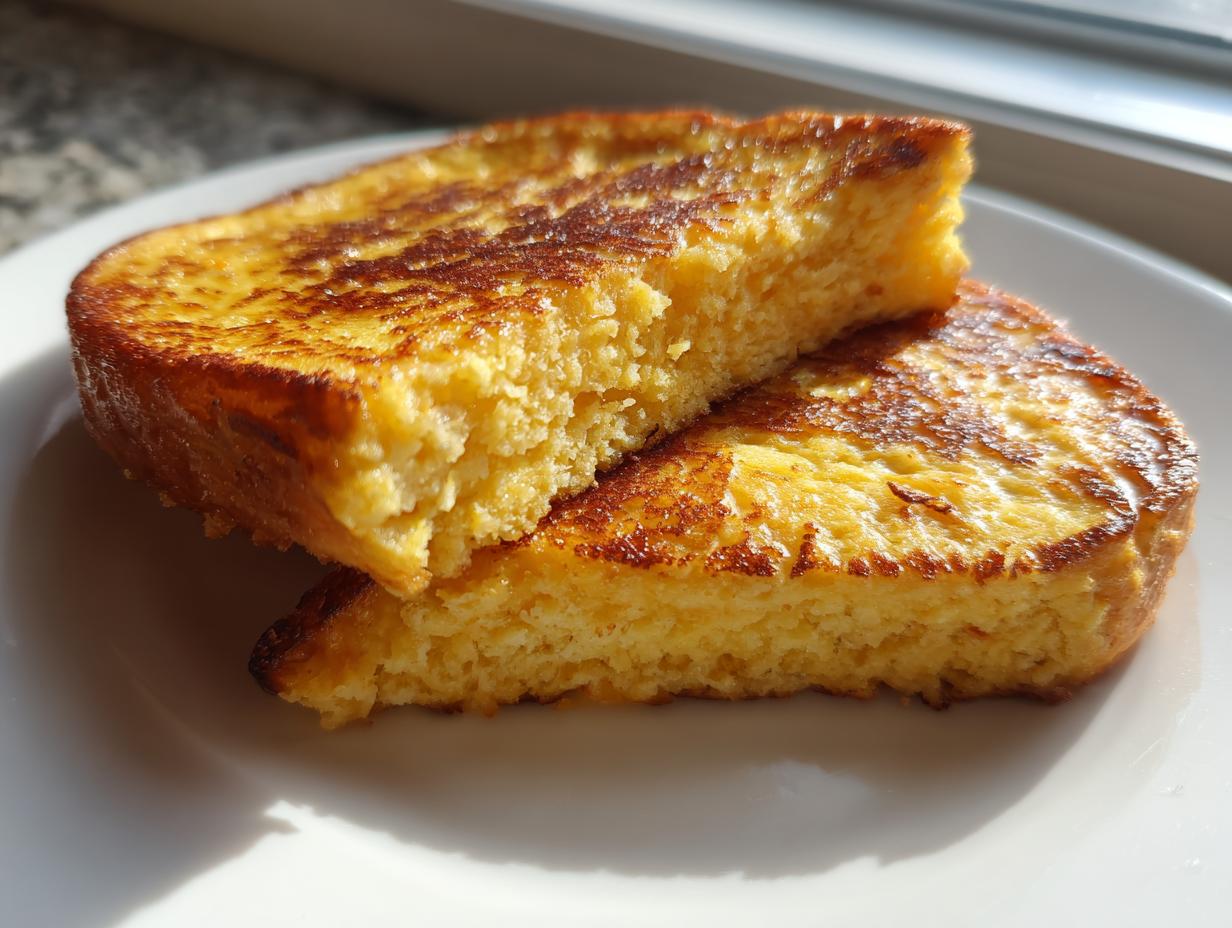
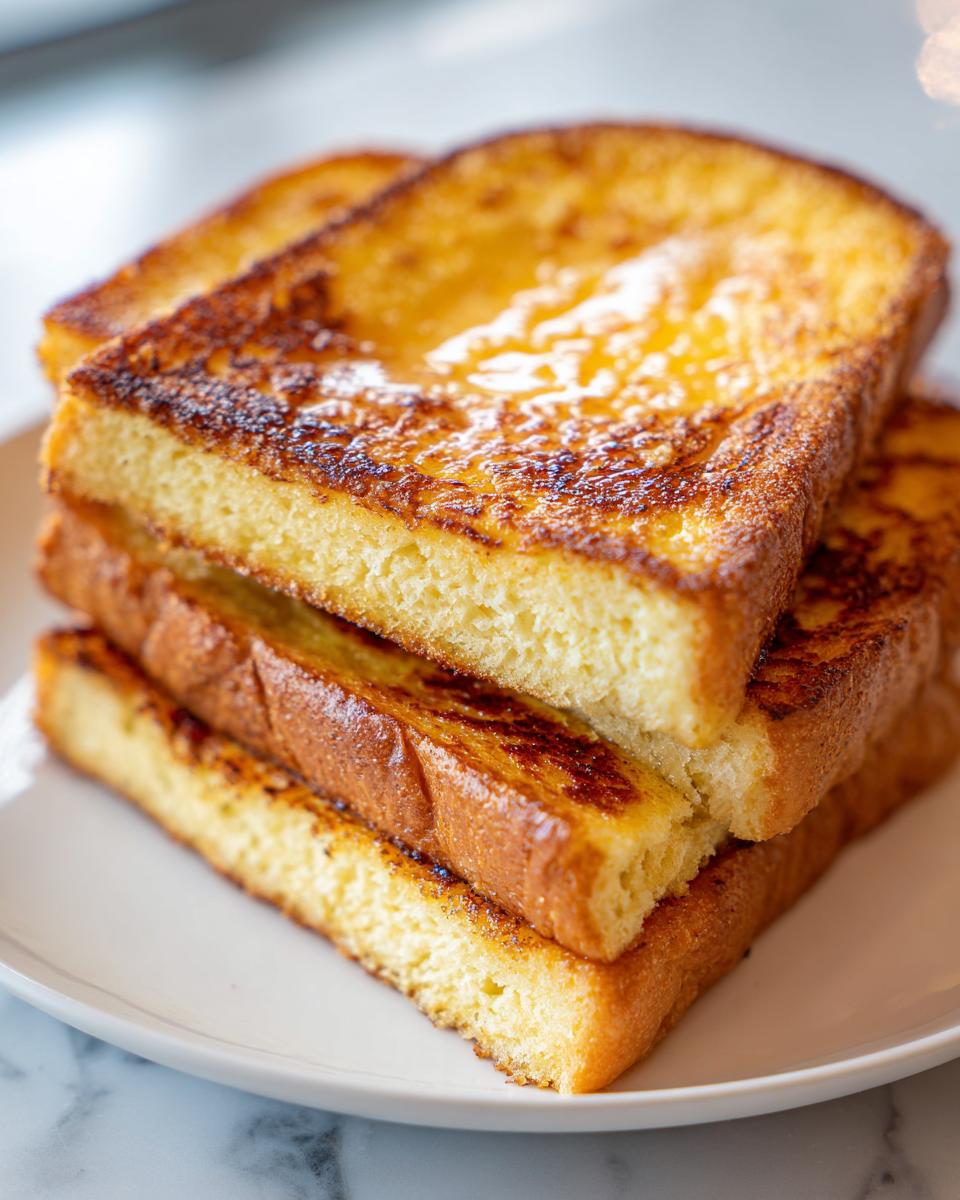
If you want that dreamy, melt-in-your-mouth, custardy French toast interior, the bread makes or breaks it. You absolutely want thick slices. I always recommend challah or brioche if you can find it because they are sturdy, slightly rich, and they soak up the egg mixture without immediately turning into a sad, soggy mess.
Using day-old bread is a pro move, too. It lets the bread absorb more of that sweet egg goodness without dissolving on the pan. When the bread is slightly dry, it actually drinks up the humidity from the batter, giving you that perfect spongy-yet-firm foundation we are aiming for.
Creating the Classic French Toast Batter
Now we get to the really fun part: mixing up that Classic French Toast Batter! This is where you combine the simple things and make something spectacular. You’ll need a shallow dish, maybe a pie plate, so we can properly dip the bread later.
Go ahead and crack your three eggs into that dish. Don’t just plop the milk in—whisk the eggs first! I like to beat them really well until they look light and slightly frothy. This simple extra step is key because it really helps incorporate air, which leads to that light, fluffy exterior we all crave.
Next, pour in your milk, the vanilla extract, the cinnamon—which gives it that amazing comforting scent—and your one tablespoon of sugar. Keep whisking until everything is totally uniform. You don’t want any sad little ribbons of egg white hiding at the bottom.
Here’s my little tip, and this is important for that perfect golden color: don’t be tempted to add more sugar than I listed! A common mistake beginners make is adding too much sugar to the batter. That sugar burns almost instantly on a medium-hot skillet, turning your beautiful French toast into something black and bitter before the inside even heats up. Stick to the tablespoon; we’ll add flavor with the syrup later!
Step-by-Step Stovetop French Toast Instructions
Alright, we have the batter ready, and the kitchen smells amazing already because of that cinnamon! Now we move to the skillet for our stovetop French toast magic. The most important thing here is heat management. You absolutely need a large skillet or griddle, and you must heat it over medium heat.
Get that butter simmering. You want it melted and sizzling gently when the bread hits—not completely smoking! This ensures the bread starts browning right away, which is what creates that wonderful crust. Melt about half your butter first; we’ll add more as needed for subsequent batches.
Here is the crucial part for that custardy middle: the dunk! Take one slice of your thick bread and dip it straight into the batter. Let it sit there for a solid 15 seconds on one side, then flip it and give the other side another 15 to 20 seconds.
Don’t leave it soaking for a full minute! We want it soaked, yes, but not completely saturated like a sponge. We are aiming for that perfect interior texture, not a puddle on your plate. Once dipped, immediately lay that slice onto your hot, buttered skillet.
Achieving Golden Brown French Toast Texture
Once the bread is sizzling away on the griddle, you can breathe a little bit. Now we wait, but not too long! I usually let it cook for about 3 to 4 minutes on that first side. You should see beautiful bubbles forming on the top surface, and the edges need to look deeply golden brown peeking out.

When you think it’s ready, carefully slide a thin spatula underneath and peek! If it’s that rich, appealing color you want, flip it over. The second side usually takes just a tiny bit less time than the first. Remember, if you are cooking for the whole family, you might have to lower the heat slightly for the second batch so the butter doesn’t burn while the center finishes cooking.
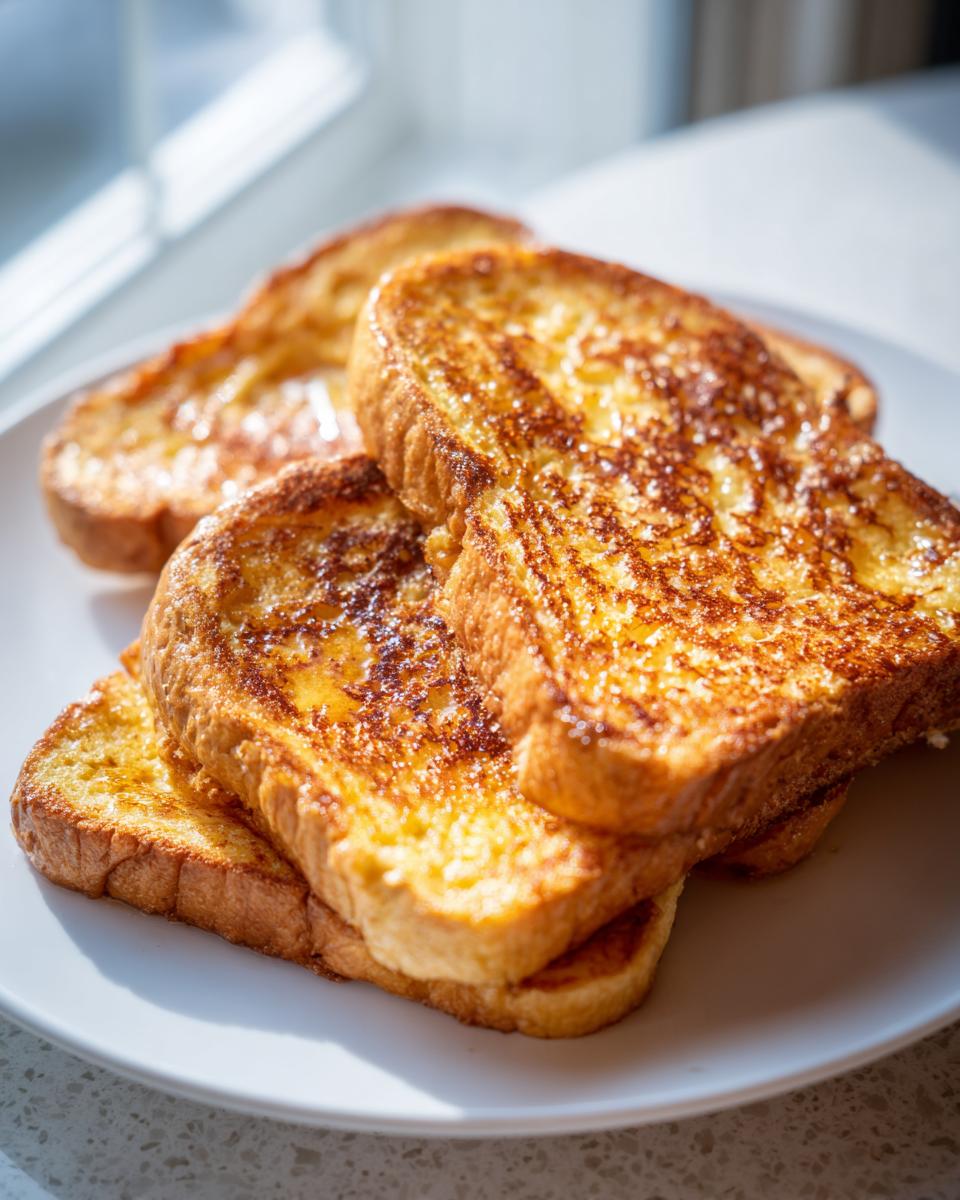
Keep pulling the finished pieces off and set them on a platter. If you’re making a huge brunch for everyone, pop the platter into a very low oven—around 200°F—to keep them hot while you finish up the rest of the batter. This really helps with serving a crowd!
Tips for the Best Homemade French Toast Success
Even with a simple recipe like this easy French toast, those little tweaks are what turn ‘good’ into the absolute best homemade French toast. Trust me on this, because I learned some lessons the hard way in my early days of trying to serve brunch!
You already know I mentioned using slightly day-old bread—it’s the number one requirement for success if you want that perfect soak. Early on, when I was trying to rush things, I’d grab bread straight from the bag. Big mistake! The fresh bread was too soft, and I’d end up wrestling with doughy, disintegrating slices on the griddle. It was messy, and honestly, a little depressing for a weekend meal. It took a few ruined loaves before I respected bread texture!
Another tip to keep your morning running smoothly is managing heat for subsequent batches. As you cook, the pan gets hotter. If you just keep dropping those cold, buttered slices onto a blistering hot skillet, the outside will char before the center warms up. So, remember to keep dialing that heat back to medium-low once you start the second round—it ensures that beautiful, consistent golden brown color we are looking for.
And finally, if you are cooking for more than two people, you need a warming strategy. I highly suggest keeping finished slices warm on a baking sheet in a very low oven, set around 200°F, while you cook the rest. This method keeps everything hot and ready to serve at the same time, which is a lifesaver when hosting! If you’re looking for other incredibly well-tested breakfast recipes, you might want to check out the approach taken over at Modern Honey.
Variations for Your Easy French Toast Morning
Part of making a recipe truly yours is knowing where you can wiggle the instructions a bit without turning it into a whole new creation! This easy French toast is wonderfully cooperative when you want to mix things up for your Family Friendly Breakfast spread.
If you’re feeling like the batter needs a little extra something, try this: add just a tiny pinch of nutmeg right in with your cinnamon. It gives a subtle depth that I think is just lovely, especially if you’re using apples or berries as a topping later on.
If you don’t have brioche or challah on hand—no panic! You can absolutely use a sturdy white bread or even Texas toast. Just remember that the thicker the slice, the better it handles that quick dip into the custard. Keep it simple, keep it quick, and keep it delicious!
Serving Suggestions for Your Cinnamon French Toast Recipe
Okay, your cinnamon French toast recipe is cooked to a perfect golden shade, smelling divine, and ready for its close-up! Now, the presentation is almost as fun as the eating, right? We want to treat this amazing easy French toast like the weekend brunch treat it deserves to be, even if it only took us 15 minutes to make.
You can never, ever go wrong with the classics. A high-quality, real maple syrup poured generously over the top is my absolute go-to. It melts right into those little nooks and crannies you worked so hard to create! A light dusting of powdered sugar next—it just looks so elegant and makes it feel special.
If you want to elevate it just a touch more for brunch guests, think about adding some fresh berries. A handful of bright red raspberries or sliced strawberries adds a beautiful pop of color and a nice little tartness to cut through the richness of the egg batter. If you happen to have some whipped cream in the fridge, a dollop on top makes it feel like absolute heaven without adding any extra work!
Storage and Reheating Instructions for Quick French Toast Recipe
Sometimes, even with the best quick French toast recipe, you just can’t eat all eight slices in one sitting! Good news: leftovers are fantastic, provided you store them correctly. You want to handle them gently so they are ready to go for another easy morning later in the week.
When cooling them down, lay the cooked slices out on a wire rack right away, not stacked on top of each other. This lets the steam escape instead of getting trapped, which is what makes toast soggy overnight. Once they are completely cool—and I mean touchable cool—transfer them to an airtight container. You can keep them in the fridge safely for about three to four days this way.
Reheating is where you bring back that crispy edge! I absolutely forbid the microwave for reheating French toast. It just turns it into rubbery sadness, and we worked too hard for that fluffy center. If you only have one or two slices, pop them straight into your toaster on a medium setting, or use a toaster oven. That gets them perfectly hot and restores some of that lovely golden crunch.
If you have a larger batch ready to go—maybe you made a big batch for Sunday brunch—your best bet is the regular oven. Just spread the slices out on a baking sheet, no overlapping, and heat them at 350°F for about 5 to 8 minutes. They warm right through, and the edges dry up just perfectly. It’s nearly as good as fresh off the griddle! For more ideas on fantastic, easy meals, check out what I’ve shared over at Break the Spice Recipes.
Frequently Asked Questions About Making Easy French Toast
I know when you’re whipping up a quick breakfast recipe, you might have a few little questions pop up right at the start. That’s totally normal! These are the things I hear most often from folks trying out this classic recipe for the first time. We want to make sure your first batch of easy French toast is a winner! If you ever need to reach out with a question about a recipe, you can always drop a line over at the contact page.
Can I use regular sandwich bread for this French Toast for Beginners?
You certainly can start with regular sandwich bread if that’s what you have! This recipe is great for French Toast for Beginners. However, I have to be honest: if you use thin, standard white bread, you run a much higher risk of it getting too soggy right down the middle. Thicker cuts, like Texas toast or that nice brioche I mentioned, can soak up much more of the custard before they compromise their structure. If your bread is thin, just cut your soaking time down to maybe 10 seconds per side!
What is the best way to prevent my Fluffy French Toast from getting soggy?
This is the number one worry people have when aiming for that fluffy French toast texture! It all comes down to two things: bread choice (which we covered!) and soaking time. You absolutely must make sure your skillet is hot enough before that bread hits the butter. If the pan is too cool, the bread just sits there absorbing the liquid without setting the outside crust. When you dip the bread, count those seconds—15 to 20 seconds per side is perfect. It needs enough time to become custardy inside, but not so long that it starts breaking down.
Is this recipe suitable for a Weekend Brunch Recipes spread?
Oh, absolutely! This is my go-to when I’m planning weekend brunch recipes because I can get a plate ready for the kids in five minutes while the coffee is brewing. Since this is a stovetop method, it is naturally fast. If you are serving a big group all at once, just remember that warming trick! Set your oven to 200°F and place your finished slices on a baking sheet in there while you cook the next batch. They stay perfectly hot and don’t steam, so the texture stays spot on!
Estimated Nutritional Information
I always like to give you a general idea of what you’re working with when you make this easy French toast, especially if you’re planning a big brunch or need to keep track of things. Keep in mind, every ingredient in your pantry can shift these numbers just a little bit, so these are good ballpark figures!
This information is based on serving two slices, using the standard ingredients listed in the recipe above.
- Serving Size: 2 slices
- Calories: 280
- Sugar: 8g
- Sodium: 250mg
- Fat: 12g
- Saturated Fat: 6g
- Carbohydrates: 30g
- Protein: 13g
It’s really important to remember that these are just estimates based on the ingredients I use. If you use a thinner bread, skip the sugar in the batter, or load up on butter when cooking, those numbers are going to change! Just use this as a general guide for your quick morning meal.
Share Your Easy French Toast Creations
Well, that’s it! You’ve officially mastered the quickest, most reliable way to make phenomenal French toast. Seriously, I hope this easy French toast becomes your new go-to for those hectic mornings when you still want something comforting on the table.
I put so much effort into making this recipe straightforward and foolproof—from the perfect batter consistency to getting that golden-brown crust without burning the sugar. Now that you’ve tried it, I would just love to hear about it!
Did you stick with the classic cinnamon, or did you try adding that pinch of nutmeg I mentioned? Drop a comment below and let me know how many stars you’d give this quick french toast recipe! And if you have a favorite topping that makes your mornings better, share that too—we cooks always need new ideas!
If you are curious about how we handle user data on the site, you can always take a peek at our Privacy Policy. Happy cooking, and thanks so much for trying out my favorite breakfast tradition!
PrintQuick & Easy French Toast: Perfect Fluffy Texture Every Time

Make the best homemade French toast with this simple recipe. It uses basic ingredients to create golden, fluffy slices with a custardy center, perfect for a fast breakfast or weekend brunch.
- Prep Time: 5 min
- Cook Time: 10 min
- Total Time: 15 min
- Yield: 4 servings 1x
- Category: Breakfast
- Method: Stovetop
- Cuisine: American
- Diet: Vegetarian
Ingredients
- 8 slices thick bread (like challah or brioche)
- 3 large eggs
- 1/2 cup milk (whole milk works best)
- 1 teaspoon vanilla extract
- 1/2 teaspoon ground cinnamon
- 1 tablespoon sugar
- 1 tablespoon butter, for cooking
Instructions
- In a shallow dish, whisk together the eggs, milk, vanilla extract, cinnamon, and sugar until fully combined. This creates your classic French toast batter.
- Heat a large skillet or griddle over medium heat. Add half of the butter and let it melt until it sizzles slightly.
- Dip one slice of bread into the egg mixture, letting it soak for about 15 to 20 seconds per side. Do not over-soak; you want the center custardy, not soggy.
- Place the soaked bread onto the hot, buttered skillet. Cook for 3 to 4 minutes per side, until the French toast is golden brown and cooked through.
- Remove the cooked slices and keep them warm while you repeat the process with the remaining butter and bread slices.
- Serve immediately with your favorite toppings like maple syrup and fresh fruit.
Notes
- Use slightly stale or day-old bread; it absorbs the custard better without falling apart.
- For extra flavor, add a pinch of nutmeg to the batter.
- If you are cooking for a crowd, keep finished slices warm on a baking sheet in a 200°F oven.
Nutrition
- Serving Size: 2 slices
- Calories: 280
- Sugar: 8
- Sodium: 250
- Fat: 12
- Saturated Fat: 6
- Unsaturated Fat: 6
- Trans Fat: 0
- Carbohydrates: 30
- Fiber: 1
- Protein: 13
- Cholesterol: 150