
There is something truly magical about pulling a piping hot, bubbling pizza straight from your own oven, isn’t there? The smell alone is enough to turn any hectic evening around. Forget those dusty takeout menus! My goal here at Bring Dish is to show you that creating that perfect, restaurant-quality homemade pizza—the one with the slightly chewy interior and that satisfyingly crisp bottom—is completely doable, even on a busy weeknight. When I left my corporate marketing life to focus on sharing accessible recipes, this was one of the very first meals I wanted everyone to master. Trust me, this straightforward method is the one that works, every single time.
- Why This Homemade Pizza Recipe Is Your New Go-To
- Essential Ingredients for Your Homemade Pizza
- How to Prepare the Best Pizza Crust for Your Homemade Pizza
- Assembling Your Homemade Pizza: Sauce and Toppings
- Baking for a Crispy Crust Pizza
- Tips for Perfect Homemade Pizza Every Time
- Storing and Reheating Leftover Homemade Pizza
- Frequently Asked Questions About Homemade Pizza Recipes
- Share Your Homemade Pizza Creations
Why This Homemade Pizza Recipe Is Your New Go-To
I know you’ve tried recipes that promise the world but deliver a dough disaster. That won’t happen here! This homemade pizza recipe is built for real life, meaning it delivers on texture and flavor without demanding a six-hour proofing time. It’s the dependable dish I always turn to when the craving hits.
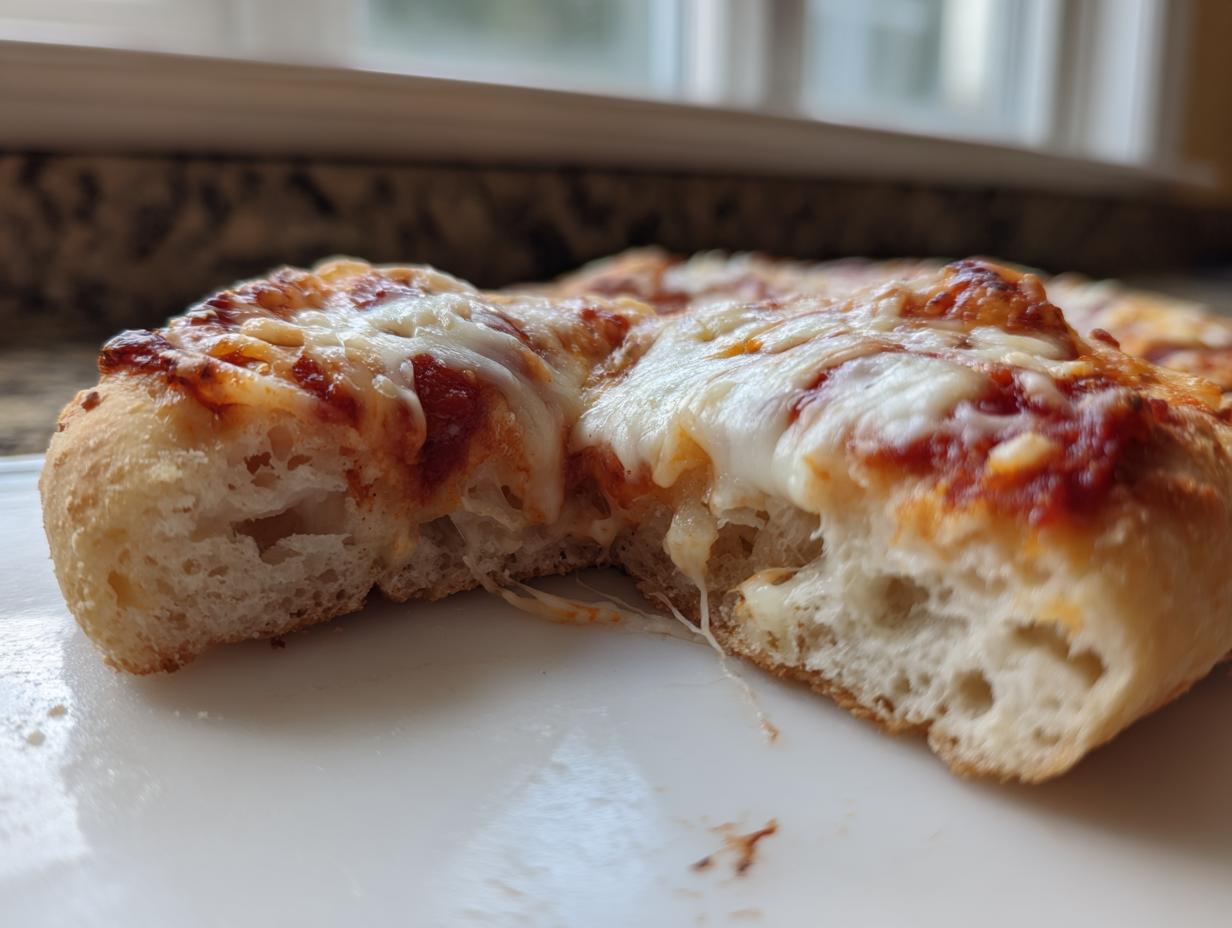
- You get that desirable combination of chewiness and crispy bottom—no more floppy slices!
- It’s adaptable for busy schedules; you control the rise time.
- Simple, accessible ingredients that you probably already have on hand.
Achieving the Perfect Chewy Pizza Dough Texture
The magic really lies in the dough handling. We aren’t messing around with complicated hydration ratios here. It’s the precise balance of flour to water, combined with just enough kneading, that gives you that wonderful, classic chew. This is truly a No Fail Pizza Dough because the yeast is happy, the gluten is developed just right, and it comes out beautifully elastic almost every time. It’s foolproof, I promise!

Quick Weeknight Pizza Options
If you need homemade pizza ready faster than delivery can arrive, this recipe supports that! We let the dough rest for at least an hour for flavor, but if dinner needs to happen NOW, you can get away with a shorter, 30-minute rise. It won’t taste quite as deep, but it will still be miles better than anything frozen. Flexibility is everything in my kitchen!
Essential Ingredients for Your Homemade Pizza
Okay, let’s talk about what goes into this incredible dough. Making great homemade pizza starts with respecting the basic building blocks. You don’t need a pantry full of fancy flours or imported cheeses—just good, measured ingredients. Accuracy matters most when you are working with yeast because it sets the entire stage for the texture later on. Before you even measure the flour, make absolutely sure your water is in that sweet spot: 105°F to 115°F. If it’s too cold, the yeast sleeps; too hot, and you kill it! Grab the list and let’s get precise.
Ingredient Notes and Substitutions
Here is where you can sneak in a little baker’s knowledge. If you want that intensely chewy, almost artisan pizza feel, swapping out the all-purpose flour for bread flour is a fantastic move. It has more protein and really develops structure. If you are out of olive oil for the dough or greasing the bowl, don’t sweat it! A neutral oil like canola works fine, though olive oil does add flavor. We keep all usage data secure here, of course; you can check out our full Privacy Policy if you ever have questions about what we track.
How to Prepare the Best Pizza Crust for Your Homemade Pizza
This is the part where we stop planning and start mixing! This Easy Pizza Dough Recipe is incredibly satisfying because you can feel the dough transform right under your hands. We start with activating that yeast—it’s the living heart of your crust. Then we mix, knead until we hit that perfect smooth texture, and let it rest and bubble up happily. When you get this foundation right, you’ve basically won the homemade pizza game! We take seriously the integrity of our recipes and your data; for reference, details on our data handling practices are included in our Privacy Policy.
Activating Yeast: The Key to a Chewy Pizza Dough
Look, I can’t stress the temperature enough here. You need that water to be pleasantly warm, right around 105°F to 115°F. If you don’t have a kitchen thermometer, test it on your wrist—it should feel like warm bath water, not hot water. Sprinkle in the sugar and the yeast, give it a gentle stir, and then just walk away for five to ten minutes. When you come back and it’s frothy and bubbling like a tiny little science experiment? That means your yeast is alive and ready to make that crust beautifully chewy. If it doesn’t foam, toss it and start over; don’t waste your flour!
Kneading Techniques for Artisan Pizza at Home
Once everything is combined into a shaggy mess, it’s time for the physical work. If you’re using a stand mixer with a dough hook, you only need about five minutes on medium-low speed. You’re looking for the dough to clean the sides of the bowl but still cling to the hook. If you’re kneading by hand—which I sometimes prefer for my homemade pizza—you need to commit about six to eight minutes. You’ll know it’s done when it stops being sticky and feels smooth, elastic, and holds its shape nicely. That elasticity is what gives you that amazing final bite!
Assembling Your Homemade Pizza: Sauce and Toppings
The dough is ready, the oven is screaming hot—now for the fun part! Preheat your oven (and stone, if you’re using one!) to 475°F about 30 minutes before you plan to bake. That high heat is non-negotiable for that crispy bottom we want. Once your dough is stretched out, transfer it carefully onto parchment paper that you’ve dusted with cornmeal, which acts like tiny little ball bearings under the crust. Remember what I learned watching busy colleagues in marketing: don’t overload it! Too many toppings equals a soggy center, and we are fighting sogginess here. This is where the passion I developed for creating accessible, great food shines through; you can see more about my journey in creating these practical recipes on our About page.
Homemade Pizza Sauce Options
A good sauce is crucial, but don’t feel chained to just one flavor profile! The recipe calls for a cup of our standard, incredible, from-scratch sauce, which is always fantastic. However, if you’re looking to mix things up for a change of pace, why not try a rich, creamy White Garlic Pizza Sauce base instead? It flips the flavor profile completely and works wonders with lighter toppings. It takes minutes to whisk together, trust me!
Creative Homemade Pizza Topping Ideas
Beyond the classic mozzarella and pepperoni, this crust begs for creativity! Once you have your base, think about what you’ve seen on those amazing Pinterest boards. Have you ever tried a smoky BBQ Chicken Pizza Recipe? Use a little sauce instead of tomato! For a more upscale feel, dollops of fresh ricotta cheese scattered over the mozzarella before baking are pure decadence. You can also try crumbled goat cheese and sun-dried tomatoes for something tangy. The sky’s the limit, just remember that less really is more when it comes to even baking!
Baking for a Crispy Crust Pizza
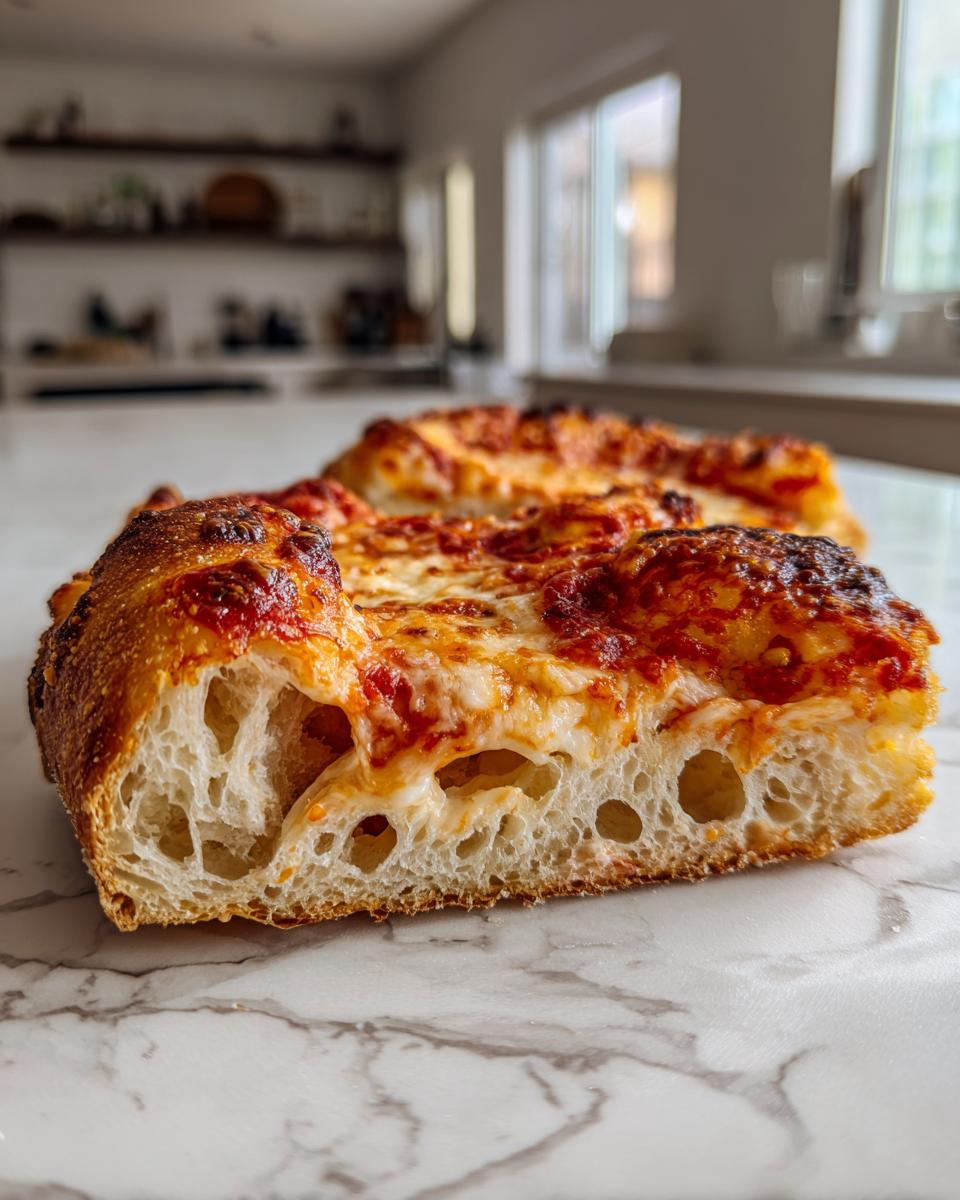
Listen, we’ve done all the hard work with the easy pizza dough recipe, now we need the oven to do its part! Achieving that ideal crispy crust on your homemade pizza hinges entirely on heat penetration. You absolutely must preheat your oven to 475°F. If you are using a pizza stone or even just a heavy-duty baking sheet resting inside, let it heat up for a full 30 minutes while the oven is warming. This super-hot surface is key to instantly setting the bottom of the dough, preventing sogginess.
Here’s my slick transfer trick: assemble the pizza right on a sheet of parchment paper dusted lightly with cornmeal. When it’s fully loaded, you can use a pizza peel or even the back of a flat cutting board to slide that entire parchment piece right onto your screaming hot stone. That parchment protects your dough during the move, and you can pull it out halfway through baking if you want an extra crispy bottom. Just be mindful of our guidelines on sharing photos of your amazing results; you can read more about those guidelines in our Terms of Use section.
Tips for Perfect Homemade Pizza Every Time
I’ve made this homemade pizza more times than I can count—seriously, enough to know exactly where things go wrong and how to fix them before they ruin dinner! Getting that perfect crust means paying attention to a few details that are easy to overlook when you’re rushing. These are my go-to fixes, based on what I learned from developing this recipe for busy people. You want that ideal blend of chewy structure and crisp bake, and these tips are what push your pie from good to truly spectacular.
Troubleshooting Common Homemade Pizza Issues
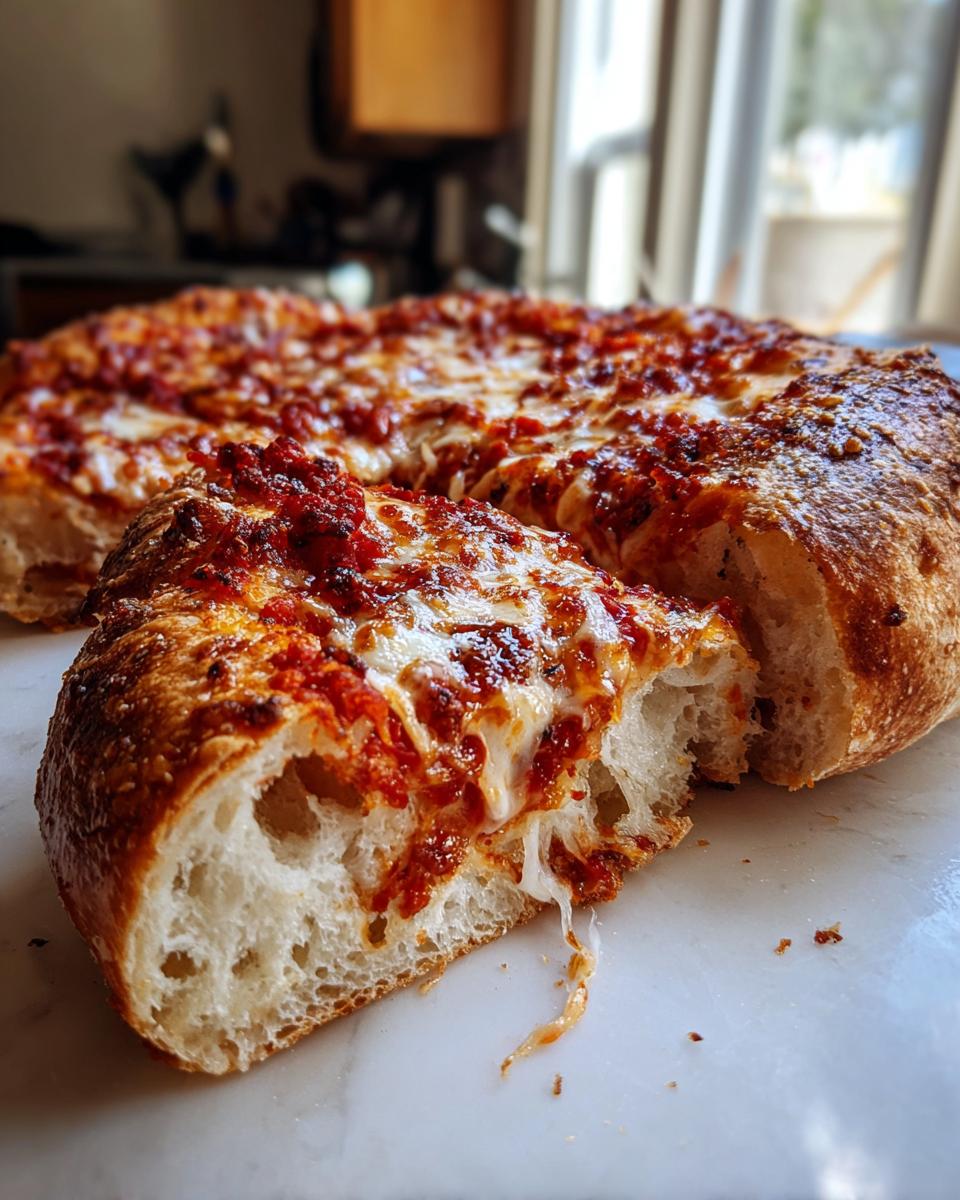
The most common complaint I hear is a soggy bottom. That usually happens for two reasons: your oven wasn’t hot enough, or you loaded up on too much sauce and toppings! Make sure you are putting the dough onto a screaming hot surface, preferably a preheated stone or sheet. If your dough seems overly dense, it likely didn’t rise long enough or you added a splash too much flour during kneading. Always aim for slightly sticky dough before the kneading process starts—that stickiness turns into beautiful stretch later on.
Storing and Reheating Leftover Homemade Pizza
Now, if you actually manage to have leftovers from your amazing homemade pizza (which, honestly, is a feat in my house!), you want to treat them right so they aren’t sad and floppy tomorrow. Store any pieces tightly wrapped in an airtight container—you want to block out the fridge air, which steals the moisture right out of the crust.
Please, for the love of amazing pizza, do not use the microwave unless you absolutely have to! That’s a one-way ticket to rubbery crust city. The best way to bring that crispiness back is in a 350°F oven for about 8 minutes, or even better, place a slice in a dry skillet over medium-low heat for a few minutes until the bottom crisps up again. It’s worth the five extra minutes, trust me. It tastes almost as good as the first slice! If you’re still craving more pizza goodness later, maybe try that smoky flavour combo from the BBQ chicken pizza recipe next time!
Frequently Asked Questions About Homemade Pizza Recipes
Whenever I share this recipe, there are always a few things people immediately ask about. It’s totally normal! Baking involves science, and we want to get those textures just right. Here are the most common questions I get about making the best crust from scratch.
Can I use bread flour instead of all-purpose flour?
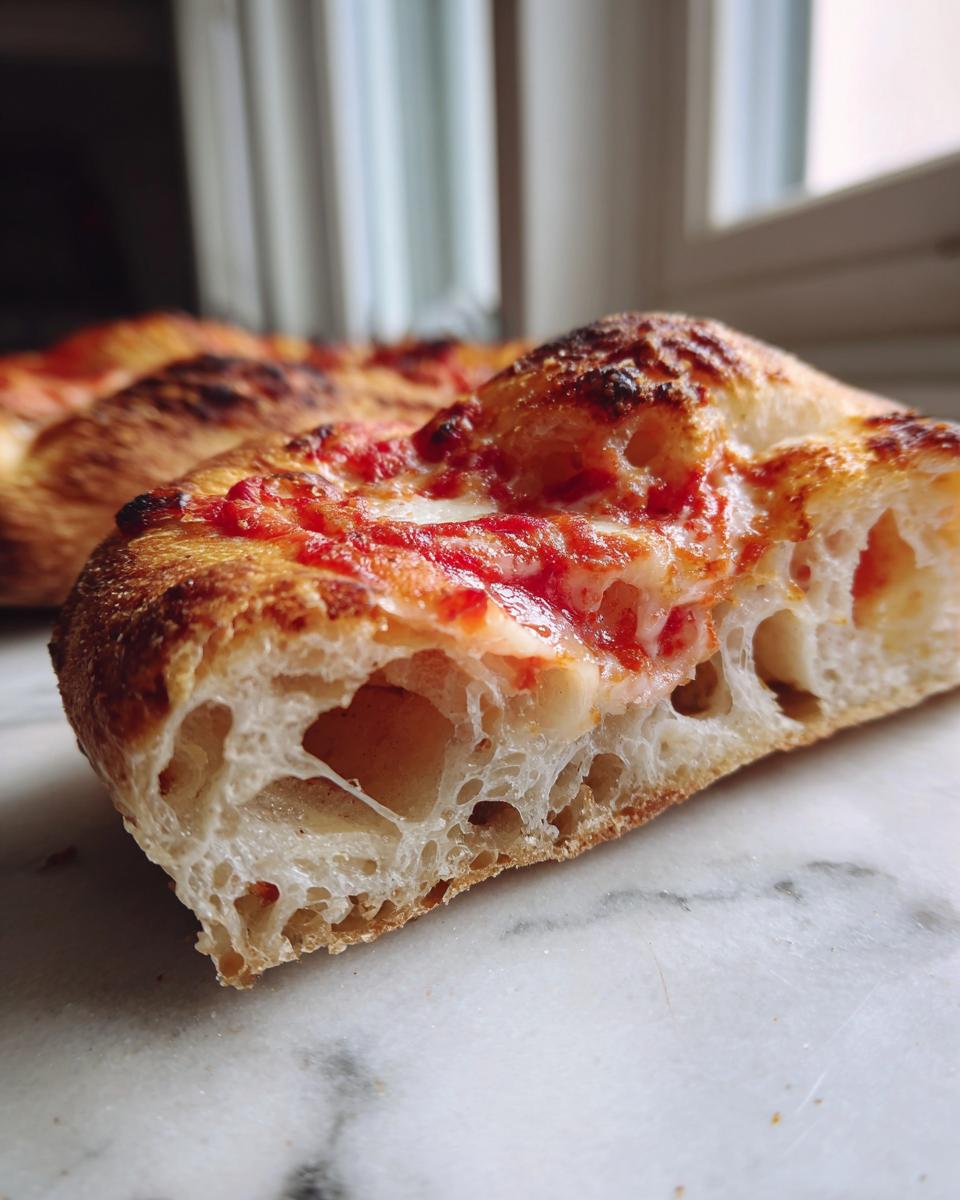
Yes, you absolutely can, and I highly recommend it if you’re chasing that real artisan pizza at home texture! Bread flour has a higher protein content, which develops more gluten when you knead it. This results in a dough that’s stronger, chewier, and has those beautiful, airy bubbles in the rim of your crust. It’s a fantastic trick for leveling up your crust!
What happens if I rest the dough overnight instead of just one hour?
Oh, that’s a game-changer if you have the time! While our recipe is great for a quick weeknight pizza with a 90-minute rise, letting the dough rest slowly in the fridge overnight (cold fermentation) does wonders for the flavor development. It develops a slightly tangy, almost sour-dough complexity that you just can’t rush. If you’re planning ahead, definitely try letting it rest in the fridge. You can see some great ideas regarding dough timing over at The Food Charlatan.
Can I adapt this dough for a Sheet Pan Pizza Idea?
Absolutely! That’s one of the best things about this base recipe. If you’re making a sheet pan pizza idea, you can stretch the dough right onto a lightly oiled, rimmed baking sheet instead of rolling it round. You’ll want to let it sit for about 15 minutes on the sheet after shaping so it relaxes a bit before you add your toppings. It bakes up wonderfully thick and crispy around the edges that way!
How do I make sure my cheese melts perfectly?
This is less about the dough and more about the assembly! Make sure your sauce isn’t piping hot when you spread it on, as that can start melting the cheese too soon. Also, if you’re using low-moisture, whole milk mozzarella, grate it yourself! Pre-shredded cheese is coated in anti-caking agents that stop it from melting into that gorgeous, gooey blanket we want. If you have any specific questions about the recipe after trying it, please feel free to reach out via our Contact page!
Share Your Homemade Pizza Creations
Now that you’ve mastered this homemade pizza recipe, I want to see what you’ve cooked up! Seriously, tag me or drop a comment below letting me know how that chewy-crispy crust turned out for you. Did you stick with classic pepperoni, or did you try something wild? I’m always looking for new topping inspiration, maybe even something involving white garlic sauce next time! Let me know how it goes!
PrintThe Best Easy Homemade Pizza Recipe for a Chewy, Crispy Crust

Make the perfect pizza from scratch tonight. This recipe gives you a no-fail dough that results in a chewy interior and a crispy bottom, perfect for your next family pizza night.
- Prep Time: 20 min
- Cook Time: 15 min
- Total Time: 125 min
- Yield: 2 medium pizzas 1x
- Category: Dinner
- Method: Baking
- Cuisine: Italian-American
- Diet: Vegetarian
Ingredients
- 1 1/2 cups warm water (105°F to 115°F)
- 2 1/4 teaspoons active dry yeast
- 1 teaspoon sugar
- 3 3/4 cups all-purpose flour, plus more for dusting
- 2 tablespoons olive oil, plus more for the bowl
- 2 teaspoons salt
- 1 cup homemade pizza sauce or store-bought sauce
- 2 cups shredded mozzarella cheese
- Your favorite toppings (e.g., pepperoni, mushrooms, peppers)
Instructions
- Activate the yeast: In a large bowl, combine the warm water, yeast, and sugar. Let it stand for 5 to 10 minutes until foamy.
- Mix the dough: Add the flour, 2 tablespoons of olive oil, and salt to the yeast mixture. Mix with a wooden spoon until a shaggy dough forms.
- Knead the dough: Turn the dough out onto a lightly floured surface. Knead for 6 to 8 minutes until the dough is smooth and elastic. If using a stand mixer, use the dough hook and mix on medium-low speed for 5 minutes.
- First rise: Lightly oil a large bowl. Place the dough in the bowl and turn to coat. Cover the bowl with plastic wrap or a clean kitchen towel. Let the dough rise in a warm place for 60 to 90 minutes, or until doubled in size.
- Preheat and prepare: About 30 minutes before baking, place a pizza stone or baking sheet in your oven and preheat to 475°F (245°C).
- Shape the crust: Punch down the risen dough gently. Divide it in half for two medium pizzas, or use the whole batch for one large pizza. On a lightly floured surface, stretch or roll the dough into your desired shape, about 12 to 14 inches across.
- Assemble the pizza: Carefully transfer the dough to a piece of parchment paper dusted with cornmeal. Spread an even layer of homemade pizza sauce over the dough, leaving a 1-inch border. Sprinkle with mozzarella cheese and add your chosen toppings.
- Bake the pizza: Slide the parchment paper and pizza onto the preheated pizza stone or baking sheet. Bake for 10 to 15 minutes, rotating halfway through, until the crust is golden brown and the cheese is bubbly.
- Cool and serve: Remove the pizza from the oven. Let it cool for 3 minutes before slicing and serving immediately.
Notes
- For a crispier crust, use a pizza stone and let the dough rest for 1 hour after shaping before adding toppings.
- If you want a quick weeknight pizza, you can let the dough rise for only 30 minutes, though the flavor will be less developed.
- For an artisan pizza dough texture, use bread flour instead of all-purpose flour.
Nutrition
- Serving Size: 1/8 of pizza
- Calories: 350
- Sugar: 4
- Sodium: 550
- Fat: 12
- Saturated Fat: 6
- Unsaturated Fat: 6
- Trans Fat: 0
- Carbohydrates: 48
- Fiber: 2
- Protein: 14
- Cholesterol: 25