
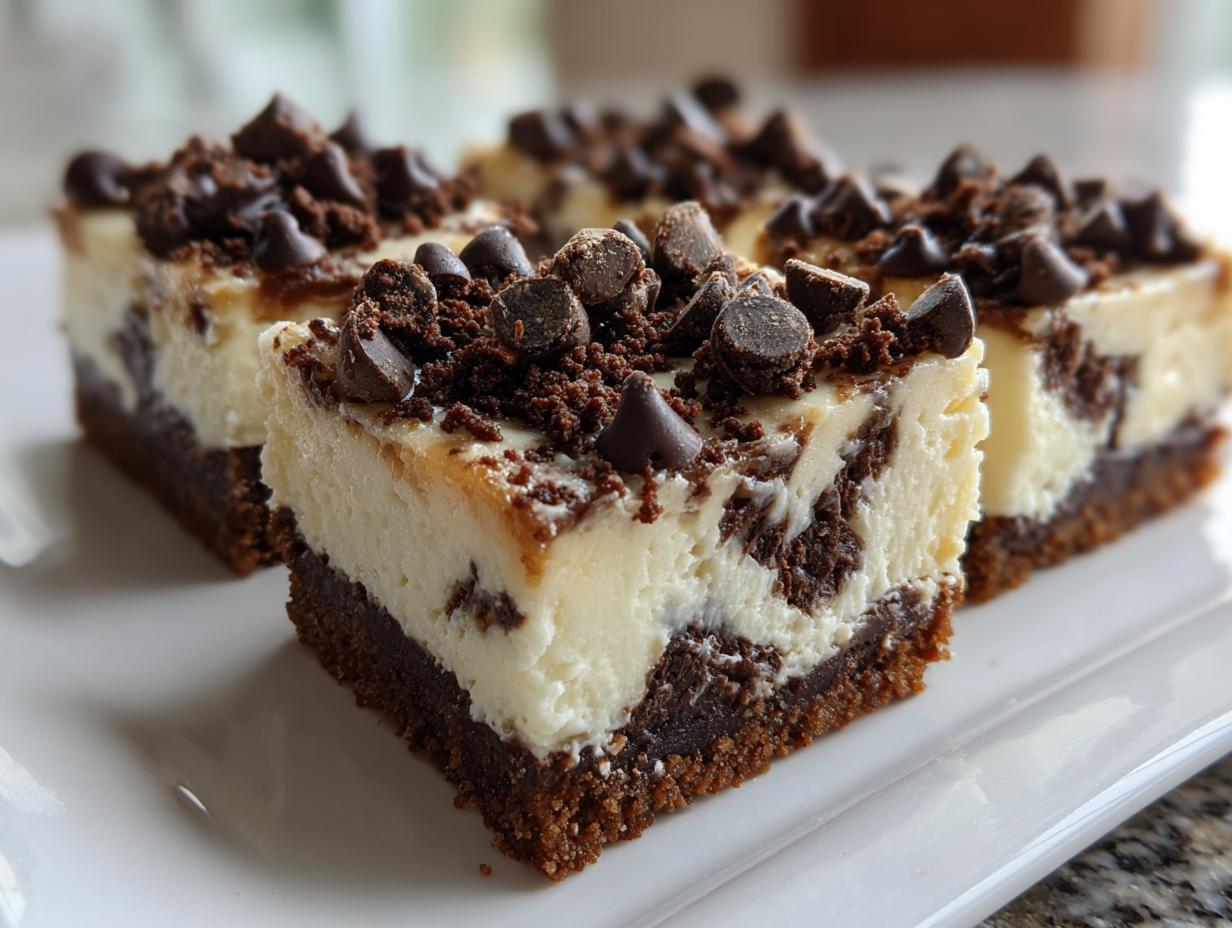
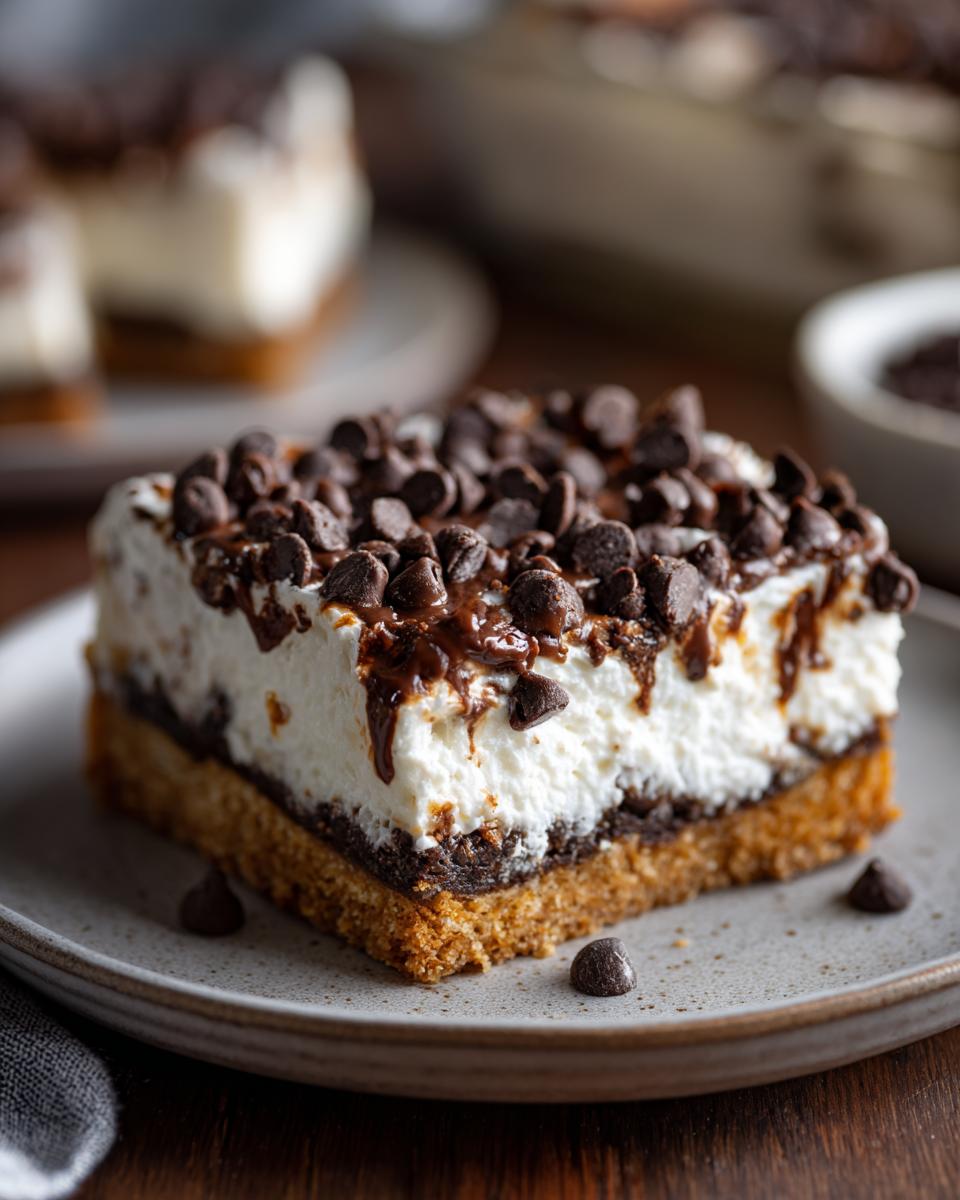
There is just something about that perfect, creamy dessert ending to a wonderful meal, isn’t there? For me, it always brings me right back to my grandmother’s kitchen, where anything rich and decadent felt earned after a long day. Too often, cheesecake seems like a complicated, intimidating bake, but I promise you, it doesn’t have to be! That’s why I’m sharing this incredible chocolate chip cheesecake recipe today, intentionally shaped into bars.
This format takes that classic, rich, and creamy texture we all crave and makes it supremely accessible—no fiddling with water baths or worrying about messy knife cuts! My philosophy here at Bring Dish is simple: we celebrate connection through food, and that means making those impressive, crowd-pleasing desserts like this one simple enough for your busy weeknight rotation. Trust me, you’ll feel like a baking professional when you serve these up!
- Why This Chocolate Chip Cheesecake Recipe Is a Must-Make
- Gathering Your Ingredients for Chocolate Chip Cheesecake
- How to Prepare Your Decadent Cheesecake with Chocolate Chips
- Tips for the Best Chocolate Chip Cheesecake Recipe
- Variations: From Baked Cheesecake to Chocolate Chip Dessert Bars
- Storage and Reheating Instructions for Your Homemade Cheesecake
- Frequently Asked Questions About This Easy Dessert to Make
- Nutritional Estimates for this Chocolate Chip Cheesecake
- Share Your Experience Making This Sweet Treat Recipes
Why This Chocolate Chip Cheesecake Recipe Is a Must-Make
When I developed this recipe, I wanted something that was undeniably impressive but actually required minimal fuss. It’s designed to hit every single craving spot you have! Making this chocolate chip cheesecake in bar form just makes life easier, and the payoff is huge. Here’s why this recipe needs to move to the top of your baking list right now:
- It delivers an absolutely Rich Creamy Dessert experience. We’re talking thick, smooth, melt-in-your-mouth cheesecake, not watery or grainy.
- It creates a truly Crowd Pleasing Dessert because who doesn’t love chocolate chips mixed into something tangy and sweet? It’s a guaranteed hit for potlucks or holidays.
- You get that gorgeous, slightly crisp Graham Cracker Crust Cheesecake base without needing to perfectly set up a springform pan.
- This is truly an Easy Dessert to Make. The steps are straightforward, and since it’s baked in a single 9×13 pan, cleanup is a breeze.
- It gives you that coveted, almost Bakery Style Cheesecake flavor instantly, but you made it right there in your own oven!
The Perfect Texture: Creamy Cheesecake Dessert
Look, the number one thing people want from cheesecake is that dense, yet unbelievably smooth texture. We nail the Creamy Cheesecake Dessert goal here because we stick to using room temperature cream cheese and, critically, we don’t overmix once those eggs go in. That little bit of patience ensures you get that beautiful, dense bite that holds up perfectly against the chocolate chips. It’s exactly what a proper Baked Cheesecake should feel like.
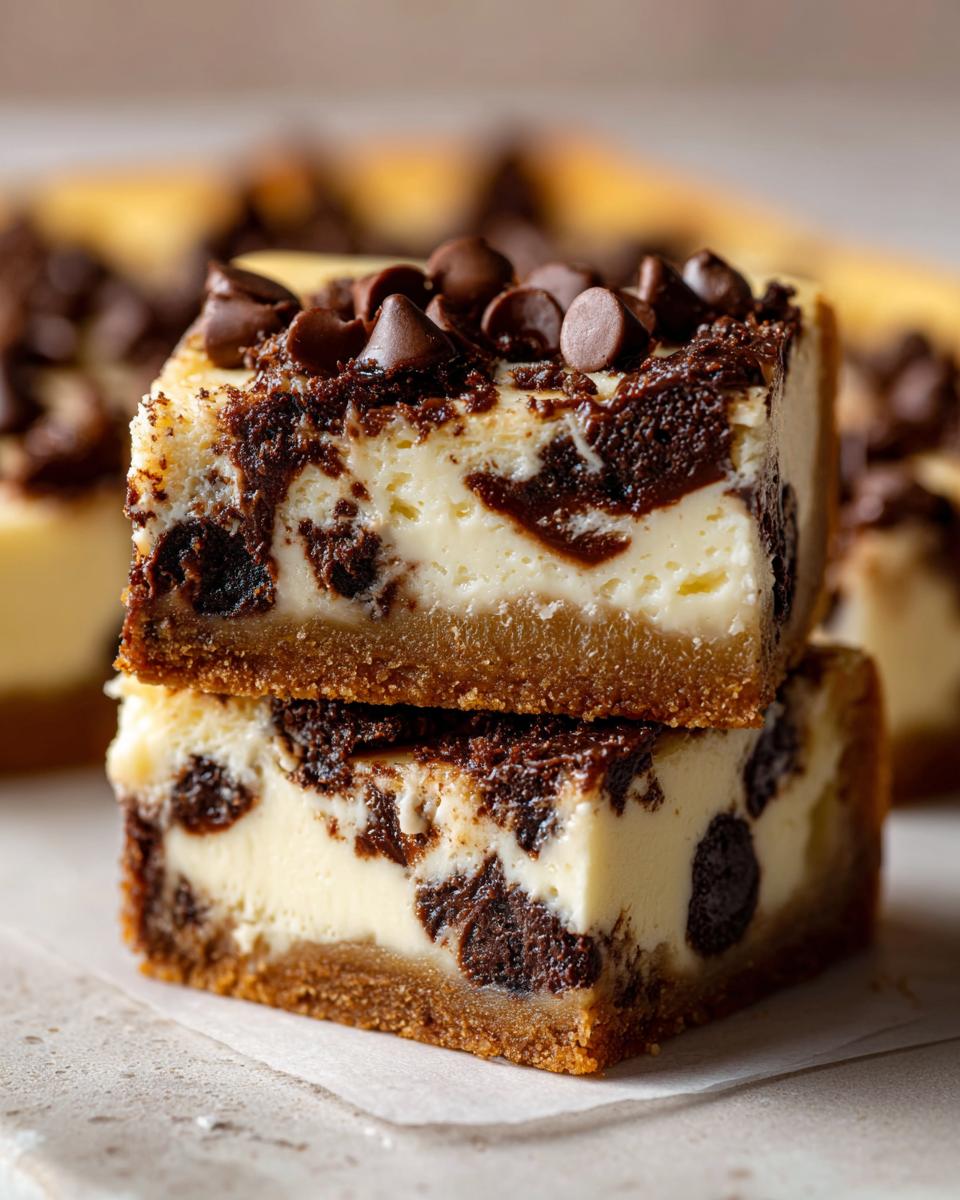
Convenience of Chocolate Chip Dessert Bars
If you’ve ever tried to move a giant, round cheesecake from a springform pan to a serving platter without disaster striking, you know the stress! That’s why shifting to Chocolate Chip Dessert Bars is genius. You bake it flat, let it chill completely, then you just lift the whole thing out using the parchment paper sling we set up. You slice gorgeous, uniform squares. It makes serving at parties or packing leftovers so much simpler. It’s honestly the best way to have a Homemade Cheesecake without the drama!
Gathering Your Ingredients for Chocolate Chip Cheesecake
Okay, now that we know these bars are going to be the easiest, most decadent thing on your table, let’s talk about what you need to grab from the pantry. Remember our motto: easy ingredients, amazing results! You don’t need anything complicated here to achieve that perfect chocolate chip cheesecake flavor. Precision matters, especially with cream cheese, so double-check those labels before you start mixing!
For the Graham Cracker Crust Cheesecake
We’re using a classic graham cracker crust because it gives us that little bit of needed structure and a subtle honey flavor that complements the rich filling beautifully. This is the foundation of our Graham Cracker Crust Cheesecake, so pack it down tight!
- One and a half cups of graham cracker crumbs (I just crush mine right in a zip-top bag!)
- A quarter cup of granulated sugar—just a little bit to sweeten the base.
- Six tablespoons of unsalted butter, and this absolutely must be fully melted before mixing.
For the Rich Creamy Dessert Filling
This is where the magic happens. The quality of your cream cheese determines how truly Rich Creamy Dessert your finished product tastes, so don’t skimp here! Ensure everything is at room temperature before you start beating.
- Three full 8-ounce packages of cream cheese. And I mean it—they need to be softened until they feel really supple.
- One and a half cups of granulated sugar. This is the main sugar boost for the filling.
- One teaspoon of pure vanilla extract. Can’t skip the vanilla; it brightens everything up!
- Four large eggs. Make sure they come to room temp too, it helps them blend without breaking the batter structure.
- One cup of semi-sweet chocolate chips—these get mixed right into the batter!
- And finally, a half cup of semi-sweet chocolate chips, reserved just for sprinkling on the very top before baking. I love that little burst of melted chocolate on the surface when it comes out of the oven.
How to Prepare Your Decadent Cheesecake with Chocolate Chips
Getting ready to make this Decadent Cheesecake is actually the fun part! We’re blending those familiar tastes of chocolate chip cookies with ultra-smooth cheesecake, and the steps are so much easier than you think. Before we dive in, I always set my oven to preheat right away. We’re aiming for 325 degrees F. Also, remember how I mentioned lining the 9×13 pan with parchment paper? Make sure you leave a nice overhang on the sides—that’s your handle for lifting the whole thing out later!
Step 1: Creating and Pre-Baking the Crust
Time to make that buttery base!
- In a bowl—any medium-sized bowl will do—toss together your graham cracker crumbs and the quarter cup of sugar reserved for the crust.
- Pour in the 6 tablespoons of melted butter. Use a fork or your clean hands to mix it up until all that crumbly magic looks like wet sand.
- This is important: Transfer the mixture to your prepared 9×13 pan and press it down firmly and evenly across the entire bottom. I usually use the base of a measuring cup for this—it keeps it nice and flat!
- Pop that crust into the 325°F oven for just 10 minutes. We just want it set up a bit before the batter goes on. Once the time is up, pull it out and let it cool down slightly while you whip up the filling.
Step 2: Mixing the Creamy Cheesecake Filling
This step separates a good cheesecake from an absolutely best chocolate chip cheesecake! The secret is patience. You do not want to beat these ingredients into oblivion, especially after the eggs are in.
- In your biggest mixing bowl, start by beating that softened cream cheese until it looks absolutely smooth and dreamy. Seriously, don’t settle for any lumps here!
- Next, add the 1 1/2 cups of sugar and the vanilla extract. Beat this just until everything is fully combined and looks light and creamy.
- Now for the eggs: Add them in ONE AT A TIME. And I mean it—mix on LOW speed after each egg, just until you see it disappear into the batter. If you beat the eggs in fast, you incorporate too much air, and that’s what causes cracking later! Keep that speed low; we aren’t making meringue here!
- Finally, grab that cup of chocolate chips that are meant for the batter. Gently fold them in using a spatula. Don’t use the mixer for this part! You want them distributed, not smashed.
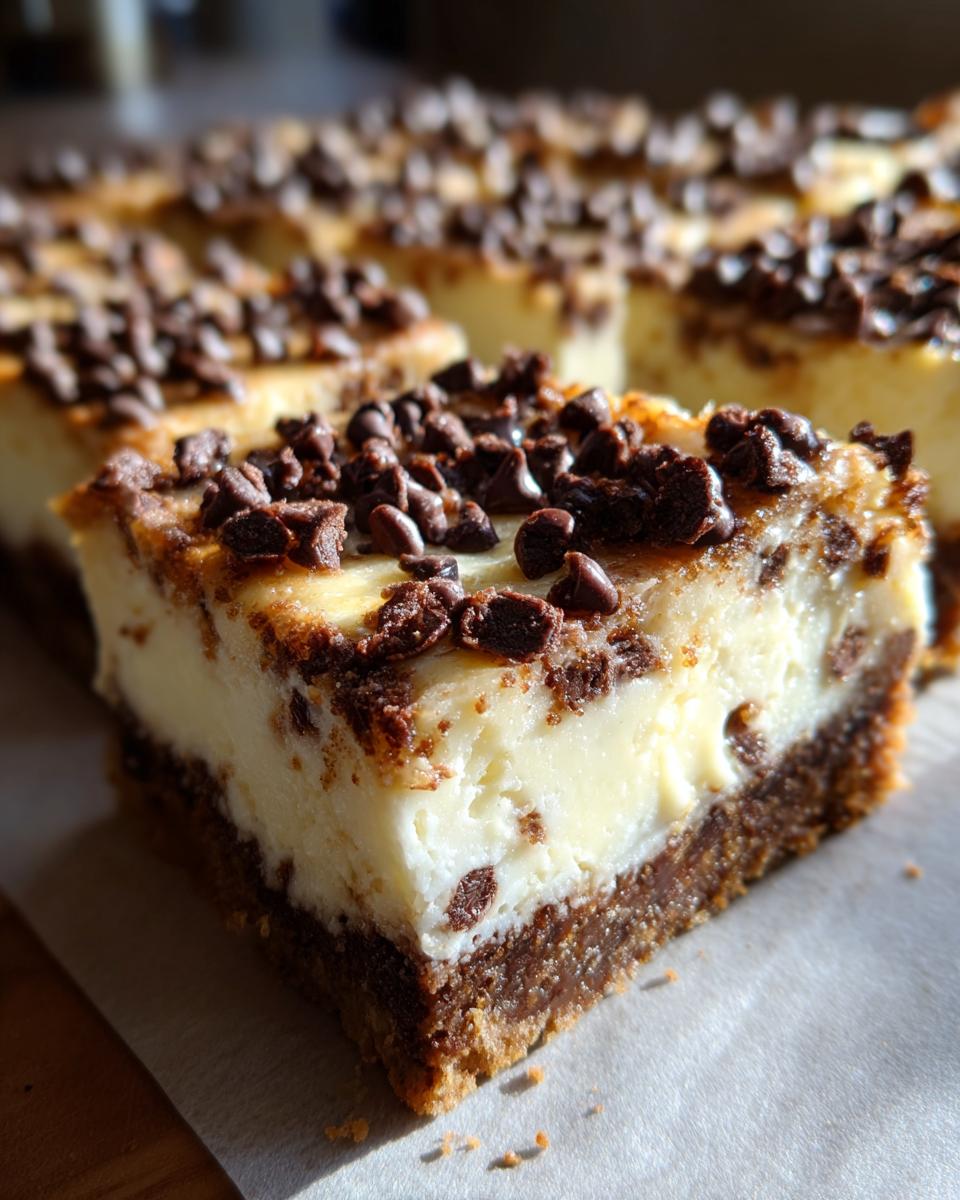
Step 3: Baking and Slow Cooling for the Best Chocolate Chip Cheesecake
We are almost there! Pour that beautiful batter directly over your slightly cooled crust. Smooth the top gently with your spatula.
Next, take the remaining half cup of chocolate chips and sprinkle them evenly across the surface. This topping layer gets just gorgeously melted towards the end of the bake!
Bake the chocolate chip cheesecake bars for 40 to 45 minutes. You’ll know they are close when the edges look totally set but the very center still has a tiny bit of a wobble—like Jell-O that’s almost firm. Don’t panic about that jiggle; it’s your sign of moisture!
This next part is non-negotiable for a perfect top! When the time is up, turn your oven OFF completely. Prop the oven door open slightly—a wooden spoon works great for holding it ajar. Let the cheesecake cool inside the oven for a full hour. This slow temperature drop is what prevents those dreaded cracks. For the cleanest slice and the best flavor, you must chill it for at least 4 hours afterward, but honestly, overnight is always better. If you want to know more about how we protect your information while you bake, you can check out our privacy policy.
Tips for the Best Chocolate Chip Cheesecake Recipe
We’ve done the hard work of mixing and baking, but sometimes the final steps are what really turn a great dessert into the best chocolate chip cheesecake recipe you’ll ever make. Cheesecake baking is all about temperature control and patience, and I’ve learned these little tricks over the years just trying to avoid that dreaded crack! If you follow these pointers, you secure that smooth, crowd-pleasing result every single time. If you want to know more about my journey here and why I share these hard-won tips, feel free to check out my About page.
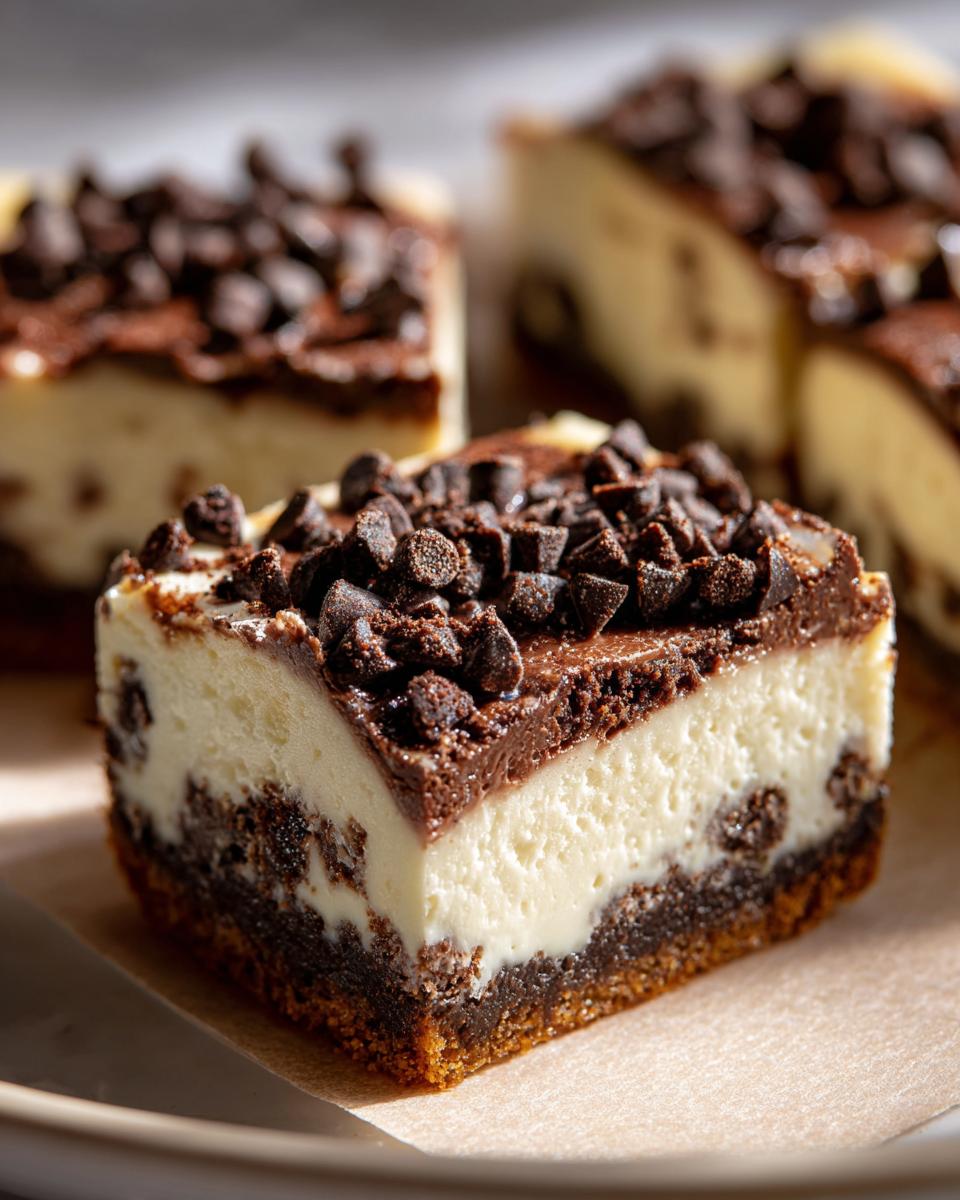
Achieving a Simple Cheesecake Recipe Set Perfectly
Remember when I mentioned that slight jiggle in the center when you take this Easy Cheesecake out of the oven? That’s your golden ticket! If you wait until the center looks completely firm, you’ve waited too long and you’ll end up with a dry dessert. That tiny wobble means the residual heat is going to finish the job during the slow cooling process we talked about.
But here’s the secret that matters almost as much as the baking itself: the chill time. You absolutely must let this set up in the fridge for at least 4 hours. I know, I know, waiting feels impossible when it smells this good! But honestly, if you try to slice it sooner, the texture just won’t be right—it will smear, and you won’t get those clean Chocolate Chip Dessert Bars we are aiming for. I promise you, the four (or better yet, eight!) hours in the cold truly transforms the texture into that super Rich Creamy Dessert consistency. It’s totally worth the wait to get that perfect, smooth finish on your Simple Cheesecake Recipe.
Variations: From Baked Cheesecake to Chocolate Chip Dessert Bars
Part of the joy of sharing a recipe here at Bring Dish is seeing how you all make it your own! While this version as Baked Cheesecake bars is my favorite for crowds—hello, no-fuss slicing!—I know some of you might be craving a different presentation or crust flavor. Don’t worry, this recipe flexes really nicely without losing that wonderful creamy center. If you ever have questions about adapting recipes, please don’t hesitate to reach out through my contact page!
Switching the Crust: Try an Oreo Crust Cheesecake
If you’re anything like me, sometimes you just need that extra layer of dark chocolate crunch. Swapping the base is super easy! If you want to experiment with an Oreo Crust Cheesecake instead of graham crackers, you absolutely can. The process is the same: just crush about 30 regular Oreo cookies (filling and all!) and proceed exactly as you did with the graham crackers. It gives the whole dessert a richer hue and doubles down on the chocolate flavor profile. It’s a delicious way to remix this standard Chocolate Chip Cheesecake.
Making a Bakery Style Cheesecake
Perhaps you are aiming for that taller, more impressive stature of a traditional round cake for a special occasion? That’s easy enough to do! To create a classic, tall Bakery Style Cheesecake, you’ll want to ditch the 9×13 pan and switch to a 9-inch springform pan—the kind with the removable sides. You’ll use all the same batter, but since the sides are higher, the baking time changes a bit. You’ll need to bake it longer, usually aiming for about 55 to 65 minutes instead of the 40 to 45 minutes we use for the bars. Remember, the center should still have that gentle wobble when it’s done!
Storage and Reheating Instructions for Your Homemade Cheesecake
Once you’ve managed to wait the requisite hours (or ideally, overnight!) and have successfully sliced your beautiful chocolate chip cheesecake bars, the next big question is: how do I keep these tasting amazing? Since this is a rich, dairy-based dessert, storage is super straightforward, but you want to make sure that creamy texture stays perfect for whenever you decide to sneak another square.
The best way to store any Homemade Cheesecake, whether it’s a full round or these handy bars, is always, always in the refrigerator. If you used the parchment overhang to lift the cheesecake out, that’s great for slicing, but for storage, you need a genuinely airtight container. I usually place the sliced bars into a large container and just place sheets of parchment paper between the layers of bars so they don’t stick together.
They will stay really fresh, tasting almost as good as the day you made them, for up to five days when kept cold and covered. Don’t even think about taking this out to “warm up” before eating! Cheesecake is meant to be served chilled—that cold temperature really enhances the density and those gorgeous chocolate chip pockets.
Reheating isn’t really a thing we do with cheesecake, folks! If you try to warm up a slice, you risk separating the cream cheese structure, and you’ll end up with a greasy, soupy mess instead of that gorgeous, firm texture. Enjoy these bars cold, straight from the fridge for the best experience!
Frequently Asked Questions About This Easy Dessert to Make
We all have those moments when we need one final dish on the table, and you just need a reliable winner! Since I built this recipe to be super straightforward, most questions revolve around tweaks or storage. If you’re looking for the legal fine print about how we run things around here, you can take a peek at our Terms of Use. Here are the common bits of advice folks ask for!
Can I make this a No Bake Cheesecake Option?
That’s a smart question! For this specific recipe, no, you really can’t easily convert it into a No Bake Cheesecake Option. The reason is the eggs! Traditional baked cheesecake relies on those eggs to set up when gently heated. A no-bake version uses stabilizers like gelatin or whipped cream to set up in the cold. If you’re looking for a true no-bake experience, I recommend looking for a dedicated recipe that skips the oven entirely. This particular recipe shines because it’s a Baked Cheesecake!
What makes this a Crowd Pleasing Dessert?
Honestly, it’s the marriage of two absolute classics! You take the tangy, rich, smooth base of a perfect cheesecake—which is already a Crowd Pleasing Dessert all by itself—and you speckle it generously with ooey-gooey melted chocolate chips. It hits the sweet spot for every single person at the party. It’s familiar enough to feel comforting, but decadent enough to feel special. I’ve never brought a tray of these Chocolate Chip Cheesecake bars to an event and had any left over. Never!
Nutritional Estimates for this Chocolate Chip Cheesecake
Now, I always like to give you a heads-up on what you’re diving into when you pull out a square of this amazing dessert! Look, it’s cheesecake topped with chocolate chips, so we know it’s not exactly a kale salad, right? These numbers are just estimates based on the ingredients I use, so they can definitely shift slightly based on your brand choices, but it gives you a good general idea.
When you’re serving up these fantastic chocolate chip cheesecake bars, you’re in for a real treat. Understanding the estimates helps you enjoy it guilt-free—it’s a special occasion sweet treat, after all! We are looking at dense, satisfying calories that make this a real showstopper when feeding a crowd.
- Serving Size: 1 bar (Remember, we cut them into 16 generous squares!)
- Calories: Approximately 350 calories
- Total Fat: About 22g (That’s where the creamy texture comes from!)
- Carbohydrates: Around 33g
- Protein: Roughly 6g
Even with that sugar content, you’re getting a nice little protein boost from the cream cheese and eggs, which helps make this Rich Creamy Dessert feel more substantial. Enjoy every single bite!
Share Your Experience Making This Sweet Treat Recipes
I truly hope that making this chocolate chip cheesecake comes as easily to you as it does to me now that I’ve ironed out all the kinks! Seeing your successes is honestly the biggest joy of running this little corner of the internet. We are all about building a community of home cooks who aren’t afraid to tackle something decadent and make it simple!
When you pull those chilled, clean squares out of the pan, I want to know exactly how they turned out! Did you manage to get that perfect, slow-oven cooling without sneaking a peek? Did you use the graham cracker crust or decide to go rogue with the Oreos?
Please, take a moment after you enjoy your first slice—or maybe your third—and drop a rating for this recipe below. Seeing those stars helps other bakers feel confident about making this Easy Dessert to Make. If you snap a picture of your gorgeous pan of Chocolate Chip Dessert Bars, tag me on social media! I love cheering you on and seeing how this Sweet Treat Recipe shows up on your table. Happy baking, friends!
PrintCreamy Chocolate Chip Cheesecake Bars: An Easy Crowd-Pleasing Dessert
Make this rich, creamy chocolate chip cheesecake recipe, presented here as easy-to-serve bars with a graham cracker crust. This decadent dessert is simple to prepare and always a hit at gatherings.
- Prep Time: 20 min
- Cook Time: 45 min
- Total Time: 5 hours 5 minutes
- Yield: 16 servings 1x
- Category: Dessert
- Method: Baking
- Cuisine: American
- Diet: Vegetarian
Ingredients
- 1 1/2 cups graham cracker crumbs
- 1/4 cup granulated sugar
- 6 tablespoons unsalted butter, melted
- 3 (8 ounce) packages cream cheese, softened
- 1 1/2 cups granulated sugar
- 1 teaspoon vanilla extract
- 4 large eggs
- 1 cup semi-sweet chocolate chips
- 1/2 cup semi-sweet chocolate chips, for topping
Instructions
- Preheat your oven to 325 degrees F. Line a 9×13 inch baking pan with parchment paper, leaving an overhang on the sides for easy removal.
- Prepare the crust: In a medium bowl, combine the graham cracker crumbs, 1/4 cup sugar, and melted butter. Press this mixture firmly and evenly into the bottom of the prepared pan. Bake for 10 minutes. Remove from the oven and set aside to cool slightly.
- Prepare the filling: In a large bowl, use an electric mixer to beat the softened cream cheese until smooth. Add 1 1/2 cups sugar and vanilla extract. Beat until fully combined and creamy.
- Add the eggs one at a time, mixing on low speed after each addition until just incorporated. Do not overmix the batter once the eggs are added.
- Gently fold in 1 cup of the chocolate chips into the cheesecake batter.
- Pour the cheesecake batter evenly over the cooled crust. Sprinkle the remaining 1/2 cup of chocolate chips over the top.
- Bake for 40 to 45 minutes. The edges should look set, but the center will still have a slight jiggle.
- Turn off the oven, prop the door open slightly, and let the cheesecake cool inside the oven for 1 hour. This slow cooling prevents cracking.
- Remove the cheesecake from the oven and let it cool completely on a wire rack. Once cool, cover the pan and refrigerate for at least 4 hours, or preferably overnight, for the best creamy texture.
- Use the parchment paper overhang to lift the cheesecake from the pan. Cut into squares before serving.
Notes
- For a bakery style cheesecake, bake the mixture in a 9-inch springform pan instead of a 9×13 pan, adjusting the baking time to about 55-65 minutes.
- If you prefer an Oreo crust, substitute the graham cracker crumbs with finely crushed Oreo cookies (about 30 cookies).
- Chill the cheesecake completely before slicing; this helps you get clean, beautiful cuts for serving.
Nutrition
- Serving Size: 1 bar
- Calories: 350
- Sugar: 28g
- Sodium: 210mg
- Fat: 22g
- Saturated Fat: 13g
- Unsaturated Fat: 9g
- Trans Fat: 0.5g
- Carbohydrates: 33g
- Fiber: 1g
- Protein: 6g
- Cholesterol: 75mg