
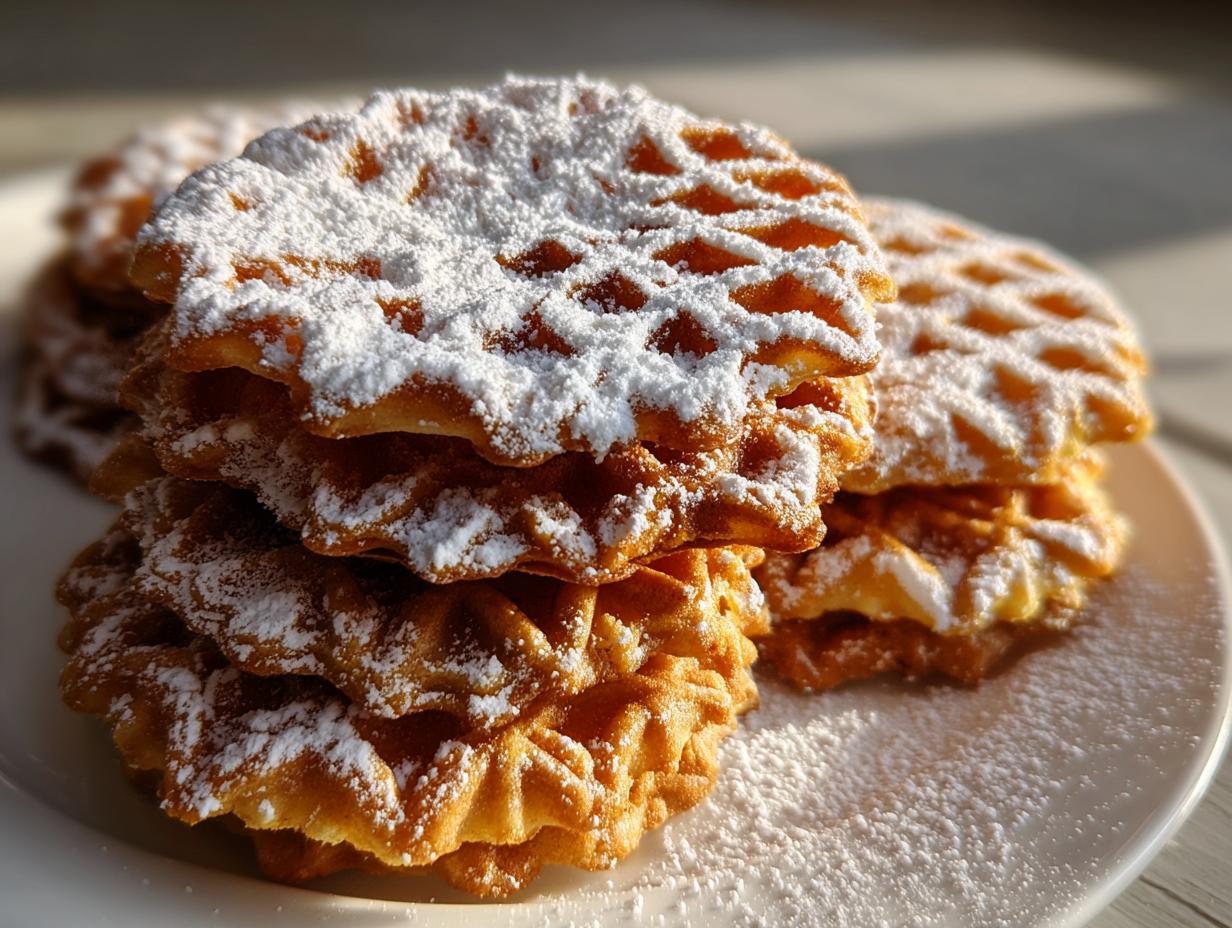
If you’ve ever seen those delicate, patterned cookies on an Italian holiday dessert tray, you know the beauty of a perfect pizzelle. For me, these aren’t just cookies; they’re the scent of tradition, connecting me right back to my grandmother’s kitchen in Chicago, even if I don’t have her exact iron! The secret to bringing home that authentic, melt-in-your-mouth experience—the thin, **crispy pizzelle cookies** you dream about—comes down to a simple, beautiful batter. Forget those thick, soft versions you sometimes find. We are going for that satisfying snap every single time. We’re making treasured memories that taste delicious, and the best part? They are surprisingly easy to master. Ready to welcome this classic into your home? You can find more easy dessert inspiration here: our full dessert collection.
- Why This is the Best Pizzelle Recipe Ever for Crispy Pizzelle Cookies
- Ingredients for Classic Vanilla and Anise Pizzelle Cookies
- Essential Equipment for Easy Pizzelle Baking
- Step-by-Step Instructions for Perfect Pizzelle Cookies
- Popular Pizzelle Cookies Variations: Chocolate and Almond
- Serving Suggestions for Traditional Italian Desserts
- Storage and Make-Ahead Tips for Homemade Pizzelles
- Frequently Asked Questions About Pizzelle Cookies
- Estimated Nutrition for These Light and Crispy Italian Treats
Why This is the Best Pizzelle Recipe Ever for Crispy Pizzelle Cookies
When people ask me how I get my Italian Waffle Cookies so shatteringly crisp, I tell them it’s not just the iron—it’s the batter’s DNA. This formula is designed to produce those beautiful, paper-thin results we look for in a truly authentic treat. Forget those thick, soft versions you sometimes find. We are going for that satisfying snap every single time. We’re making treasured memories that taste delicious, and the best part? They are surprisingly easy to master. If you want to see how others tackle this classic, check out great tips from others baking amazing pizzelle cookies!
- We use a higher proportion of fat—melted butter, not softened—which keeps the dough fluid enough to spread thinly across the hot plates.
- The combination of whole eggs plus extra egg yolks provides essential richness without adding bulk that would prevent crisping.
- We avoid anything that adds too much puffiness, like baking soda, sticking only to baking powder for a gentle lift.
Achieving That Delicate, Thin Italian Waffle Cookies Texture
The key that unlocks that delicate texture is how the butter and eggs interact. Because we melt the butter and cool it just slightly before mixing it in, the structure stays fairly loose. Normally, creaming butter and sugar leaves little air pockets, making a cake or soft cookie. But with pizzelles, we want those air pockets to get flattened out under the weight of the iron!
The extra egg yolks are crucial here too. Yolks are mostly fat and lecithin, which really helps emulsify the batter and keeps the final product from puffing up like a pancake. We want it thin! You should be able to see the intricate pattern of your iron clearly when you pull the cookie off.
Ingredients for Classic Vanilla and Anise Pizzelle Cookies
When you look at this ingredient list, you’ll notice it’s pretty straightforward—that’s the beauty of **Traditional Italian Desserts**! We rely on simple pantry staples because the real magic happens when they marry under that hot iron. Remember, precision matters here, especially when dealing with extracts, because those flavors really sing in these thin cookies.
For this recipe, which yields about three dozen delicate little treats, here’s what you’ll need:
- 3 large eggs
- 3 large egg yolks (Yes, the extra yolks are non-negotiable!)
- 1 cup granulated sugar
- 1 cup unsalted butter, melted and cooled slightly
- 1 teaspoon vanilla extract
- 1 teaspoon anise extract (optional, but trust me, try the traditional flavor first!)
- 2 1/2 cups all-purpose flour
- 2 teaspoons baking powder
- 1/4 teaspoon salt
- Powdered sugar, just for dusting later—don’t skip that pretty finish!
Ingredient Notes and Flavor Substitutions for Pizzelle Cookies
That little bit of anise extract is what makes these distinctly what folks call **Anise Cookies Italian**. It gives them that unmistakable, warm, slightly licorice note that travels through generations. If you’re wondering if you can skip it, sure, you can! But for the first batch, try to find it. It truly transforms these into authentic **pizzelle cookies**.
Now, if anise isn’t quite your speed, don’t worry! You have lots of options for flavor variations. If you prefer a nuttier profile, swap out the anise extract entirely and use 1 1/2 teaspoons of almond extract instead; you’ll have a lovely **Almond Pizzelle Recipe** ready to go! And for those who love chocolate, stick with the vanilla and follow the cocoa powder substitution I mention in the variations section later on. It’s all about making these delicate patterned cookies your own.
Essential Equipment for Easy Pizzelle Baking
Okay, let’s talk tools. You just can’t make these delicate beauties without the right hardware. If you are diving into the world of **Traditional Italian Desserts**, then getting yourself a **Pizzelle Iron Recipes** machine is a must. These aren’t like a standard waffle maker; they heat up hotter and press much flatter to create those trademark thin designs.
I’ve seen people use old-fashioned, rotating hand irons, and honestly, bless their hearts—they are works of art, but they require serious muscle! If you’re looking for **Easy Pizzelle Baking**, an electric, nonstick iron is your best friend. Make sure you choose one that gets nice and hot; that heat is critical for that crispy finish we want!
Once the cookie comes off the iron, you have mere seconds before it sets, so you need a thin metal spatula handy. Thin is key here, otherwise you risk tearing those lacy edges.
If you are planning ahead, especially around the holidays, think about investing in a cone mold. Rolling the cookie stiff and thin is lovely, but wrapping it around a cone while it’s still pliable right off the iron lets you make cannoli shells or little horns to fill with cream or even gelato! It’s amazing how versatile these little cookies can be. For great ideas on achieving that classic anise flavor, you might want to check out resources like this one.
Step-by-Step Instructions for Perfect Pizzelle Cookies
Getting these beautiful **pizzelle cookies** just right is all about the heat and speed. Since we need **Easy Pizzelle Baking** results, remember that your iron has to be screaming hot before you even think about adding batter. Seriously, let it preheat for a solid 10 minutes past when it indicates it’s ready. That initial blast of heat sets the structure immediately.
Follow the instructions I laid out—whisking the eggs until frothy, slowly incorporating the sugar, and then gently folding in the sifted dry ingredients. That batter is thick, almost like a very heavy cake batter, which is exactly what we want so it doesn’t run everywhere!
When you drop the batter on, use just enough to cover the pattern without overflowing. Close the iron firmly and patiently! You’ll hear the sizzling start to slow down as the moisture cooks off. That’s your cue.
- Prepare your pizzelle maker or iron according to the manufacturer’s directions. Preheat it completely.
- In a large bowl, whisk together the eggs and egg yolks until they are light and frothy.
- Gradually whisk in the granulated sugar until the mixture is pale yellow and smooth.
- Slowly mix in the cooled melted butter, vanilla extract, and anise extract, if using.
- In a separate medium bowl, whisk together the flour, baking powder, and salt.
- Gradually add the dry ingredients to the wet ingredients, mixing until just combined. Do not overmix; a few small lumps are acceptable. The batter will be thick.
- Using a small spoon or measuring cup, drop the batter onto the center of the hot pizzelle iron. Use only enough batter to cover the surface without overflowing when closed.
- Close the iron quickly and cook for 30 to 60 seconds, or until the steam stops escaping and the cookie is golden brown. Cooking time depends on your specific iron.
- Carefully remove the hot pizzelle using a thin spatula. It will be soft. Immediately place it on a wire cooling rack to crisp up as it cools. If you want to shape it (into a cone or cannoli shape), do so quickly before it hardens.
- Repeat with the remaining batter, placing cookies directly onto the iron without greasing the plates if your iron is nonstick.
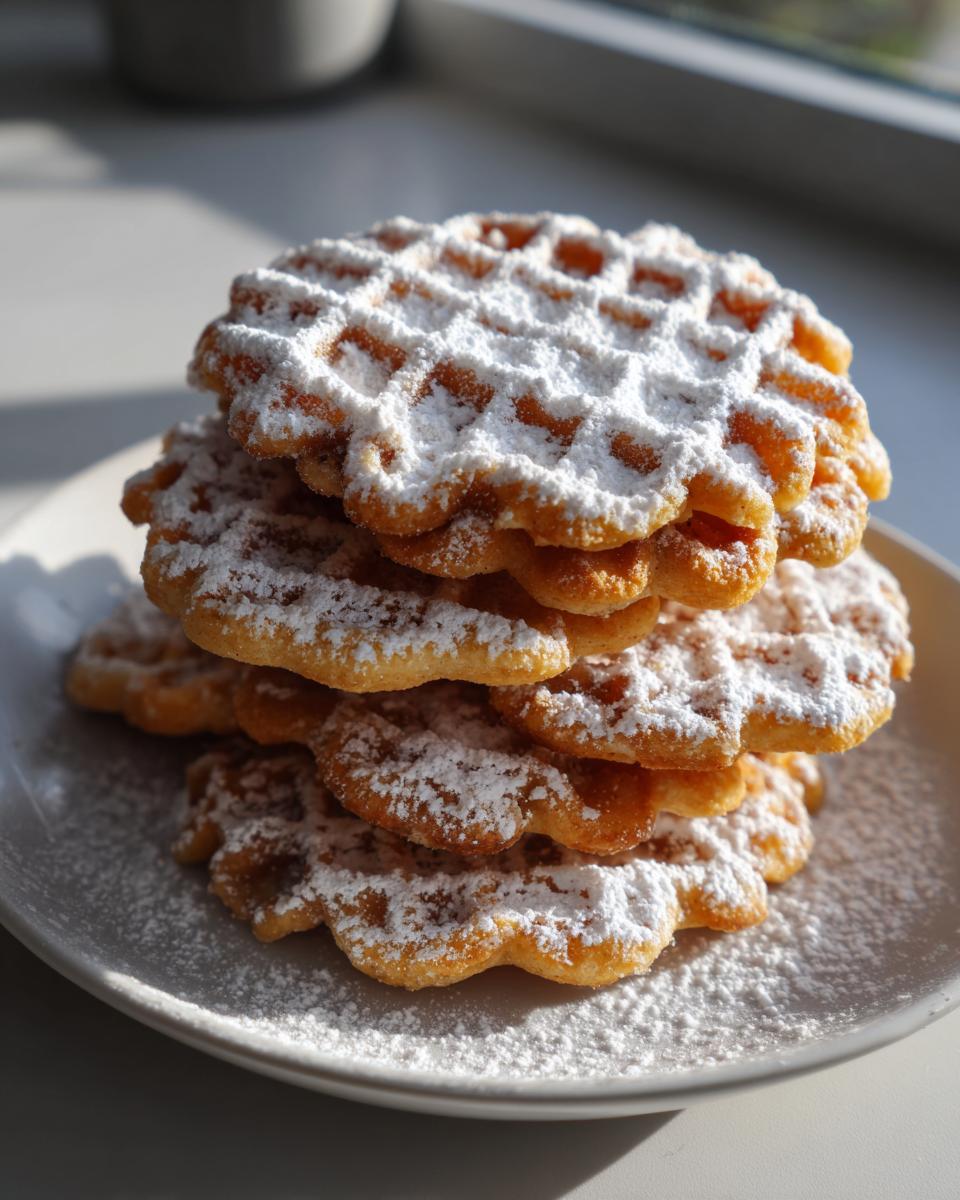
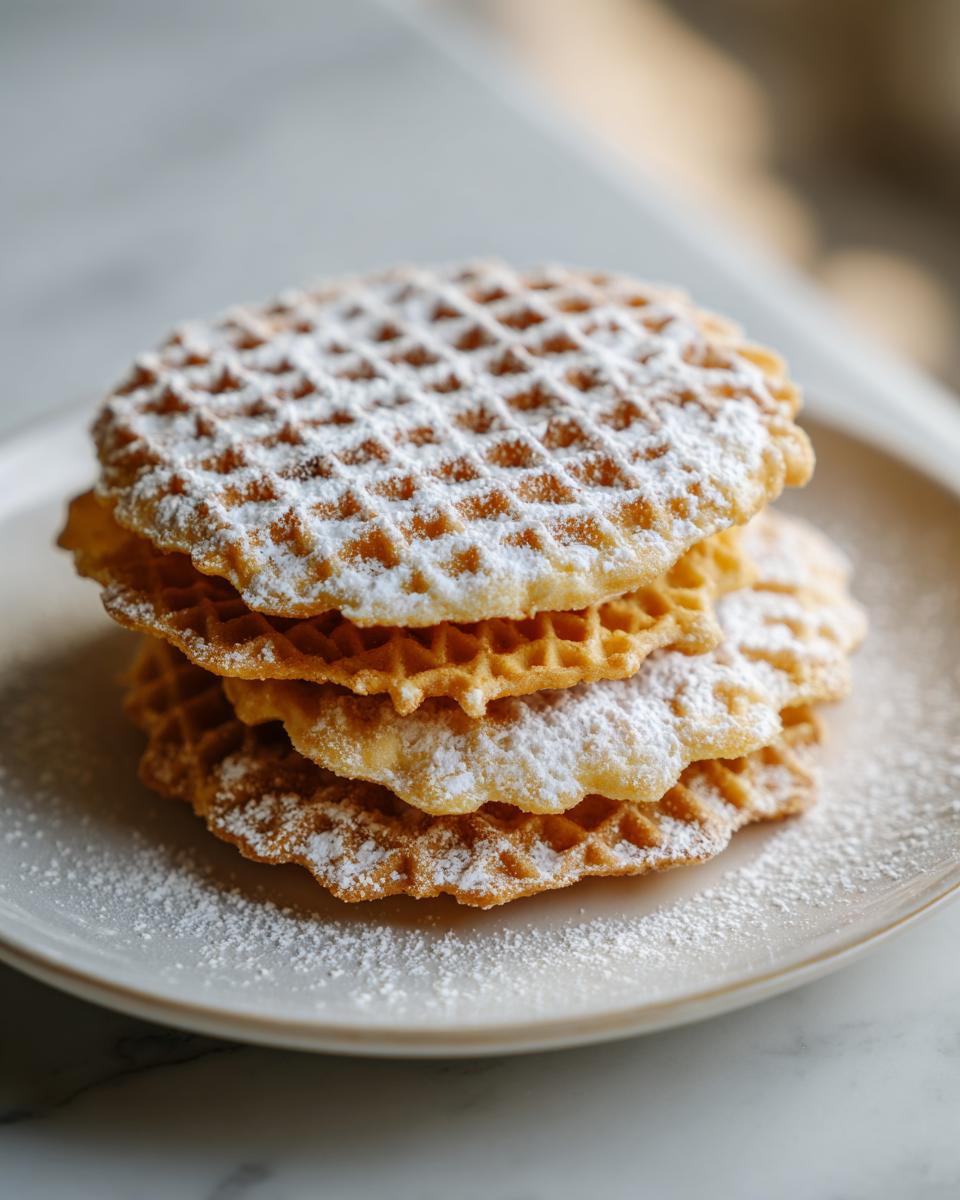
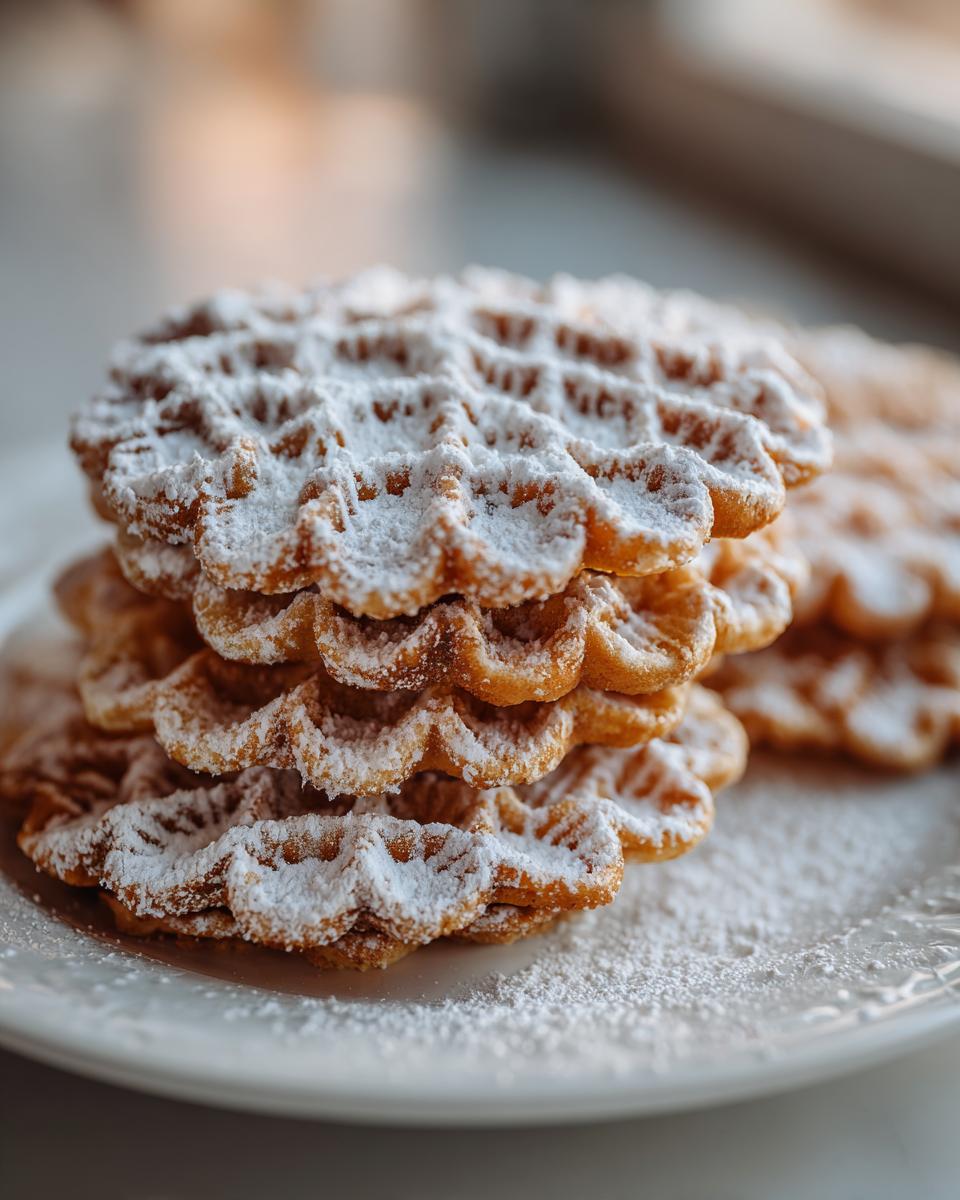
- Once completely cool, dust the crispy pizzelle cookies with powdered sugar before serving or storing.
You can find my full breakdown of tips for success, especially regarding the batter, over at another great recipe site!
Tips for Achieving Maximum Crispness in Your Pizzelle Cookies
Listen, I’ve wasted enough dough on soft, slightly chewy pizzelles to know the real secret to those **Thin Italian Cookies**. The second that cookie comes off the iron, it’s flexible—almost like leather, right? If you don’t get it onto a wire rack *immediately*, the steam getting trapped underneath will make it gummy. A wire rack lets the air circulate underneath, which is crucial.
Don’t stack them while they’re warm, either! I learned that the hard way during my first Christmas trying to make a massive batch. They all fused together into one giant soft cookie disc. Let them cool completely, one layer on the rack. When they hit that perfect crispness, they let out the faintest little *tink* noise as they settle. That’s the sound of perfection in my kitchen!
If your kitchen is humid (and seriously, who’s isn’t sometimes?), I sometimes bake them in low, slow batches—around 300°F—for just a few extra minutes after they’ve cooled to help dry them out. That little bit of extra time ensures your **pizzelle cookies** stay shatteringly crisp for days.
Popular Pizzelle Cookies Variations: Chocolate and Almond
Part of the joy of baking family recipes, just like my grandmother taught me, is learning how to adapt them slightly without losing their heart. These classic **pizzelle cookies** are totally versatile! Once you nail the original vanilla and anise base, you can start experimenting with different flavors. This lets you tailor them for any gathering, whether it’s for a sophisticated dinner party or just because you’re craving something different.
I’ve got a few favorite ways to mix things up, and they all start right here with the base batter we just made. If you want to see some gorgeous examples of chocolate versions, check out what folks are doing over at this site for inspiration!
Chocolate Pizzelle Variations
Everyone loves chocolate, right? Making a batch of **Chocolate Pizzelle Variations** is super easy! The key is balancing the dry ingredients because we are removing flour and adding cocoa powder, which can sometimes make things a little dry if you aren’t careful. Trust me, the rich, dark pizzelle is stunning when dusted with regular powdered sugar.
Here’s the quick swap for when you’re ready to try it:
- Take the 2 1/2 cups of all-purpose flour listed in the main recipe.
- Reduce that amount by 1/4 cup. So, you’ll use 2 1/4 cups of flour total.
- To replace that volume, add 1/4 cup of unsweetened cocoa powder (the regular kind works perfectly) to your dry ingredients when mixing.
Mix them in exactly the same way! The batter might look a little darker and slightly different in texture, but the heat of the iron works its usual magic. They only need about the same amount of time to cook, but keep an eye on the color so you don’t burn that lovely dark chocolate!
The Almond Pizzelle Recipe Swap
If you prefer something lighter—maybe for a springtime brunch or when you just want that wonderful nutty fragrance—making the **Almond Pizzelle Recipe** is even simpler than the chocolate version. You don’t have to mess with the flour measurement at all!
This substitution happens entirely in the extract stage. Simply omit the full teaspoon of anise extract we discussed earlier. In its place, measure out 1 1/2 teaspoons of pure almond extract. Yes, a bit more than the anise, because almond is a little less potent in the final bake! This gives you a crisp, buttery cookie with a beautiful, delicate marzipan-like flavor. I love using this version when serving them alongside fresh berries.
Serving Suggestions for Traditional Italian Desserts
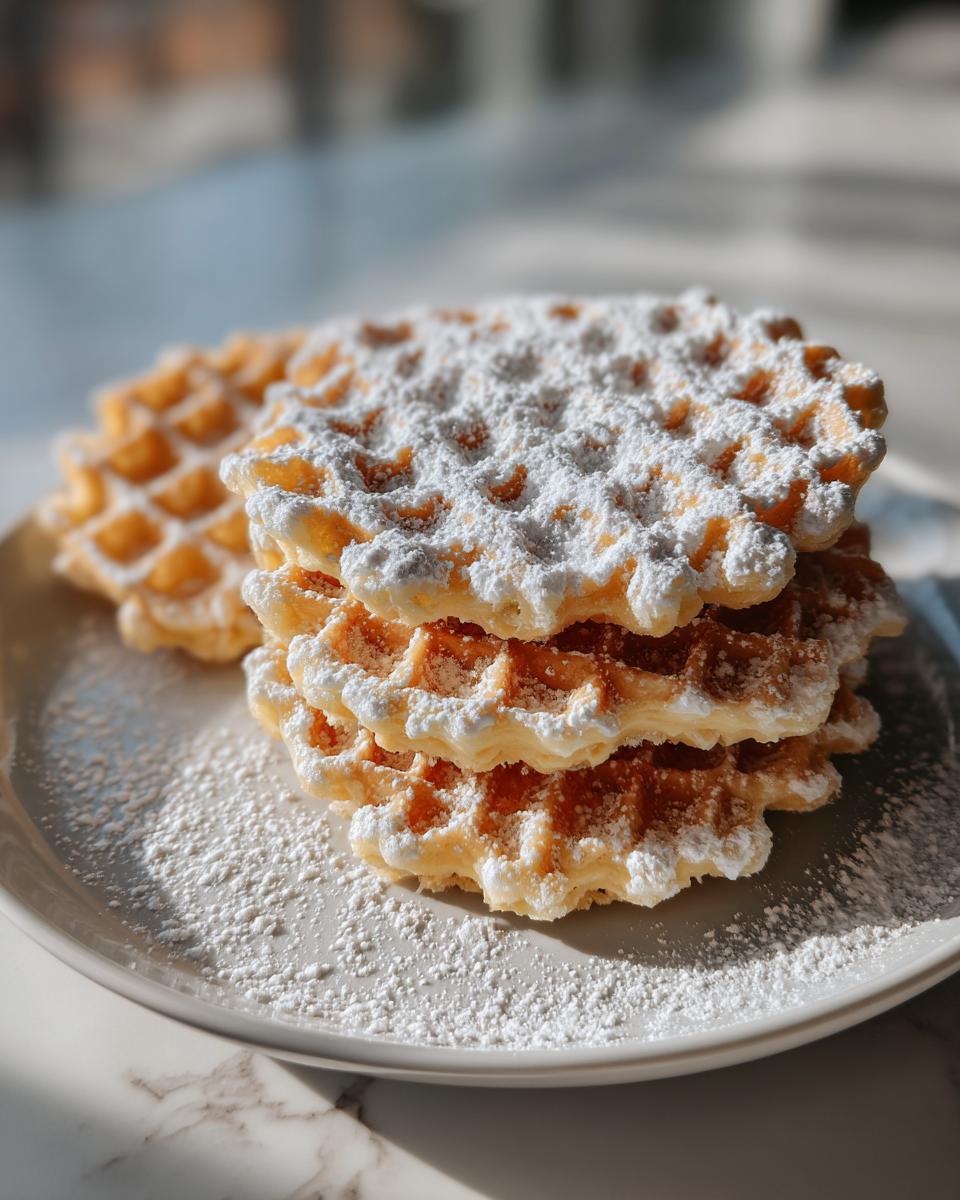
Once you have perfected your batch of crispy pizzelle, the real fun begins: how to serve them! My family usually insists on the traditional method—a simple, light dusting of powdered sugar right before serving. It highlights the beautiful pattern etched into the cookie, and honestly, it’s usually perfect just like that.
But if you’re setting up a big platter for a party or a holiday gathering, you absolutely can get more creative with these delicate patterned cookies. They are so much more than just a plain cookie!
Have you ever tried using them as a structural element? Since these pizzelles are so thin and crisp when they cool flat, they are the perfect base for something creamy. If you have a cone mold, roll them immediately after pressing while they are still hot and pliable. Once they harden, they make incredible little cannoli shells!
Here are a few ways I love to dress them up for guests:
- Dipping: If you’re making chocolate pizzelles, skip the dusting and dip one end into melted high-quality dark chocolate. Let that set on parchment paper. They look incredibly elegant on a holiday platter.
- Coffee Pairing: The vanilla or almond versions are sublime when served alongside strong, dark espresso throughout the afternoon. They are meant to be dunked just slightly—not fully submerged—to soften the edge just before eating.
- Layered Trifles: For large dessert centerpieces, you can gently layer broken pieces of pizzelle into a trifle with ricotta cream, fresh berries, and perhaps a drizzle of lemon curd. It adds such a lovely textural contrast to soft puddings.
I also saw an idea for colorful pizzelles over on Ciao Italia’s site that blew my mind—imagine using these as edible decorations! If you’re looking for a great drink to serve alongside these sweet treats, I have a fantastic sparkling option you might love for your next crowd: my easy punch recipe.
Storage and Make-Ahead Tips for Homemade Pizzelles
Because we put so much effort into making sure these **pizzelle cookies** end up perfectly thin and crisp, we have to treat their storage seriously! These are fantastic **Homemade Pizzelles** to make ahead, especially if you are preparing for a big event or navigating the craziness of **Christmas Pizzelles**, because they actually taste better the next day once they’ve fully settled.
But here is my number one rule for keeping them crisp: humidity is the enemy! We spent all that time baking the moisture out, so we absolutely cannot let them sit out on the counter absorbing kitchen dampness overnight. Don’t even store them in a cookie tin by themselves—that traps any slight moisture they might still have.
Get yourself a very good airtight container. Before you seal the lid, place a small, clean, dry piece of paper towel right on top of the cookies inside the container. That paper towel acts like a little sponge to absorb any stray moisture that tries to sneak in. This keeps my **pizzelle cookies** tasting fresh and snap-worthy for over a week!
You can definitely make them in advance, too. I often bake all my Christmas cookies on the first weekend of December, and the pizzelles are always the first batch I tackle. I store them airtight, and they are absolutely perfect by the time Christmas Eve rolls around. They hold up wonderfully!
If you accidentally bake a batch that seems a little soft or chewy (maybe your iron wasn’t hot enough, oops!), don’t toss them! You can often revive them. Just spread them out on a baking sheet and pop them back into a very low oven—say 275°F—for about 5 to 7 minutes, just until they feel lighter and definitely crisp when gently pressed. Then cool them completely on the rack before putting them away properly.
Frequently Asked Questions About Pizzelle Cookies
I know you might still have a few little questions swirling around, because moving from a regular cookie recipe to using a special iron can feel a bit different! That’s totally normal. When I first started making these, I felt like I needed a tiny instruction manual just for the machine itself. Here are some common sticking points that always come up when people are baking **Homemade Pizzelles** for the first time.
Can I make these crispy pizzelle cookies without a pizzelle iron?
This is the question I get asked the most! Honestly, not really in the authentic way. The pizzelle iron is what gives you that signature thinness and the beautiful lacey pattern that lets the cookie crisp up properly. If you tried to press the batter super thin between two standard, un-patterned hot griddles, you’d likely just get a very flat, slightly tough wafer. Some folks have tried using a panini press, but they usually don’t get hot enough or press flat enough to achieve that great **Buttery Crisp Cookies** texture. I really recommend investing in the proper iron if you truly want the best results.
Why are my pizzelles coming out soft instead of crispy?
Oh, this is frustrating, but there are usually two culprits! First, and most likely, is cooling. If you stack them while they are warm, they steam each other and get gummy again. They *must* cool completely, one layer deep, on a wire rack. Second, check your iron temperature. If it’s not ripping hot when the batter hits it, the cookie starts cooking slowly, which means it absorbs more moisture before it sets. For those perfect **Thin Italian Cookies**, you need maximum heat right from the start!
What is the difference between using vanilla and anise flavoring?
This comes down to tradition! The vanilla flavor is sweet, familiar, and always delicious. It lets the buttery flavor really shine through. If you use only vanilla, you have a wonderful, delicate cookie that goes perfectly with anything. However, the anise extract is what elevates these to classic **Anise Cookies Italian** status. Anise carries that slight, warm licorice taste, which is the defining flavor for many Italian families around the holidays. You can certainly use both extracts together, or pick one based on your preference! For more festive ideas, you might look at options like the Gingerbread versions I linked over at Recipes by Diana.
Can I make these ahead of time for Christmas cookie exchanges?
Yes, please do! These are arguably one of the best **Holiday Cookie Recipes** to make in advance. As I mentioned in the storage section, they often taste even better on day two once they’ve completely set and crisped up. Keep them layered with paper towels in an airtight container, and they will be perfect for weeks!
Estimated Nutrition for These Light and Crispy Italian Treats
Whenever I share my recipes, people always ask me about the numbers, and I get it. We want to enjoy these wonderful treats without guesswork! Keep in mind that these nutrition facts are just an estimate of the standard vanilla pizzelle cookie, not the chocolate or almond variations we talked about earlier. Since every pizzelle maker presses a slightly different thickness, your serving size might vary a tiny bit, but this will give you a great general idea for enjoying these delicate, patterned cookies.
This information breaks down what you can expect for one single, perfectly crisp cookie:
- Serving Size: 1 cookie
- Calories: 110
- Fat: 6g
- Saturated Fat: 4g
- Trans Fat: 0g
- Cholesterol: 45mg
- Sodium: 35mg
- Carbohydrates: 12g
- Sugar: 6g (That’s the good stuff!)
- Protein: 2g
- Fiber: 0g
See? Not bad at all for something so buttery and delicious! They are certainly light enough that you can enjoy a few with your afternoon coffee without feeling heavy. That’s the beauty of keeping them thin and crispy—they are just light little bites of tradition!
PrintClassic Crispy Pizzelle Cookies: Authentic Italian Waffle Cookies

Make traditional, thin, and crispy Italian Waffle Cookies using this straightforward recipe. These delicate, patterned cookies are flavored with vanilla and anise, perfect for holidays or coffee.
- Prep Time: 15 min
- Cook Time: 20 min
- Total Time: 35 min
- Yield: About 3 dozen 1x
- Category: Dessert
- Method: Pressing/Ironing
- Cuisine: Italian
- Diet: Vegetarian
Ingredients
- 3 large eggs
- 3 large egg yolks
- 1 cup granulated sugar
- 1 cup unsalted butter, melted and cooled slightly
- 1 teaspoon vanilla extract
- 1 teaspoon anise extract (optional, for traditional flavor)
- 2 1/2 cups all-purpose flour
- 2 teaspoons baking powder
- 1/4 teaspoon salt
- Powdered sugar, for dusting
Instructions
- Prepare your pizzelle maker or iron according to the manufacturer’s directions. Preheat it completely.
- In a large bowl, whisk together the eggs and egg yolks until they are light and frothy.
- Gradually whisk in the granulated sugar until the mixture is pale yellow and smooth.
- Slowly mix in the cooled melted butter, vanilla extract, and anise extract, if using.
- In a separate medium bowl, whisk together the flour, baking powder, and salt.
- Gradually add the dry ingredients to the wet ingredients, mixing until just combined. Do not overmix; a few small lumps are acceptable. The batter will be thick.
- Using a small spoon or measuring cup, drop the batter onto the center of the hot pizzelle iron. Use only enough batter to cover the surface without overflowing when closed.
- Close the iron quickly and cook for 30 to 60 seconds, or until the steam stops escaping and the cookie is golden brown. Cooking time depends on your specific iron.
- Carefully remove the hot pizzelle using a thin spatula. It will be soft. Immediately place it on a wire cooling rack to crisp up as it cools. If you want to shape it (into a cone or cannoli shape), do so quickly before it hardens.
- Repeat with the remaining batter, placing cookies directly onto the iron without greasing the plates if your iron is nonstick.
- Once completely cool, dust the crispy pizzelle cookies with powdered sugar before serving or storing.
Notes
- For the crispiest pizzelle cookies, let them cool completely on a wire rack away from humidity.
- If you prefer a strong licorice flavor, increase the anise extract to 1 1/2 teaspoons.
- To make Chocolate Pizzelle Variations, reduce the flour by 1/4 cup and add 1/4 cup unsweetened cocoa powder to the dry ingredients.
- For Almond Pizzelle Recipe, substitute the anise extract with 1 1/2 teaspoons of almond extract.
- Store finished cookies in an airtight container at room temperature for up to one week.
Nutrition
- Serving Size: 1 cookie
- Calories: 110
- Sugar: 6g
- Sodium: 35mg
- Fat: 6g
- Saturated Fat: 4g
- Unsaturated Fat: 2g
- Trans Fat: 0g
- Carbohydrates: 12g
- Fiber: 0g
- Protein: 2g
- Cholesterol: 45mg