
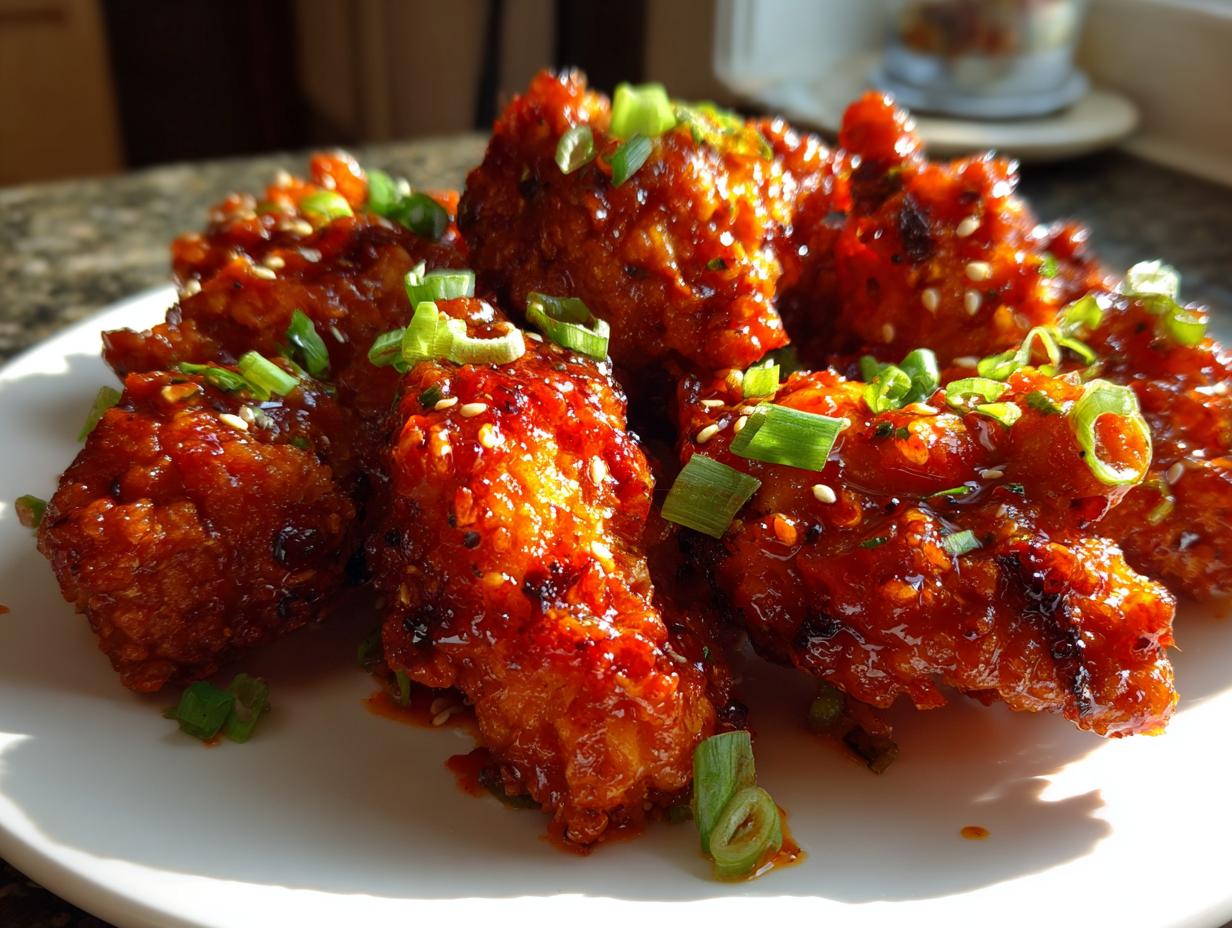
I’m Maya, and if you’ve ever stared longingly at takeout containers, wishing you could bottle that shatteringly crisp crunch they manage to achieve, then welcome home! We are finally cracking the code on restaurant-quality **Korean Fried Chicken** right here in your kitchen.
Forget soggy disappointments. The absolute magic behind the best **Korean Fried Chicken Recipe** you’ll ever make centers around one non-negotiable technique: the double-fry method. It sounds fancy, but I promise, it’s super practical and the key to that unbelievably crunchy chicken. This recipe gives you the power to choose your adventure too—we’re covering both the fiery, addictive sweet and spicy **Gochujang Glaze Recipe** and the deeply savory, universally loved **Soy Garlic Fried Chicken**.
Here at Bring Dish, we focus on recipes that foster connection. This isn’t about complicated fuss; it’s about creating high-quality, honest food that brings joy to your table, whether that’s a quiet Tuesday night dinner or a loud game day celebration. Trust me, mastering this authentic texture is a moment you’ll want to share!
Ready to dive in? If you love mastering deep-fried perfection, you might also want to check out how I nail an easy shredded chicken for tacos later in the week—simpler cooking can still be sensational. This quick shredded version is a weeknight lifesaver!
- Why This Korean Fried Chicken Recipe Delivers Ultimate Crunch
- Gathering Ingredients for Authentic Korean Chicken
- Step-by-Step Instructions to Make Korean Fried Chicken
- Expert Tips for the Best KFC Recipe
- Serving Suggestions for Your Crispy Chicken Dinner Ideas
- Storage and Reheating Instructions for Leftover Korean Fried Chicken
- Frequently Asked Questions About Making Korean Fried Chicken
- Nutritional Estimate for This Korean Fried Chicken
- Share Your Korean Fried Chicken Creations
Why This Korean Fried Chicken Recipe Delivers Ultimate Crunch
I’ll be honest, for years my attempts at **Crispy Chicken At Home** ended in greasy sadness. That beautiful, thin shell you get from the best spots just wouldn’t happen for me. It was frustrating! But once I started treating the **Korean Fried Chicken** process as two distinct steps instead of one rushed fry, everything changed. If you want that unbelievably **Crunchy Chicken Recipe** result—the kind that shatters slightly when you bite into it—you simply have to commit to the technique detailed below.
The first time I pulled that second batch out of the oil, deeply golden and perfectly ridged, I actually gasped a little. It wasn’t just *good* chicken; it was *the* chicken. This method ensures the inside cooks fully without burning the outside, and then that second blast of heat seals the deal.
The Secret: Mastering the Double Fried Chicken Technique
The **Double Fried Chicken Technique** is your golden ticket to crispy bliss. Think of the first fry like gently poaching the chicken in hot oil. You keep the temperature lower, around 325°F, and fry until the chicken is fully cooked through—usually about 8 to 10 minutes. It will look pale and a little sad, but don’t panic!
Crucially, you pull that chicken out and let it rest on a wire rack for at least 15 minutes. This allows internal moisture to redistribute and steam to escape, setting up the crust. Then, wham! You kick the oil up to 375°F, throw it back in for just 2 to 4 minutes, and that high heat turns that pale crust into a deep, rock-solid crunch that sauces won’t immediately destroy. It’s pure science, but it tastes like magic!
Gathering Ingredients for Authentic Korean Chicken
Okay, before we get to the fun part—the frying—we need our cast of characters lined up. Getting the right components makes achieving that Authentic Korean Chicken taste so much easier. Remember, baking/frying is precise, so measuring matters! Keep all your ingredients ready to go before you even think about heating the oil, especially since the subsequent steps move pretty quickly.
Because we are covering two main flavor profiles (spicy heat and savory garlic), you’ll notice the list is broken down into three parts. If you’re only doing one sauce, just make sure you skip the ingredients for the flavor you aren’t using. If you’re making the spicy version, you absolutely must have good Gochujang on hand; it’s the heart of that flavor!
If you plan on serving this with something bright to cut through the richness—and you totally should—these quick pickled carrots are the perfect, speedy sidekick!
For the Chicken and Batter
- 3 lbs chicken pieces (wings, drumettes, or thighs—your choice!)
- 1 cup all-purpose flour
- 1/2 cup potato starch or cornstarch (Don’t skip this starch; it’s part of the crunch secret!)
- 1 teaspoon salt
- 1/2 teaspoon black pepper
- 1/2 teaspoon baking powder
- 1 cup cold water
- Vegetable oil, for frying (You’ll need a nice deep supply!)
For the Sweet & Spicy Gochujang Glaze Recipe
- 1/4 cup Gochujang (Korean chili paste)
- 3 tablespoons soy sauce
- 3 tablespoons honey or corn syrup (I usually grab honey because I always have it handy)
- 2 tablespoons rice vinegar
- 1 tablespoon minced garlic
- 1 teaspoon grated fresh ginger
For the Savory Soy Garlic Glaze
- 1/4 cup soy sauce
- 3 tablespoons brown sugar
- 2 tablespoons water
- 1 tablespoon minced garlic
- 1 teaspoon sesame oil
- Garnish: Toasted sesame seeds, chopped green onions
Step-by-Step Instructions to Make Korean Fried Chicken
Now for the main event! Actually cooking this chicken is faster than you might think, provided you don’t rush the waiting period—that rest after the first fry is absolutely non-negotiable for amazing texture. This is where we turn our raw dough into that perfect, crunchy shell. If you’ve already mastered making homemade potato chips, you understand the importance of oil temp; treat our chicken with the same respect!
Mixing the Batter and Preparing the Chicken
First things first: the batter shouldn’t be thick like traditional American batter. In a large bowl, whisk together your flour, your starchy goodness (potato or cornstarch!), salt, pepper, and baking powder. Then, slowly whisk in the cold water. We’re aiming for something thin and lacy—almost like crepe batter. When you dip the chicken, you want a thin coat, not a heavy glob. Make sure your chicken pieces are patted bone-dry before dipping them in; dry chicken equals a crispier crust! Then, just dip and place them on a simple wire rack.
The First Fry: Cooking the Korean Fried Chicken
Time to heat the oil. I use my cast iron Dutch oven for this because it holds heat so steady. Get your oil up to exactly 325°F (160°C). Fry your chicken in batches—don’t crowd the pot, trust me on this—for about 8 to 10 minutes. The chicken should be cooked all the way through and just look lightly golden. Once done, pull them out and let them rest on that wire rack for a solid 15 minutes. Seriously, walk away! This rest is what makes the difference between greasy and gorgeous.
The Second Fry: Achieving Crispy Chicken At Home
Okay, your chicken has rested and is ready for its final transformation! Crank that heat up until the oil is running at 375°F (190°C). This high temperature is all about crisping the exterior quickly. Drop the wings back in, two or three minutes maximum, until they are deep golden brown and loud enough to wake the neighbors when you pull them out. Drain them immediately on paper towels or a fresh wire rack.
Glazing and Finishing Your Korean Fried Chicken
While the chicken is resting after its second trip through the oil, quickly simmer your chosen sauce until it thickens just slightly. This is vital: when the sauce is ready, put the hot, ultra-crispy chicken into a large, dry bowl. Pour the sauce *right over the top* and toss fast! You need to coat them quickly so the sauce adheres but doesn’t have time to steam the crust away. Finish with a sprinkle of sesame seeds and sliced green onions. Eat them immediately!
Expert Tips for the Best KFC Recipe
If you’re aiming for the absolute **Best KFC Recipe**, those little secrets tucked away in the recipe notes really do matter. I learned early on that perfect **Korean Fried Chicken** comes down to tiny tweaks. You want that crunch to last through the entire batch, not just the first few pieces!
These aren’t complicated steps, but they guarantee you that restaurant-level quality every single time you set out to make this **Crunchy Chicken Recipe**.
Ingredient Adjustments for Texture and Flavor
The single best adjustment I ever made was making sure I use that potato starch or cornstarch; it prevents gluten formation, which is what makes batter tough instead of crispy. Also, don’t be afraid to taste your Gochujang before mixing it into the glaze! If your paste is particularly fiery that day, pull back on the amount you add. You want flavor, not pain, in your sauce!
Keeping Your Korean Fried Chicken Warm Between Batches
This is crucial when you are frying large quantities. Once a batch has had its glorious second fry, don’t just leave it on the counter! Put a wire rack over a baking sheet and keep the cooked pieces in an oven set very low—around 200°F is usually perfect. This keeps the chicken hot and prevents residual steam from softening the crust while you finish the next batch. It’s the secret to serving a whole table steaming hot, crispy chicken. It works wonders, just like keeping my breakfast potatoes crispy!
Serving Suggestions for Your Crispy Chicken Dinner Ideas
Okay, you’ve pulled that perfect, crunchy, saucy **Korean Fried Chicken** out of the bowl. Awesome! But what do you serve it with? These **Crispy Chicken Dinner Ideas** really sing when you pair them with something that cuts through that richness. You don’t want a heavy side dish fighting that incredible fried texture.
If you’re serving this as an appetizer or for game day, just a big bowl of the chicken and maybe some toothpicks is perfection. But if you’re thinking **Crispy Chicken Dinner Ideas** for the whole family, we need balance. I always lean into traditional Korean pairings because they just work so well!
You absolutely must have some kind of quick pickle on the side. Traditional Korean pickled radish—the sweet, tangy, vinegary cubes—are phenomenal for resetting your palate between bites. If you don’t want to mess with pickling, a quick batch of vinegar-cured onions works in a pinch!
For a full meal, consider serving this alongside a simple bowl of sticky white rice. If you want something a little heartier, I love putting this chicken over my deconstructed chicken rice bowls, but skip the heavy sauce on the rice base since the chicken is already coated. Seriously, nothing beats that sweet, spicy, juicy chicken next to something sharp and cold!
These bold flavors also work brilliantly as **Asian Chicken Appetizers** at a party, especially when served with simple, cooling cucumber slices.
Storage and Reheating Instructions for Leftover Korean Fried Chicken
Now, the tough part: having leftovers of this amazing **Korean Fried Chicken**. If you manage to have any—which is rare in my house—we need to treat them right! The biggest enemy here is moisture taking over that beautiful, shatteringly crisp crust we worked so hard to build.
First, storage is key. Do not, I repeat, *do not* store the sauced chicken in the same container as the plain pieces, if you have both. If your chicken is coated in sauce, let it cool just until it’s manageable, and then store it in an airtight container. I try to place a small piece of paper towel in the container to absorb any immediate condensation, but you need to get it sealed up quickly before the moisture settles back into the batter.
When it comes to reheating, your microwave is the enemy! Microwaves are the fastest way to turn your glorious crunch into sad, rubbery sadness. Seriously, toss the microwave idea out the window when reheating this fantastic dish.
The Oven Method: Best for Re-Crisping
If you have time, the oven is your best bet for reviving the texture. Preheat your oven to about 375°F (190°C). Spread the leftover chicken pieces out in a single layer on a wire rack set over a baking sheet. The rack is important because it allows air to circulate underneath, helping dry out the bottom crust.
Bake them for about 8 to 10 minutes. Keep an eye on them—especially if they are sauced, as the sugar can burn faster the second time around. This method gives you a result that’s surprisingly close to freshly fried!
The Air Fryer: Quick and Effective
If you’re in a rush, the air fryer is your next best bet for reclaiming that crunch. Set your air fryer to about 350°F (175°C). Place the chicken in a single layer—don’t stack it!—and cook for about 5 minutes, shaking the basket halfway through. The circulating hot air does a great job of drying out the crust again.
If you’re looking for other ways to handle leftovers that might seem doomed, like that leftover roast, you can check out my tips for making the best turkey soup. But for this **Korean Fried Chicken**, low and slow heat regeneration is the path to savory success!
Frequently Asked Questions About Making Korean Fried Chicken
We all have those little lingering questions when trying a new, technical recipe like this. I get it! Cooking amazing **Korean Fried Chicken** is about confidence, and knowing the answers to these common hurdles makes you feel like a pro!
If you’ve navigated the frying stages successfully, you’re already miles ahead. But here are a few things I get asked about constantly regarding texture, sauce choices, and making it perfect for a party setting. It’s all about delivering that perfect crunch every time!
Can I use an Air Fryer for this Korean Fried Chicken Recipe?
This is probably the question I get most often! Because our main goal here is achieving that legendary, shatteringly crisp crust, the double-fry method is still unmatched—it involves heat transfer through the oil that an air fryer just can’t replicate exactly. However, if you are looking to drastically cut down on the oil, an air fryer is a fantastic substitute for the *first* fry. You can coat the chicken, air fry it until cooked, and then, if you’re truly dedicated, you can briefly toss it into very hot oil (maybe 400°F) for a minute or two just to give the crust a final sear for crispness.
What is the best oil temperature for the second fry?
Please don’t eyeball this temperature! The second fry is where all the crispness happens, and if your oil is too cool, the crust will just absorb grease. You absolutely need to hit 375°F (190°C) for that final 2-to-4-minute blast. It needs to be screaming hot to instantly crisp up that surface you set during the resting period. Grab a thermometer; it’s your best friend for this step!
How do I make this a Sweet and Spicy Chicken Wings appetizer?
Oh, wings are the perfect candidate for this recipe! They cook even faster than thighs, which is great news when you’re hosting. If you want strictly **Sweet and Spicy Chicken Wings** as an appetizer, I recommend cutting the recipe quantity in half unless you are feeding a crowd. Wings are finger food, so people grab more than they do when it’s a full dinner portion.
When coating them, make sure your batter is thin, as I mentioned. For the glaze, I usually reserve a tiny handful of the cooked, plain wings to toss in the Soy Garlic glaze instead, just to give guests a non-spicy option. Also, serve them with toothpicks! It just makes clean-up easier.
If you’re interested in some other great, easy appetizer ideas that keep the kitchen tidy, you should check out how I manage simple one-bowl desserts—because hosting requires balance!
Nutritional Estimate for This Korean Fried Chicken
I know some of you are tracking things closely, and while enjoying incredible food is about joy and connection here at the table, it’s fair to want a general idea of what goes into our delicious **Korean Fried Chicken**. Please remember, because we are deep-frying these beauties, the exact values—especially fat and calories—will shift dramatically based on how much oil your crust soaks up and the specific brand of Gochujang or honey you use.
This information is just a guide, not a strict mandate! We focus on flavor first. But for those planning a **Crispy Chicken Dinner Ideas** night, here’s a rough ballpark for one serving (about 4 pieces) using our recipe standards:
- Serving Size: 4 pieces
- Calories: 550
- Fat: 32g (This reflects deep frying, naturally!)
- Saturated Fat: 7g
- Carbohydrates: 35g
- Sugar: 18g (Pretty standard when using honey/syrup in the glaze)
- Protein: 30g
- Sodium: 750mg (This will spike up if you use extra salty soy sauce, so be mindful!)
If you’re worried about the sodium or sugar, remember you have total control over the glaze consistency! Mix a little lighter on the honey or use low-sodium soy sauce in your **Soy Garlic Fried Chicken** if that fits your lifestyle better. Either way, these are worth every single bite!
Share Your Korean Fried Chicken Creations
Wow, we did it! You’ve mastered the double-fry technique, decided between fiery Gochujang and savory Soy Garlic, and produced some absolutely phenomenal **Korean Fried Chicken**. Seriously, take a moment and be proud of yourself!
This is where the connection part of cooking really starts. Food is meant to be shared, and I absolutely love seeing what you create when you bring these recipes into your own kitchen. It validates all the testing and perfecting we do here. Did you manage that shatteringly crisp crust? Was the double-fry less scary than you thought? Tell me!
I really want to hear from you. Head down to the comments section below and let me know what happened when you tried these out! Did you go spicy or garlicky, or did you perhaps attempt the ambitious feat of making both sauces? Which one was the clear winner at your table?
Snap a picture of your gorgeous, crunchy masterpiece! If you share it on social media, please tag us. Seeing your plating and your happy eaters is the absolute best part of running Bring Dish. Knowing that a recipe I developed helps bring people together around the table—that’s why I left the boardroom! For more on our philosophy of honest, accessible cooking, feel free to learn a little bit more about why we started this cooking community.
Don’t forget to click that star rating right above the comments too. Your feedback helps other home cooks feel confident trying this technique. Happy cooking, and I can’t wait to see your amazing **Korean Fried Chicken**!
PrintUltimate Crispy Double-Fried Korean Fried Chicken with Two Sauce Options
Make restaurant-style Korean Fried Chicken at home using the double-fry technique for an ultra-crispy texture. This recipe includes instructions for both the classic sweet and spicy Gochujang glaze and a savory Soy Garlic coating.
- Prep Time: 25 min
- Cook Time: 25 min
- Total Time: 50 min
- Yield: 4 servings 1x
- Category: Dinner
- Method: Deep Frying
- Cuisine: Korean
- Diet: Non-Vegetarian
Ingredients
- 3 lbs chicken pieces (wings, drumettes, or thighs)
- 1 cup all-purpose flour
- 1/2 cup potato starch or cornstarch
- 1 teaspoon salt
- 1/2 teaspoon black pepper
- 1/2 teaspoon baking powder
- 1 cup cold water
- Vegetable oil, for frying
- For Sweet & Spicy Gochujang Glaze:
- 1/4 cup Gochujang (Korean chili paste)
- 3 tablespoons soy sauce
- 3 tablespoons honey or corn syrup
- 2 tablespoons rice vinegar
- 1 tablespoon minced garlic
- 1 teaspoon grated fresh ginger
- For Soy Garlic Glaze:
- 1/4 cup soy sauce
- 3 tablespoons brown sugar
- 2 tablespoons water
- 1 tablespoon minced garlic
- 1 teaspoon sesame oil
- Garnish: Toasted sesame seeds, chopped green onions
Instructions
- Prepare the Chicken Batter: In a large bowl, whisk together the flour, potato starch, salt, pepper, and baking powder. Gradually whisk in the cold water until you have a thin, smooth batter, similar to pancake batter.
- Coat the Chicken: Pat the chicken pieces very dry with paper towels. Dip each piece into the batter, letting excess drip off, and place them on a wire rack.
- First Fry (Cooking): Heat about 3 inches of vegetable oil in a deep, heavy-bottomed pot or Dutch oven to 325°F (160°C). Fry the chicken in batches, ensuring not to overcrowd the pot, for 8 to 10 minutes until lightly golden and cooked through. Remove and drain on a wire rack. Let the chicken rest for at least 15 minutes. This rest period is key for crispiness.
- Second Fry (Crisping): Increase the oil temperature to 375°F (190°C). Return the rested chicken to the hot oil in batches. Fry for an additional 2 to 4 minutes until the crust is deep golden brown and shatteringly crisp. Remove and drain immediately.
- Prepare Sauces: While the chicken rests after the second fry, prepare your chosen sauce. For the Gochujang Glaze, combine all glaze ingredients in a small saucepan. Heat over medium heat, stirring until the sugar dissolves and the sauce thickens slightly (about 3 minutes). For the Soy Garlic Glaze, combine all ingredients in a saucepan and simmer until slightly reduced and syrupy.
- Toss and Serve: Place the hot, crispy chicken in a large bowl. Pour your desired sauce over the chicken and toss quickly to coat evenly. Work fast so the sauce adheres without softening the crust too much.
- Garnish immediately with toasted sesame seeds and chopped green onions. Serve your crispy chicken dinner right away.
Notes
- For the best results in achieving that ultra-crispy texture, use a mix of flour and potato starch in your coating.
- If you prefer a milder heat in the Gochujang sauce, reduce the amount of Gochujang slightly.
- To keep the chicken warm while you finish frying the batches, place cooked pieces on a wire rack set over a baking sheet in a very low oven (around 200°F).
Nutrition
- Serving Size: 4 pieces
- Calories: 550
- Sugar: 18g
- Sodium: 750mg
- Fat: 32g
- Saturated Fat: 7g
- Unsaturated Fat: 25g
- Trans Fat: 0g
- Carbohydrates: 35g
- Fiber: 1g
- Protein: 30g
- Cholesterol: 110mg