
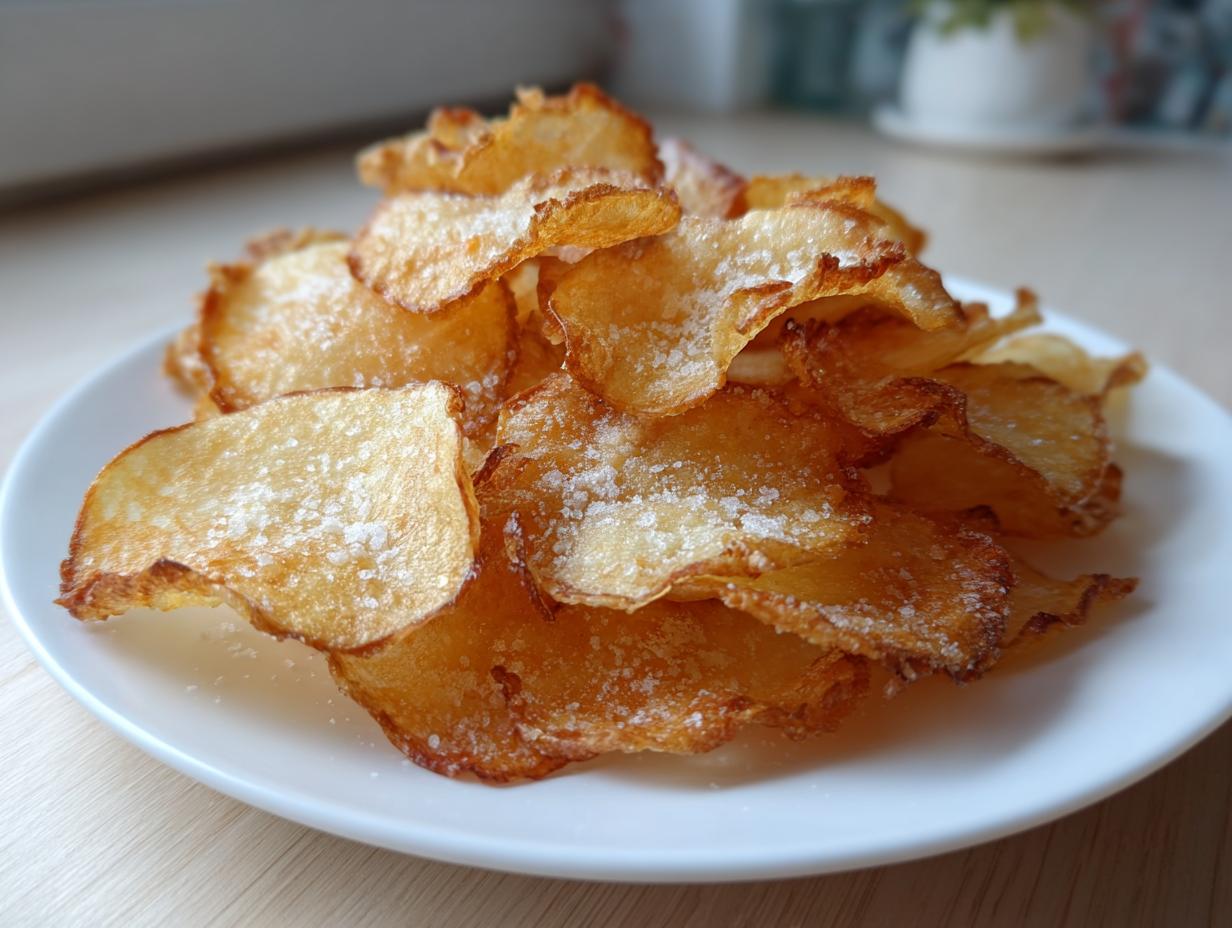
There is just nothing in this world like the sound of a perfectly crunchy, salty snack hitting your ears. That sharp, satisfying *shatter* is what I chase every single time I head to the kitchen. For me, the smell of freshly made, warm potato chips takes me right back to my grandmother’s house when we’d gather on a Friday night.
Forget those sad, flimsy store-bought bags! I’m going to show you the absolute best way to get that irresistible crunch at home. Seriously, this guide is the ultimate promise: we are mastering homemade potato chips using three guaranteed methods—you can deep fry them, bake them in the oven, or even toss them in the air fryer. You absolutely will not be disappointed with this crunchy snack!
- Why You Need These Crispy Potato Chips Recipe Secrets
- Selecting the Best Potato for Chips and Prep for Maximum Crunch
- Ingredients for Perfectly Seasoned Potato Chips
- How to Make Crispy Potato Chips Using Three Methods
- Flavor Variations for Your Seasoned Potato Chips
- Tips for Success: Achieving Ultimate Crispiness in Homemade Potato Chips
- Storage and Reheating Instructions for Freshly Made Chips
- Frequently Asked Questions About Making Chips From Scratch
- Serving Suggestions for Your Crunchy Snack Recipes
Why You Need These Crispy Potato Chips Recipe Secrets
You might be thinking, why go through the trouble? Well, because my methods cure all the biggest chip disappointments we face in the kitchen. I spent way too many afternoons pulling sad, soggy slices out of the oven before I figured out the real secrets!
Here’s what you get when you follow this guide:
- The Magic Crunch: I detail the precise steps—slicing and soaking—that guarantee maximum crispiness, whether you fry or bake. No more flimsy chips here!
- Ultimate Flexibility: You get three complete methods in one guide. Whether you want the rich flavor of a deep-fried chip or a healthy potato chips alternative, we cover it all.
- Easy Homemade Snacks: These are simple enough for a quick Tuesday night craving but impressive enough for any party spread. Seriously, they come together faster than you think.
If you’re looking for an easy homemade snack that delivers that addictive texture every single time, you’ve found your forever recipe. These secrets are the difference between disappointment and pure, crunchy joy.
Selecting the Best Potato for Chips and Prep for Maximum Crunch
Okay, before we even think about oil or the oven, we need to talk potatoes. This is where most people make their first, fatal mistake! You can have the best fryer in the world, but if you use the wrong spud, you end up with floppy, sad results. Trust me, I learned this the hard way during a huge movie night snack disaster.
For the crispiest potato chips, stick to Russets or Yukon Golds. Why? It all comes down to starch content. Russets are king here; they break down beautifully when cooked, giving you that airy, shatteringly crisp texture we are desperately trying to achieve. Yukon Golds are a close second for a slightly richer flavor.
Next up: the slice. You cannot eyeball this! For truly thin, uniform potato chips, you absolutely need a mandoline slicer. I know they look scary, but setting that blade to about 1/16th of an inch is non-negotiable. If your slices aren’t the same thickness, some will burn while others are still chewy.
The Essential Step: Soaking and Drying Thinly Sliced Potatoes
Once those perfect, microscopic slices are ready, they go straight into a massive bowl of ice-cold water. This step is crucial for removing that excess surface starch. I usually leave them soaking for at least 30 minutes, sometimes longer if I’m slow getting organized. When you drain them, the water will look cloudy—that’s the starch washing away!
But here’s the real secret sauce moment: drying. You must pat every single slice bone dry. Seriously, lay them out on a couple of clean kitchen towels and use more towels to press down hard. If there is any residual moisture, I promise you, it will ruin the crunch of your homemade potato chips. Moisture is the enemy of crisp!
If you want to give your breakfast potatoes a similar crunch treatment later, check out my best crispy breakfast potatoes recipe; the drying technique is almost identical!
Ingredients for Perfectly Seasoned Potato Chips
Now that our potatoes are naked of starch and perfectly thin, it’s time to gather the crew! You’ll notice the ingredient list is super short. That’s the beauty of making your own snacks from scratch—you control exactly what goes into them. Less junk, more flavor!
Since this guide covers three methods, I’ve broken down the required basics and then what you need depending on if you’re frying or keeping things light.
- Potatoes: 3 large Russet or Yukon Gold potatoes. Remember what I said about starch? Russets are your best friends here!
- Salt: 1 tablespoon of salt is the starting point. Always add more after cooking, but this gets the flavor moving!
- Oil (If Deep Frying): Enough oil to cover the chips in your pot. Just use a standard frying oil like canola or peanut oil.
- Oil (For Baking/Air Frying): Only 1 tablespoon of standard olive oil is required for these methods. That’s why they are so much lighter!
- Seasoning of Choice: This is where you get fun! Think smoked paprika, garlic powder, black pepper, or even some onion powder for a homemade ranch vibe.
See? It’s just potatoes and salt at the core. Everything else is just customization to make these the best potato chips you’ve ever whipped up!
How to Make Crispy Potato Chips Using Three Methods
This is the main event! Since we prepped our potatoes perfectly—thinly sliced and completely dry—now we just need to choose our adventure. I love giving people options, so whether you are looking for that deep-fried, restaurant-quality crunch or a guilt-free baked snack, I have the instructions right here. Remember, **no matter the method**, you absolutely must season them immediately after they come out of the heat, or the salt won’t stick!
And since we’re talking about ultimate crunch and crispy appetizers, if you ever want to elevate snack time further, you have to check out my coconut shrimp recipe. It uses similar principles, but with shrimp!
Method 1: Deep Frying for Classic Potato Chips
Deep frying delivers unparalleled flavor and golden color, making these the best potato chips, period, if you’re not worried about oil content. You need about two inches of high-heat oil in a heavy-bottomed pot, heated precisely to 350°F (175°C). If you don’t have a thermometer, drop one slice in; if it starts bubbling vigorously right away, you’re good to go.
This is important: cook in small batches! You cannot overcrowd the pot, or you will drop the oil temperature immediately, and that is how you get greasy, soggy chips instead of crunchy ones. Fry them for about three to five minutes, stirring gently to keep them separated. Once they are golden brown, scoop them out fast onto paper towels. Immediately—and I mean *immediately*—sprinkle them generously with salt. They soak up seasoning best when they are piping hot!
Method 2: Oven Baked Chips for a Healthier Option
If you’re aiming for those healthy potato chips we all crave sometimes, the oven is your friend. Preheat your oven nice and hot to 375°F (190°C). If you seasoned your chips with olive oil back in the prep stage, give them one last toss to make sure every slice is lightly coated.
Line one or two baking sheets with parchment paper—don’t skip the paper, trust me on this one! Arrange the seasoned slices in a single layer; if they are overlapping, they will steam instead of roast, and you’ll lose that crunch. Bake for about 15 minutes, then give them a quick flip. Keep an eye on them because they go from perfect to burned very quickly! Pull them when the edges start looking deeply golden brown.
Method 3: Air Fryer Potato Chips for Quick, Low-Calorie Chips
My newer favorite for quick, low calorie chips is the air fryer. Preheat it to 350°F (175°C). Again, if you oiled your potatoes, they should be ready to go.
The biggest mistake people make is overloading the basket. You need space for the hot air to circulate! Work in single layers or very small batches. Set the timer for 10 minutes to start, but the real key is shaking the basket vigorously every five minutes. That shaking action moves the chips around so they brown evenly on all sides. Check them around the 12-minute mark, and if they are golden and you hear a nice rattle when you shake the basket, they are done! Instant, crunchy snack!
Flavor Variations for Your Seasoned Potato Chips
Salt is classic, right? It’s what you need for that undeniable craving. But honestly, once you nail the crunch—and you will, because you soaked and dried those slices perfectly—you have to start playing with the seasonings! This is where things get really exciting and where you can make these homemade potato chips your own signature party snack.
You want bold flavor? You got it. Remember, you have to sprinkle these on **the second** the chips come out of the heat, whether they are fried, baked, or air-fried. They need that residual heat to bake the flavor into the surface of the chip.
Here are three of my absolute favorite seasoned potato chips combinations that instantly upgrade your movie night snack ideas:
- Smoked Honey BBQ: This is a showstopper. Mix together 1 teaspoon of smoked paprika (this is the secret ingredient!), 1/2 teaspoon of garlic powder, 1/2 teaspoon of onion powder, and just a tiny pinch right at the edge of cayenne pepper for warmth. If you want true BBQ sweetness, you can drizzle these chips lightly with some of that amazing creamy homemade beer cheese dip after they cool, though honestly, the dry rub is enough!
- Zesty Ranch Dust: Crush up a tablespoon of your favorite dry ranch seasoning packet, or make your own with dried parsley, dried dill, onion powder, and a dash of buttermilk powder if you have it. Toss immediately. The salty tang is incredible, especially on baked chips!
- Garlic & Parmesan Kick: This one feels decadent! Mix 1 teaspoon of garlic powder (not garlic salt!) with 2 tablespoons of finely grated, good-quality Parmesan cheese. Add a generous grind of black pepper. This works best on the fried or air-fried versions because the cheese crisps up beautifully.
Don’t be shy! Now that you’ve mastered making these crunchy snack recipes from scratch, you can season them exactly how you like. These aren’t just healthy potato chips; they are gourmet snacks!
Tips for Success: Achieving Ultimate Crispiness in Homemade Potato Chips
So, you’ve made your first batch of homemade potato chips. Maybe they were fried golden perfection, or maybe they came out of the oven a little limp. Don’t worry! Even Maya Thompson learns something new every time she pulls a tray out. I remember one batch where I thought I dried the potatoes well, but I obviously didn’t pat them hard enough. They came out of the fryer looking great, but five minutes later on the cooling rack? Total flop. It was the moisture, I swear! That’s why I’m sharing the master tips here. These hacks take you from decent to absolutely perfect, every single time you make these crunchy snack recipes.
The absolute best potato for chips, the Russet, is recommended because its high starch content just fries up lighter and crisper than anything else. If you’re using sweet potatoes for a change, you might need slightly lower cooking temps because they have more sugar.
Here are the non-negotiable final checks to ensure you get that dream crunch:
- Slice Consistency is Everything: I cannot stress this enough—use the mandoline! If you have thick spots, they will never crisp up and they’ll just drag down the whole batch.
- The Oil Temperature Check (For Frying): If you are deep frying, the oil *must* be at 350°F (175°C). If it’s too cool, the oil seeps in before the chip cooks, leading to sogginess. If it’s too hot, they burn before they dry out. It’s a delicate science!
- The Emergency Crunch Rescue: Did your oven-baked or air fryer potato chips sit out too long and lose their snap? Don’t throw them away! I usually gather them up, spread them back out on a dry baking sheet, and stick them in a 300°F oven for about five minutes. It seems crazy, but that gentle heat dries out any lingering dampness and brings back that amazing crunch instantly.
Mastering these steps means you’ve officially conquered making potato chips from scratch that beat anything store-bought. If you’re looking for a great dip to pair with these crispy wonders, my easy creamy pumpkin curry recipe makes a surprisingly fantastic dipping sauce base!
Storage and Reheating Instructions for Freshly Made Chips
Now, if you manage to have any of these incredible homemade potato chips left over after your first taste test—which, let’s be honest, is a miracle in itself—you have to store them correctly. The enemy of the perfect homemade chip is always air and humidity. If you let them sit out on the counter in a bowl, they will go soft faster than you can say “guilt-free snacking.”
The best way to keep your freshly made chips at maximum crunch is to cool them *completely* on a wire rack first. Don’t put them into storage while they are even slightly warm, especially if you made air fryer potato chips, because trapped steam will turn them chewy! Once they are totally cool, transfer them into a truly airtight container. A sturdy plastic container with a snap-top lid is perfect, or even a zip-top bag with all the air pressed out works in a pinch.
Keep that container stored at room temperature. Don’t put them in the fridge; that moisture will ruin everything! If you follow this, they should stay satisfyingly crunchy for a good two days. Maybe three if you have exceptional willpower.
The Emergency Crunch Rescue: Reheating Crispy Potato Chips
I mentioned this briefly before, but it deserves its own moment because it’s a lifesaver. If you grab that airtight container on day three and realize your chips are just a little bit stale—maybe they’ve lost that loud *snap*—don’t despair! We can revive them. This is my secret weapon for bringing limp chips back to life.
You just need a low, gentle blast of dry heat. Spread the leftovers in a single layer on a baking sheet. Stick them into an oven that is preheated to 300°F (150°C). Let them sit in there for about five minutes. That gentle heat wicks away any microscopic surface moisture they’ve absorbed from the air. When you pull them out, let them cool on the tray for just a moment, and BAM! They are crunchy again. It’s like having a magic button for instant satisfaction when you need a low calorie chips fix!
Frequently Asked Questions About Making Chips From Scratch
I know getting deep into a new recipe can spark a bunch of questions! We covered the main techniques for getting that perfect crunch whether you baked them or fried them, but here are a few things I hear often when people are first trying out these recipes from scratch. Honestly, most problems when making potato chips come down to moisture, but let’s dive in!
Why are my homemade potato chips soggy instead of crunchy?
Oh, the dreaded limp chip! This is almost always a moisture issue, trust me. Did you soak them long enough to pull out that starchy glue? And more importantly, did you dry them completely before they hit the oil or the oven? If those slices have even a drop of water left on them, they will steam instead of fry or bake, and you end up with something softer than you wanted. If you are making oven baked chips, another reason might be overcrowding the pan—make sure they aren’t touching!
Can I substitute sweet potatoes for regular potatoes for low calorie chips?
You absolutely can, and they are gorgeous! Sweet potatoes make for amazing, slightly sweet chips. However, you need to treat them a little differently. Because they have more natural sugar, they brown much faster than Russets. If you’re baking or air frying, I suggest dropping the temperature down by about 25 degrees F and keeping a *very* close eye on them. They still need that soaking step to help maintain some structure, so don’t skip it!
What is the single best oil to use for deep frying potato chips?
When I want that unbelievably rich, classic flavor, I stick to oils with a neutral flavor and a high smoke point. Peanut oil is my top pick because it’s clean-tasting and handles the 350°F mark beautifully. Canola oil is a fantastic, budget-friendly second choice. Whatever you use, make sure you have enough to fully cover the chips, and please, make sure it’s fresh! We don’t want any old, smoky flavors tainting our freshly made chips.
How can I easily season my chips right after they come out of the oven?
This is a fun little setup trick! As soon as you pull that tray of oven baked chips out, slide the entire piece of parchment paper—chips and all—onto a cooling rack that’s sitting over a rimmed baking sheet. You can now sprinkle your seasonings over the top, and any excess salt or seasoning falls onto the sheet below instead of onto your counter. It makes the final seasoning so much cleaner. If you want a truly easy side for your new chips, you have to try my easy Jiffy corn casserole recipe!
Serving Suggestions for Your Crunchy Snack Recipes
So, you’ve got your massive platter of homemade potato chips—crispy, perfectly seasoned, and ready to disappear in five minutes flat. These aren’t just a side dish; they deserve to be the star! Whether you’re putting together an epic movie night spread or you’ve got a crowd over for a game day, these chips are the perfect foundation for serious snacking.
Since these are such fantastic party snacks, you need stellar companions. Forget just eating them plain (though they are incredible that way!); it’s time to bring out the dips and the sandwiches that need that structural integrity only a sturdy, homemade chip can provide. These pairings make the whole experience better!
For the ultimate pairing, you need a dip that can handle the crunch! I’m obsessed with having a cool, sharp dip to contrast that hot, salty flavor. If you haven’t tried my whipped ricotta dip recipe yet, you need to stop what you’re doing and make it. It’s so light and garlicky, and those perfectly constructed, crunchy snack recipes of chips dive in there perfectly.
If you’re making these for a big gathering, here are a few ways I love to serve them up:
- The Ultimate Sandwich Sidekick: Ditch the boring fries! A pile of these seasoned potato chips next to a sloppy joe or a hearty deli wrap is honestly life-changing. The crispness holds up against the tomato juice without getting soggy too fast.
- Movie Night Munchie Bar: Set up a station where people can customize! Have your chip choices (fried vs. air fryer) available, and have tiny bowls of different seasonings next to them—chili powder, smoked salt, maybe even finely crumbled bacon bits. It’s interactive and so much fun.
- Elevated Loaded Chips: Treat them like nachos! Pile the fried chips onto a platter, drizzle lightly with a homemade cheese sauce (maybe one you don’t have a recipe for yet!), sprinkle on some fresh jalapeños, and bake or broil for just one minute until the cheese is melted. It transforms your simple snack into a full-blown appetizer!
Honestly, once you bite into these truly crunchy snack recipes, you’ll realize that store-bought junk just can’t compete. Enjoy making memories around your table!
Print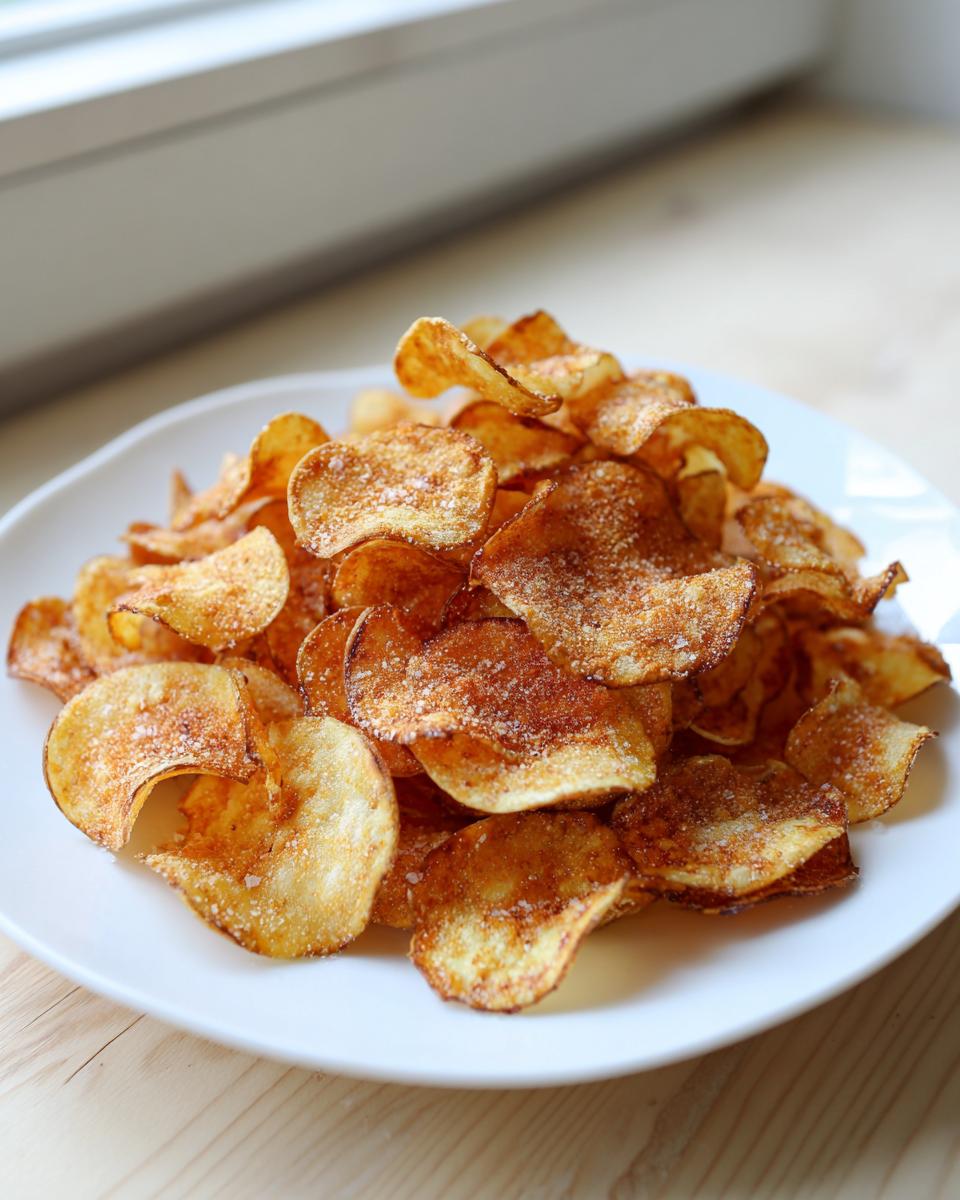
The Ultimate Crispy Homemade Potato Chips: Fried, Baked, and Air Fryer Methods
Learn how to make perfectly thin, crunchy potato chips from scratch using three methods: deep frying, oven baking, or air frying. This guide gives you the secrets to achieving irresistible crispiness every time for your next easy homemade snack.
- Prep Time: 15 min
- Cook Time: 20 min
- Total Time: 35 min
- Yield: 4 servings 1x
- Category: Snack
- Method: Frying, Baking, Air Frying
- Cuisine: American
- Diet: Vegetarian
Ingredients
- 3 large Russet or Yukon Gold potatoes
- 1 tablespoon salt (or to taste)
- Oil for frying (if deep frying)
- 1 tablespoon olive oil (if baking or air frying)
- Seasoning of choice (e.g., paprika, garlic powder, black pepper)
Instructions
- Prepare the potatoes: Wash and dry the potatoes completely. Do not peel them unless you prefer peeled chips.
- Slice the potatoes: Using a mandoline slicer, slice the potatoes as thinly as possible, aiming for uniform thickness (about 1/16 inch) for even cooking.
- Soak the slices: Place the potato slices in a large bowl of cold water. Soak for at least 30 minutes, or up to 2 hours, to remove excess starch. This step is key for achieving maximum crunch.
- Dry thoroughly: Drain the potatoes and rinse them under cold water until the water runs clear. Spread the slices in a single layer on clean kitchen towels or paper towels. Pat them completely dry. Moisture prevents crisping.
- Seasoning preparation: If using the baking or air fryer method, toss the dry slices with 1 tablespoon of olive oil and your desired seasonings. If deep frying, skip the oil toss for now.
- Choose your cooking method:
- For Deep Frying: Heat 2 inches of oil in a heavy-bottomed pot to 350°F (175°C). Fry the chips in small batches, stirring occasionally, until golden brown and crisp (about 3-5 minutes). Remove with a slotted spoon and drain on paper towels. Immediately sprinkle with salt while hot.
- For Oven Baking: Preheat your oven to 375°F (190°C). Arrange the seasoned slices in a single layer on baking sheets lined with parchment paper. Bake for 15-20 minutes, flipping halfway through, until edges are brown and crisp. Watch closely to prevent burning.
- For Air Frying: Preheat the air fryer to 350°F (175°C). Place the seasoned slices in a single layer in the basket (work in batches). Cook for 10-15 minutes, shaking the basket every 5 minutes, until golden and crunchy.
- Final seasoning: Taste the chips and add more salt or your preferred seasonings immediately after cooking. Serve fresh for the best texture.
Notes
- For the crispiest results, use Russet potatoes as they have a higher starch content.
- If you notice sogginess after cooling, you can briefly reheat the chips in a 300°F oven for 5 minutes to restore crunch.
- Try seasoning variations like smoked paprika and onion powder for a BBQ flavor, or just use fine sea salt for a classic taste.
Nutrition
- Serving Size: 1 serving (approx. 1 oz)
- Calories: 150
- Sugar: 0.5
- Sodium: 250
- Fat: 8
- Saturated Fat: 1.5
- Unsaturated Fat: 6.5
- Trans Fat: 0
- Carbohydrates: 18
- Fiber: 1.5
- Protein: 2
- Cholesterol: 0