
There are certain desserts that just taste like coming home, right? For me, that flavor is packed into something wonderfully simple, yet incredibly rich: magic cookie bars. When I was helping my grandmother in the kitchen, these layered beauties were always the first things we made when company was coming over because you absolutely cannot mess them up. Seriously, they are the definition of an easy bar cookie that makes everyone happy!
We call this my Ultimate Gooey Magic Cookie Bars recipe because they hit that perfect spot between chewy and dense. You might also know them as Seven Layer Bars, and trust me, they live up to the hype. It’s the kind of nostalgic baking that brings a smile to your face before you even take that first bite of pure, melted goodness. It’s what cooking is all about—sharing something comforting!
- Why This magic cookie bars Recipe is the Best Comfort Food Desserts
- Ingredients for the Ultimate magic cookie bars
- How to Prepare Your magic cookie bars Step-by-Step
- Tips for Perfect Gooey Dessert Bars
- Ingredient Notes and Substitutions for magic cookie bars
- Storage & Reheating Instructions for your Classic Layered Cookies
- Serving Suggestions for these Crowd Pleasing Desserts
- Frequently Asked Questions about magic cookie bars Recipe
- Sharing Your Nostalgic Baking Creations
Why This magic cookie bars Recipe is the Best Comfort Food Desserts
When I switched careers from marketing back to the kitchen full-time, it was recipes like these magic cookie bars that reminded me why I made the jump. They are pure, effortless comfort. Forget fussy techniques; these are just layered ingredients that bake up into heaven. They are such a fantastic staple for easy get-togethers.
Here is why I truly believe this recipe reigns supreme among best bar cookie recipes:
- The texture is unbelievably gooey every single time, thanks to that magical ingredient.
- They are incredibly fast to assemble—you’re looking at maybe 15 minutes of active work!
- They capture that wonderful feeling of nostalgia and comfort we all crave in baking.
That rich, syrupy texture you see? That comes entirely from the way the sweetened condensed milk melts down around the chips, nuts, and coconut while baking. It truly binds everything into one glorious, chewy square.
Ingredients for the Ultimate magic cookie bars
Gathering these simple ingredients is half the fun! When I first learned this recipe, I realized that almost everything needed was already in my pantry. The magic really happens when you layer them up. I’ve listed everything below, but I have to stress that for the most authentic, rich result, you absolutely need that classic can of sweetened condensed milk. I stick with the Eagle Brand because that’s what my grandma always used!
If you are looking for more ways to use that can, check out my guide on sweetened condensed milk recipes!
- 1 1/2 cups graham cracker crumbs
- 1/2 cup unsalted butter, melted (don’t be tempted to skip melting it!)
- 1 (14 ounce) can sweetened condensed milk (Eagle Brand highly recommended!)
- 1 cup semi-sweet chocolate chips
- 1 cup butterscotch chips (only if you love that extra gooey caramel note!)
- 1 cup flaked coconut, sweetened
- 1 cup chopped pecans or walnuts (use whatever you have on hand!)
How to Prepare Your magic cookie bars Step-by-Step
Putting these magic cookie bars together is incredibly straightforward. It’s mostly just layering, which is why they are such a wonderful, stress-free bake for me. Remember to start by preheating your oven to 350°F (175°C). I also line my 9×13 inch pan with parchment paper first, making sure I leave some overhang on the sides. This overhang is your best friend later when you try to lift these gooey dessert bars out! For the easiest experience, use a pan lined just like you would for my easy sugar cookie bars!
Preparing the Graham Cracker Crust for magic cookie bars
First up is the base! You just grab your graham cracker crumbs and the melted butter and mix them real well in a bowl. Then, you press that crumb mixture firmly and evenly right into the bottom of your prepared pan. You need to pack it down tight—use the bottom of a glass or measuring cup if you have one. A good, solid crust keeps these layers from getting soggy later on.
Layering the Toppings and Pouring the Sweetened Condensed Milk
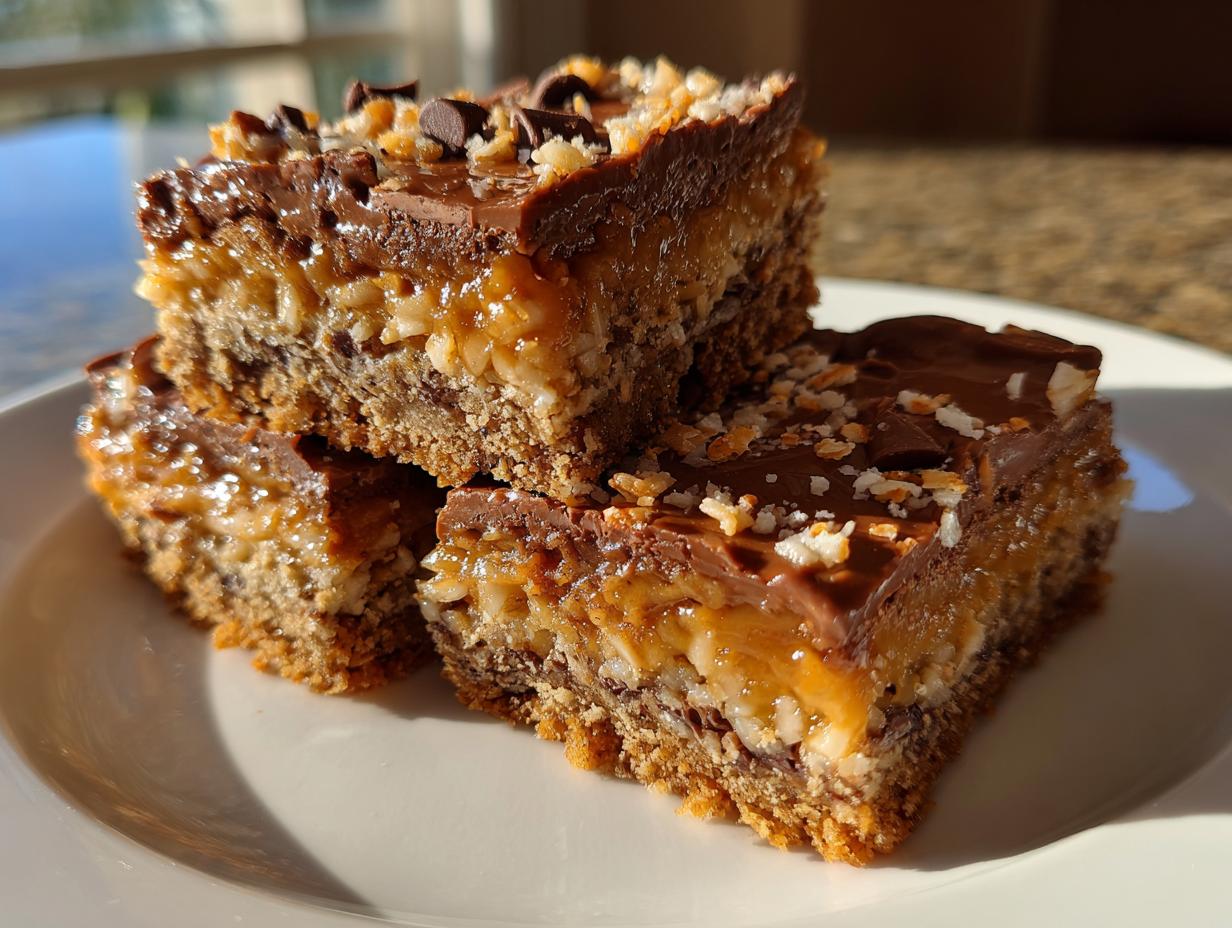
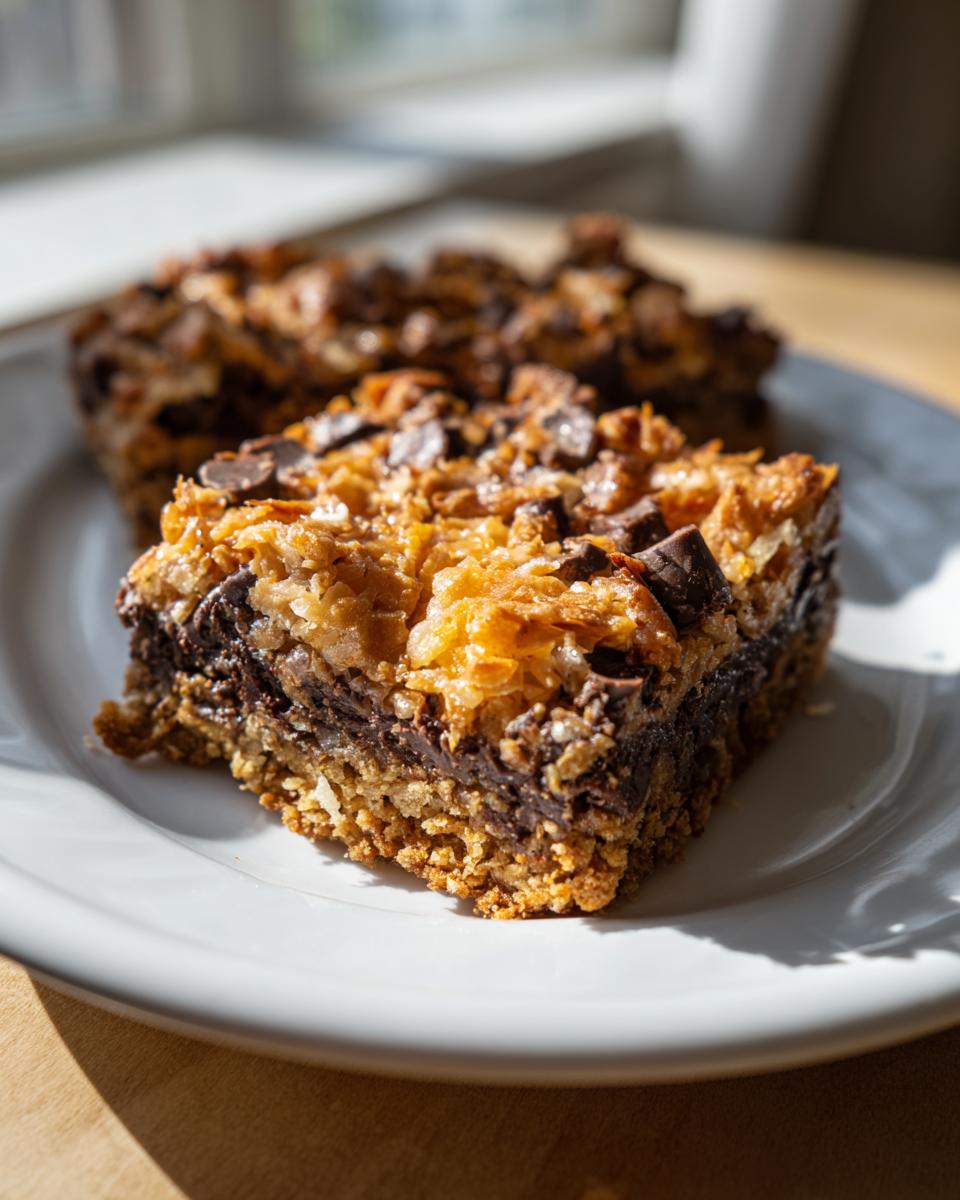
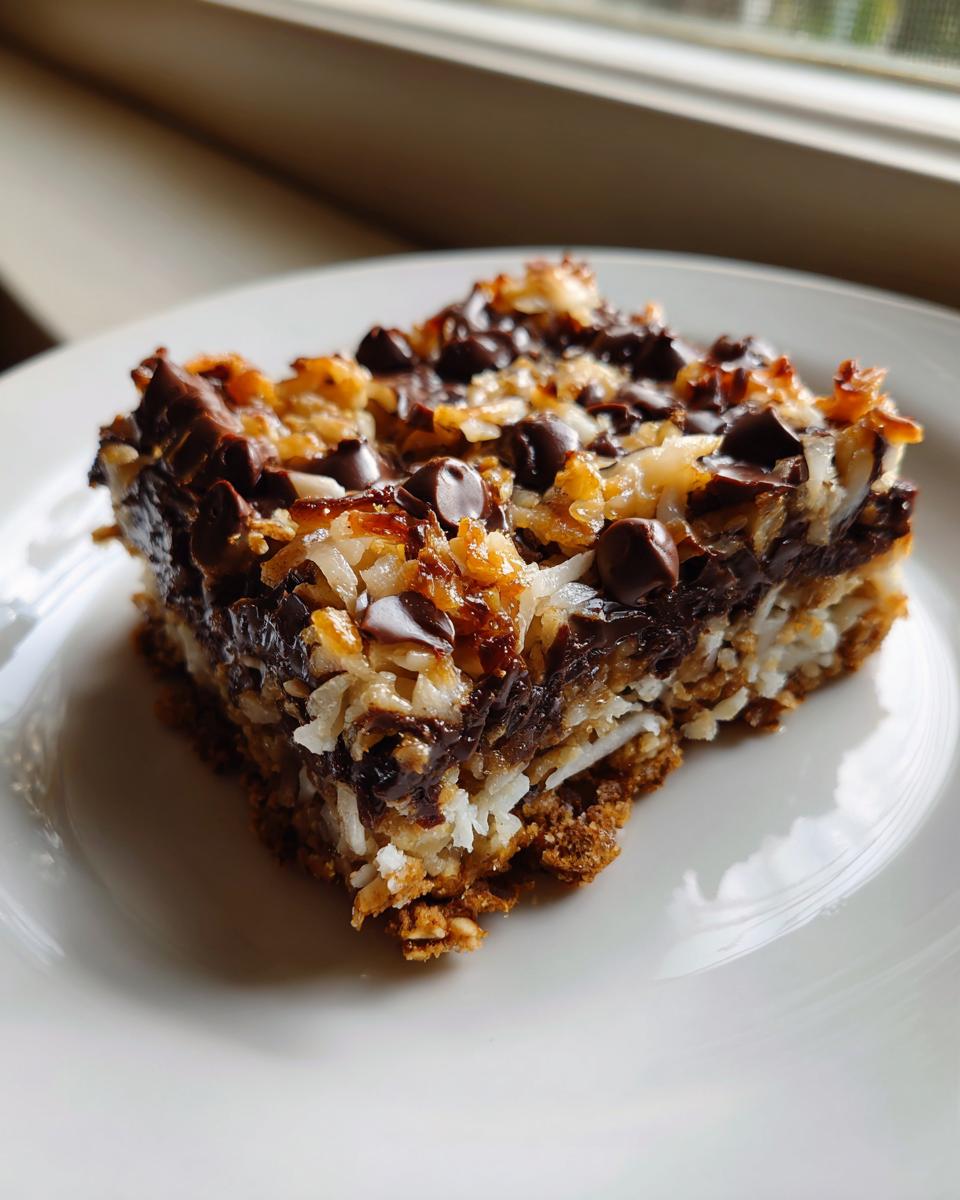
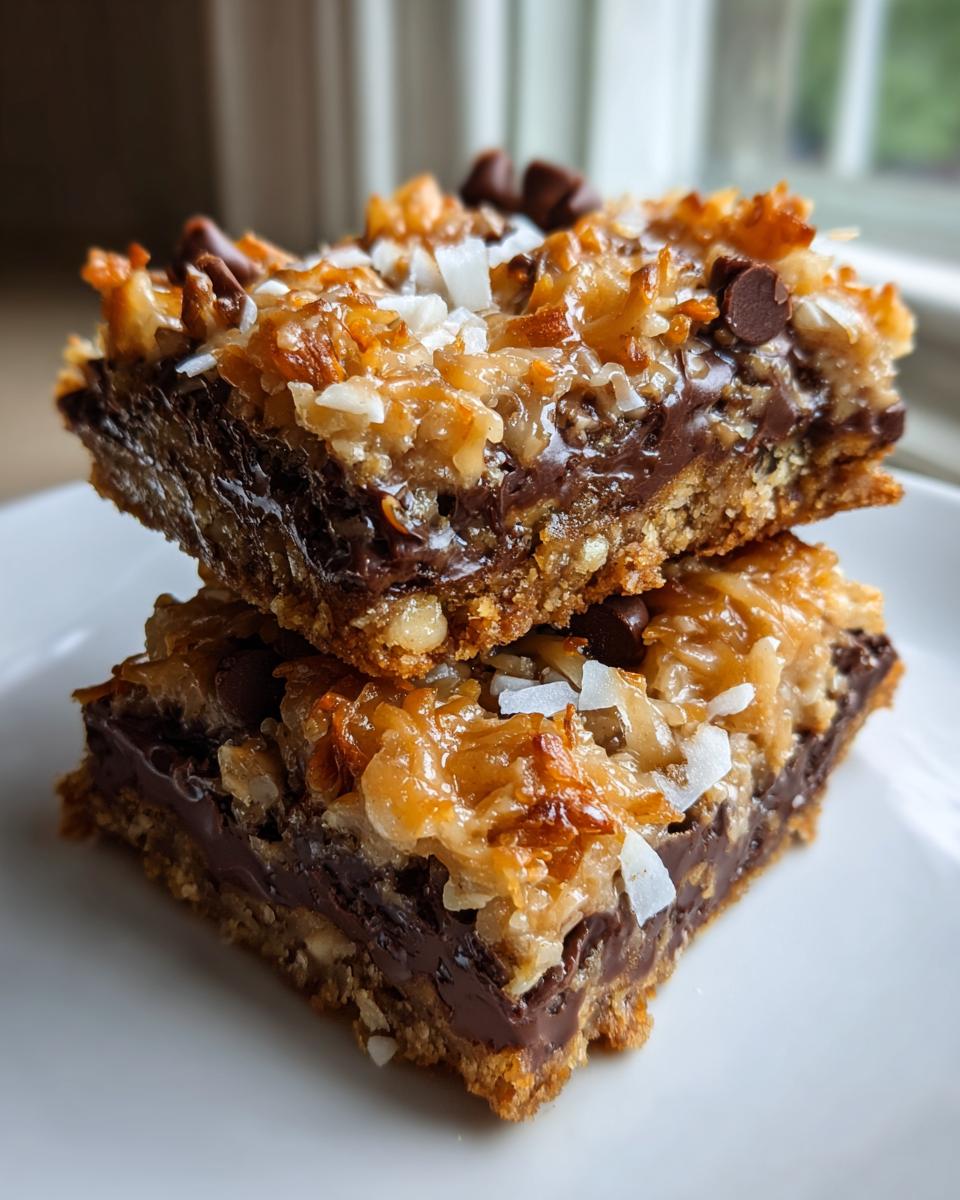
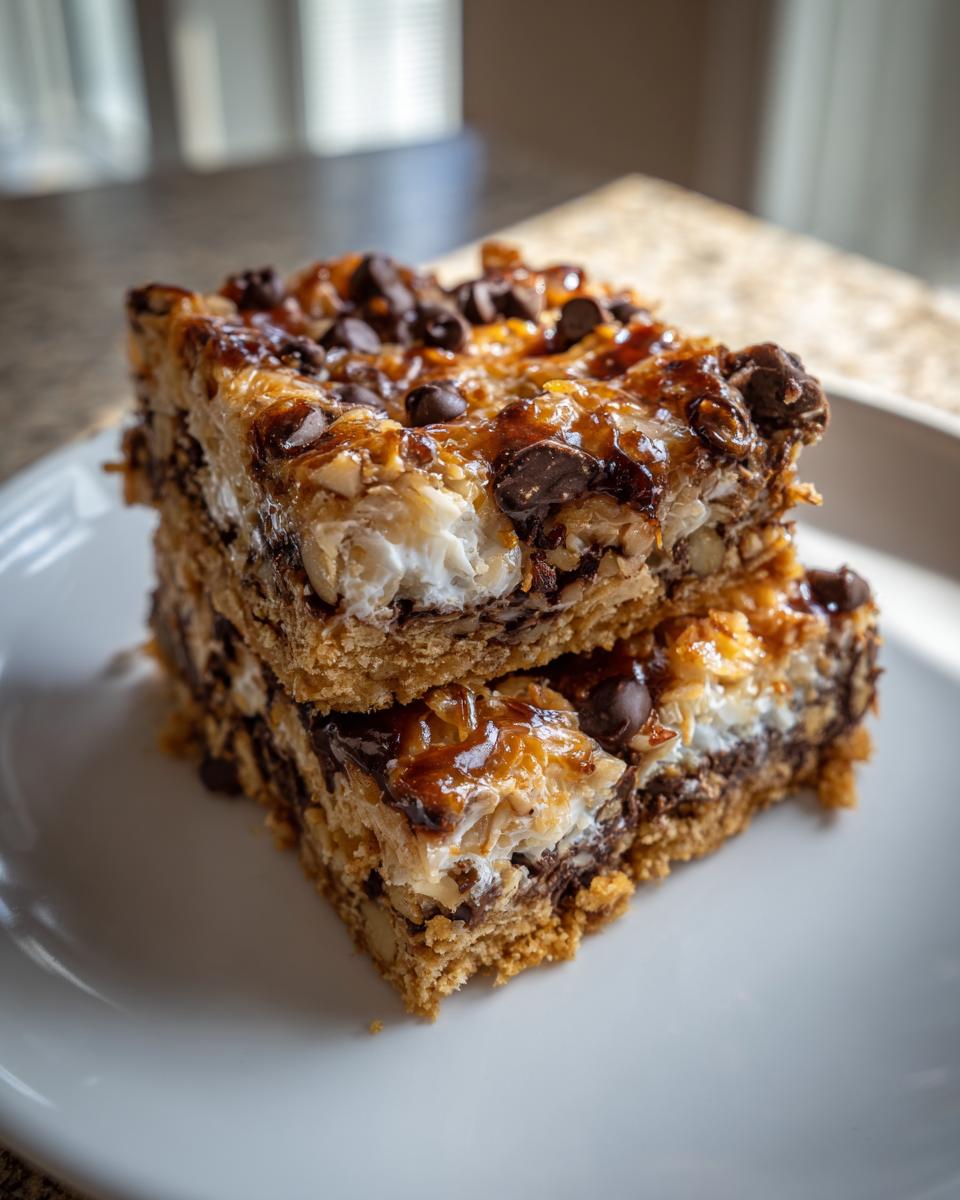
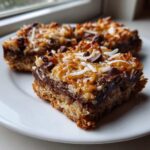
Now for the fun part! Sprinkle everything evenly over that packed crust: the chocolate chips, then the butterscotch chips if you are using them, followed by the flaked coconut, and finally those chopped nuts. Don’t worry if they don’t look perfectly distributed; the next step fixes everything. Slowly, drizzle that whole can of sweetened condensed milk over the top of all those layers. You want it to seep down and coat everything so those layers stick together beautifully when baked. If you want to see how others layer these classics, check out this great recipe for Seven Layer Bars! After they come out of the oven, you absolutely must let them cool completely before cutting. If you try to slice them warm, you’ll end up with a delicious, but messy, pile of crumbly goodness!
Tips for Perfect Gooey Dessert Bars
I learned the hard way that these gooey dessert bars have a tiny window where they are perfect! My first batch, I was too eager, of course. I tried to cut into them right when they came out of the oven, thinking they’d still hold a shape, but nope—it was total chaos! We ended up eating them with spoons right out of the pan that night, which was fun, but not what I was aiming for.
My biggest piece of advice is to resist the urge to pull them out early. You want the edges to look just set and golden brown, but the middle should still look a little soft and shiny when you take them out. That’s the key to that addictive chewiness you get in these Seven Layer Bars. Then, you must, must, *must* let them cool completely—I mean fully firm up—before attempting to slice them. If you need them faster, chilling helps firm up that delicious condensed milk layer perfectly. You know, these bars remind me a bit of the texture I get when I make my classic butter cookies—that soft structure is everything! Just look at how beautiful those bars are when baked correctly; you can see why people love these classics so much!
Ingredient Notes and Substitutions for magic cookie bars
I get so many questions about swapping ingredients in this recipe because everyone has different tastes, and that’s totally fine! If you need to make these nut-free for a gathering, just leave out the pecans or walnuts—they become delicious Six Layer Bars, and trust me, no one will even notice they are missing because the chocolate and coconut are so strong.
A common question is about the butterscotch chips. They are optional, but they add this amazing hint of butterscotch caramel flavor that I love, so I highly recommend keeping them in! Lastly, please, please, please use sweetened condensed milk, not evaporated milk. Evaporated milk will just leave you with a runny mess! For more simple bakes that use similar pantry staples, check out my banana chocolate chip muffins recipe.
Storage & Reheating Instructions for your Classic Layered Cookies
One of the best things about these magic cookie bars is how sturdy they are for storing! Since they are packed with sugar from the condensed milk, they actually keep really well. I store my leftovers in an airtight container right on the counter—no need to chill them unless you want them extra firm.
You can generally count on these classic layered cookies being delicious for nearly a week! I’ve never needed to reheat them because they are perfect at room temperature, or even slightly chilled from the fridge. They taste exactly the same the next day, which is why they are always my go-to for potlucks. If you are freezing them, make sure they are cut first for easier serving later. If you love how simple this is, you might also want to try my cookie cake recipe for another make-ahead treat!
Serving Suggestions for these Crowd Pleasing Desserts
Because these magic cookie bars are so rich and sweet—thanks to all that condensed milk!—they pair beautifully with something simple. I always serve them warm with a big scoop of plain vanilla ice cream when we have them at home. That contrast between hot and cold is just heaven.
If you are taking these to a big event, though, they are truly crowd pleasing desserts on their own! They hold up great on a platter next to less-sweet treats. For a beautiful presentation, I sometimes put out a small bowl of fresh raspberries nearby. The tartness cuts through the sweetness perfectly. They are also seriously good with a strong cup of coffee, which I usually need after baking!
If you are looking for a drink to serve alongside them for a crowd, you should definitely check out my recipe for easy champagne punch!
Frequently Asked Questions about magic cookie bars Recipe
I get so many messages after people try this recipe—it seems to bring back memories for everyone! Here are the most common things folks ask me when they are getting ready to bake these comforting layers.
Are these really Seven Layer Bars, and if so, where are all seven layers?
That’s a fun question! Yes, they always go by Seven Layer Bars, too. If you count every single component—the graham crackers, the butter that soaks into them, the chocolate chips, the butterscotch chips, the coconut, the nuts, and finally that blanket of sweetened condensed milk—you hit seven! It really depends on how you count them, but the name definitely stuck because it sounds impressive for such an easy bake. If you skip the optional butterscotch chips, they are still amazing Classic Layered Cookies!
I only have evaporated milk; can I use that instead of sweetened condensed milk?
Oh, trust me, don’t make that substitution if you want these to turn out right! I learned years ago when I ran out once that evaporated milk will bake up thin and watery. You absolutely need that thick, sugary richness of the sweetened condensed milk to get the right gooey texture that makes these bars famous. You can find more tips on making other rich desserts by checking out my guide on soft sugar cookies, but for these bars, stick to the good stuff!
Can these be made nut-free for a school event?
Absolutely! They are fantastic as Simple Dessert Squares even without the nuts. Just leave them out entirely, and you are perfectly fine. They will still set up beautifully because that milk does all the heavy lifting binding everything together. My sister always makes a nut-free batch for my nephew.
How long do these need to cool before I try cutting them?
This is critical advice for your first batch! If you try to cut them warm, they will absolutely fall apart on you, turning into a delicious puddle rather than clean squares. You must let them cool on the counter for at least two hours, or better yet, chill them for an hour. For more baking wisdom, make sure you read through the tips on this great recipe as well!
Sharing Your Nostalgic Baking Creations
Now that you have made a batch of these wonderfully easy and incredibly gooey magic cookie bars, I genuinely want to know what you think! Sharing food is what Bring Dish is all about, and I love seeing your baking triumphs.
Did you stick to the classic seven layers, or did you dare to add a little something extra? Tell me in the comments below which layer you look forward to the most—is it the chocolate, the coconut, or maybe those buttery graham cracker crumbs on the bottom?
If you snapped a photo of your finished squares, please tag me on social media! It makes my day when I see these familiar, comforting desserts showing up in your kitchens. I’m always looking to connect with fellow home cooks who appreciate simple, honest food that brings people together. For everything else about our mission here at Bring Dish, you can read more on my About page. Happy baking, everyone!
PrintThe Ultimate Gooey Magic Cookie Bars (Seven Layer Bars)
This recipe delivers the classic, comforting Magic Cookie Bars, also known as Seven Layer Bars. They feature a buttery graham cracker crust topped with layers of chocolate chips, nuts, coconut, and held together by sweet, rich condensed milk for a perfectly gooey texture.
- Prep Time: 15 min
- Cook Time: 30 min
- Total Time: 45 min
- Yield: 24 servings 1x
- Category: Dessert
- Method: Baking
- Cuisine: American
- Diet: Vegetarian
Ingredients
- 1 1/2 cups graham cracker crumbs
- 1/2 cup unsalted butter, melted
- 1 (14 ounce) can sweetened condensed milk (Eagle Brand recommended)
- 1 cup semi-sweet chocolate chips
- 1 cup butterscotch chips (optional, for extra flavor)
- 1 cup flaked coconut, sweetened
- 1 cup chopped pecans or walnuts
Instructions
- Preheat your oven to 350°F (175°C). Line a 9×13 inch baking pan with parchment paper, leaving an overhang for easy removal.
- In a medium bowl, combine the graham cracker crumbs and melted butter. Press this mixture firmly and evenly into the bottom of the prepared pan. This forms your crust.
- Sprinkle the chocolate chips evenly over the crust layer.
- Sprinkle the butterscotch chips (if using) over the chocolate chips.
- Sprinkle the flaked coconut evenly over the chips.
- Sprinkle the chopped nuts evenly over the coconut layer.
- Slowly and evenly pour the entire can of sweetened condensed milk over all the layered ingredients. Make sure the milk covers the layers as much as possible.
- Bake for 25 to 30 minutes, or until the edges are lightly golden brown and the condensed milk is bubbly.
- Let the bars cool completely in the pan on a wire rack before lifting them out using the parchment paper overhang.
- Once cool, cut into squares. These gooey dessert bars are best served at room temperature or slightly chilled.
Notes
- For a nut-free version, simply omit the nuts. These are still delicious as Six Layer Bars.
- To get the best gooey texture, do not overbake. The center should still look slightly soft when you remove them from the oven.
- These bars store well in an airtight container at room temperature for up to one week.
Nutrition
- Serving Size: 1 bar
- Calories: 210
- Sugar: 18g
- Sodium: 75mg
- Fat: 13g
- Saturated Fat: 7g
- Unsaturated Fat: 6g
- Trans Fat: 0.1g
- Carbohydrates: 22g
- Fiber: 1g
- Protein: 3g
- Cholesterol: 15mg