

Tell me honestly, have you ever walked past one of those fancy French bakeries, inhaled that heavenly scent of butter and warm chocolate, and sighed? Wow, I know I have! Getting true, bakery-quality chocolate croissants at home used to feel like a massive undertaking—I mean, who has time for all that complicated folding and chilling?
When I was balancing my crazy marketing career, I learned that incredible food doesn’t need extraordinary effort. That realization is why I’m sharing this genius shortcut! We’re skipping the traditional lamination nightmare and using store-bought puff pastry to create the flakiest, most buttery chocolate croissants you’ve ever had, and guess what? They are ready in under an hour. Seriously, this recipe is my answer to those busy weeks when my family still deserves an indulgent chocolate filled pastry moment.
- Why You Will Love These Bakery Style Croissants At Home
- Essential Ingredients for Buttery Chocolate Croissants
- Step-by-Step Guide to Making Shortcut Chocolate Croissants
- Expert Tips for Perfect Chocolate Croissants Every Time
- Serving Suggestions for Your Quick Breakfast Pastry
- Storage and Reheating Instructions for Leftover Chocolate Croissants
- Variations on the Classic French Pastry Recipe
- Frequently Asked Questions About Easy Croissant Recipe
- Nutritional Estimates for Indulgent Breakfast Desserts
Why You Will Love These Bakery Style Croissants At Home
When you need a moment of pure indulgence without committing to an all-day baking project, this is your recipe. Trust me, you won’t believe the results we get from a simple box mix!
- Speed Demon: You get true bakery-style croissants in about 40 minutes total. That makes them perfect for a last-minute treat or a quick breakfast pastry.
- Foolproof Flakiness: We lean on great quality puff pastry, so that signature flaky pastry texture happens every single time. No tears, no stress!
- Maximum Reward: They look like you spent hours rolling dough, but you only spent minutes assembling them. Hello, impressive homemade baked goods!
Essential Ingredients for Buttery Chocolate Croissants
Because we are using the puff pastry hack, the ingredient list is mercifully short, but every item needs to be good quality. When you’re only using a few things, you really taste them! The most important part here is the chocolate; don’t skimp on this!
You’ll need one package of frozen puff pastry, and make sure it’s fully thawed according to the box—this is key for that gorgeous flaky pastry. For the inside of your **chocolate croissants**, grab about 4 ounces of really good bittersweet or semi-sweet chocolate. I prefer to use solid sticks or batons because they melt perfectly in the layers.
Finally, we need one large egg mixed quickly with a teaspoon of water for our egg wash, which gives everything that shiny, golden-brown finish. Oh, and if you feel like being extra fancy, a tiny sprinkle of granulated sugar on top after the wash really amps up the bakery look!
Step-by-Step Guide to Making Shortcut Chocolate Croissants
Okay, this is where we turn that thawed pastry into magic! Don’t be intimidated; this is the easiest French pastry you’ll ever make. We’re going straight for that beautiful, golden exterior and the gooey center. Preheat your oven right now to 400°F (200°C) and line two big baking sheets with parchment paper. Trust me, parchment paper is your best friend when baking with buttery pastry!
Preparing the Puff Pastry and Chocolate Filling
First things first: getting that puff pastry ready. You need to let it thaw completely—usually, I leave it on the counter for about 40 minutes, but check your package instructions. Once thawed, gently unfold one sheet onto a surface that’s just barely dusted with flour. If it’s looking a little wonky or square, just trim the edges slightly to make one nice, neat rectangle. Now, take a knife and carefully slice that rectangle lengthwise into three equal strips. This gives us our perfect size for the **chocolate filled pastry**!
Next, grab those chocolate sticks. Place one piece right near the end of a pastry strip. Now, gently roll the pastry over the chocolate just once. Then, place your second piece of chocolate right next to the edge you just rolled, and continue rolling until you finish the strip. This way, you get two glorious pockets of melted chocolate in every croissant!

Shaping and Egg Washing Your Homemade Pain Au Chocolat
When you finish rolling, you need to make sure that seam is tucked underneath! Placing the rolled-up **homemade pain au chocolat** seam-side down on the baking sheet is crucial so it doesn’t unravel while baking. Space your croissants a couple of inches apart because they really puff up in that oven. While they’re chilling slightly, whisk that egg and water together for the wash. Brush this mixture generously but lightly all over the tops and sides of the pastry. If you’re sprinkling sugar, do it right after the wash so it sticks!

Baking for Perfect Flaky Pastry
Into the oven they go for 15 to 20 minutes. Keep an eye on them! You are looking for that magnificent, deep golden brown color; that’s how you know the layers have lifted and you’ve achieved that amazing **flaky pastry**. Once they look perfect—puffy and crisp—pull them out immediately. I know it’s hard to wait, but let them sit on that hot sheet for just five minutes before moving them to a wire rack. This brief rest helps them set up beautifully before you dig in!

If you want to see some serious puff pastry technique inspiration, check out this great guide on making these beautiful pastries, even though we are using the shortcut method!
Expert Tips for Perfect Chocolate Croissants Every Time
Even though we’re using store-bought dough, getting those picture-perfect **puff pastry croissants** still requires a little finesse! My biggest struggle for the longest time was keeping the sides from getting too messy when rolling. My solution? Keep everything cold!
My biggest breakthrough—a tip I wish I knew when I first tried these—is making sure the thawed puff pastry is as cold as possible when you start rolling. If your kitchen is warm, assemble your croissants quickly, place them on the sheet, and pop them in the freezer for about 10 minutes before the egg wash step. This helps the butter layers stay firm, which translates directly to better lift and flakiness when baking.
Also, don’t overwork the dough when you’re cutting! If you handle the strips too much, you melt those lovely butter layers right out. Be swift and gentle when you roll them around the chocolate. If you want to see how others approach perfection, this guide on easy chocolate croissants has some great visual takes!
Serving Suggestions for Your Quick Breakfast Pastry
Look, these **chocolate croissants** are indulgent on their own, right? They are the perfect centerpiece for a slow weekend morning, but a few simple additions can turn them into a full brunch spread. I always picture serving these when friends pop over unexpectedly—they look so fancy, but they were so easy!
For the ultimate **weekend brunch ideas**, you absolutely need something bright and tart to cut through all that buttery goodness. A simple bowl of fresh raspberries or sliced mangoes is perfect. The tartness really makes the semi-sweet chocolate inside pop!
If you’re enjoying these as a true **chocolate morning treat**, you have to pair them with the right mug. I’m a huge fan of serving them alongside a strong, dark roast coffee, or maybe a rich café au lait. The bitterness of the coffee balances the sweetness of the chocolate beautifully.
If you are assembling a big spread, sometimes I’ll offer a little side of slightly sweetened yogurt or Crème fraîche. It feels very French, and it’s just lovely to dip the flaky edges into something cool and creamy. Head over to this collection of great morning treats for more inspiration on pairing!
Storage and Reheating Instructions for Leftover Chocolate Croissants
Now, the real challenge: stopping yourself from eating all the **chocolate croissants** in one sitting! If you do have any leftovers, the key is keeping them away from air to keep that glorious butter locked in. I never refrigerate them; cold air makes pastry stiff and dulls the flavor.
Store them in an airtight container right on the counter for best results, usually for up to two days. If you need to keep them longer, *then* the freezer is okay, wrapped really well in foil first.
To bring back that fresh-from-the-oven crispness—that perfect **flaky pastry** feel—don’t use the microwave! It makes them soggy. Instead, I heat mine in a toaster oven or a conventional oven set to about 300°F for just 5 to 7 minutes. They come out warm, crisp, and you’d never know they weren’t baked moments ago. It’s such a simple rescue trick!
Variations on the Classic French Pastry Recipe
We’ve nailed the classic homemade pain au chocolat here, but honestly, once you master the technique with the puff pastry, you can start playing around! That’s what baking is all about—making the recipe truly yours. Since the base shell is so perfect, you can customize the filling easily.
If you’re not huge on bittersweet chocolate, go for milk chocolate! I found that using those milk chocolate caramel squares creates something truly decadent, almost like a candy bar wrapped in buttery layers. Just be sure they are relatively solid so they roll up nicely and don’t melt out immediately onto the baking sheet.
Another great twist uses almond paste. You can buy tubes of this, or even make a simple frangipane-style filling. Simply spread a thin layer of almond paste onto the pastry strip before you roll it up with the chocolate. It gives you that wonderful, nutty flavor that pairs so well with the richness of the butter. You can find some great ideas for filling swaps over at this collection of classic pastry ideas.
If you want to go absolutely over the top (and sometimes, you just have to!), you can definitely add a simple glaze after they cool slightly. I’m not talking about a thick frosting—we don’t want to drown those lovely flakes! Just whisk together about half a cup of powdered sugar with a teaspoon of vanilla and just enough milk or orange juice until it drizzles nicely off your spoon. A very light drizzle over the top adds sweetness and looks stunning!
Frequently Asked Questions About Easy Croissant Recipe
I know you might still have a few nagging questions, especially if you’re new to working with puff pastry. It happens to all of us! Since this is meant to be an easy croissant recipe, let’s clear up the most common hurdles so you can get amazing results with your **chocolate croissants**.
Can I use pie crust instead of puff pastry?
Oh, sweetie, please don’t! Pie crust is shortcrust pastry, which relies on fat that coats the flour particles, making it tender and crumbly when baked—think of a pie shell. Puff pastry, however, is laminated; it has layers and layers of fat that create steam, which causes that magical, airy lift and crunch. We really need that puff pastry to get the true flaky pastry texture we are aiming for here.
Can I make these ahead of time for an easy breakfast?
Yes, you absolutely can! You can assemble the **homemade pain au chocolat** completely, brush them with the egg wash, and then place them on the baking sheet. Cover them tightly with plastic wrap and let them chill in the refrigerator for up to 24 hours. Just pull them out about 30 minutes before baking so they aren’t freezing cold, and go ahead and bake them!
Why aren’t my croissants truly flaky? They look dense.
Dense means the butter in the puff pastry didn’t create steam properly. Usually, this happens for one of two reasons: you handled the pastry too much, melting the butter layers before baking, or your oven temperature wasn’t hot enough when they went in. The initial high heat—400°F is key—is what forces those layers to separate and puff up into beautiful, golden layers!
Can I use chocolate chips instead of chocolate sticks?
You sure can! While sticks provide a cleaner line of chocolate, chips work fine for your **chocolate morning treats**. The only difference is that chips tend to be smaller, so you might need to add a few more of them, perhaps placing two small lines of chips rather than one stick.
Nutritional Estimates for Indulgent Breakfast Desserts
Now, I want to be super clear about this part, because that pastry goodness comes from butter, and butter is wonderful, but it does add up! The numbers below are just estimates based on typical store-bought puff pastry and bittersweet chocolate. Real life baking varies wildly depending on the exact pastry brand you grab or how much sugar you sprinkle on top!
We developed these indulgent breakfast desserts using standard measurements, so use these figures as a guide rather than a strict medical analysis. I developed this recipe because I believe in enjoying food, not stressing over spreadsheets, but it’s good to have a baseline!
- Serving Size: 1 croissant
- Calories: 350
- Fat: 22g (including 12g Saturated Fat)
- Carbohydrates: 32g
- Sugar: 12g
- Protein: 5g
See? Totally worth it for a weekend treat! Don’t forget that these estimates don’t account for serving them with a side of fruit or a fancy café au lait, which I highly recommend!
PrintEasy Homemade Chocolate Croissants Using Puff Pastry

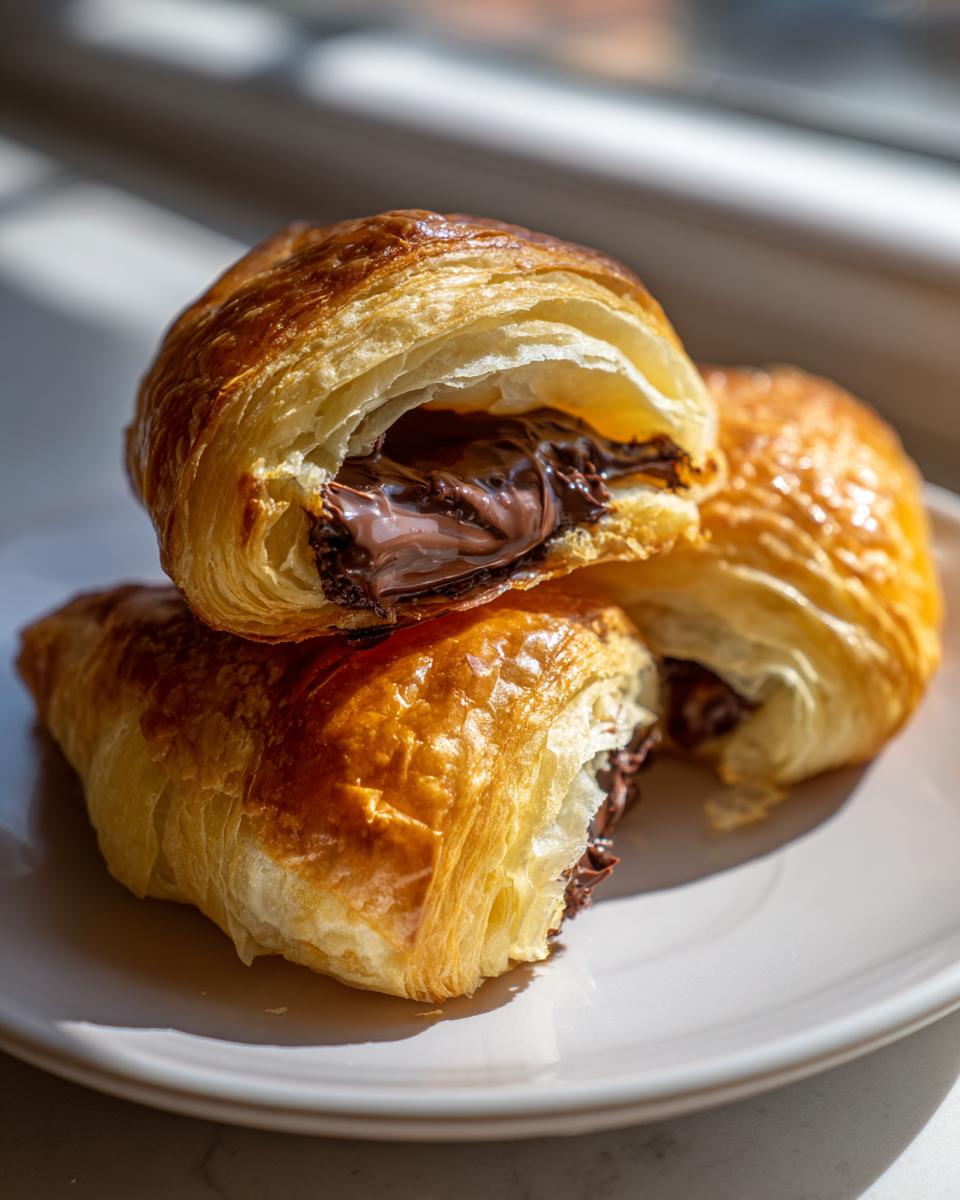
Make bakery-style chocolate croissants at home without the difficult lamination process. This recipe uses store-bought puff pastry to create flaky, buttery pain au chocolat perfect for breakfast or brunch.
- Prep Time: 20 min
- Cook Time: 20 min
- Total Time: 40 min
- Yield: 6 servings 1x
- Category: Breakfast
- Method: Baking
- Cuisine: French
- Diet: Vegetarian
Ingredients
- 1 package (14.1 ounces) frozen puff pastry, thawed according to package directions
- 4 ounces good quality bittersweet or semi-sweet chocolate, cut into sticks (or use chocolate batons)
- 1 large egg, beaten with 1 teaspoon water (for egg wash)
- 1 tablespoon granulated sugar (optional, for sprinkling)
Instructions
- Thaw the puff pastry sheets completely according to the package instructions, usually overnight in the refrigerator or for about 40 minutes at room temperature. Preheat your oven to 400°F (200°C). Line two baking sheets with parchment paper.
- Unfold one sheet of thawed puff pastry onto a lightly floured surface. If the sheet is square, trim it slightly to make a more even rectangle. Cut the rectangle lengthwise into three equal strips.
- Take one strip and place a piece of chocolate near one end. Roll the pastry strip over the chocolate once, then place another piece of chocolate near the new edge, and continue rolling until you reach the end of the strip. You should have two pieces of chocolate inside each croissant. Repeat this process for all strips.
- Place the rolled croissants seam-side down on the prepared baking sheets, spacing them a few inches apart.
- Brush the tops and sides of each croissant lightly with the egg wash. If desired, sprinkle lightly with granulated sugar for extra shine and crunch.
- Bake for 15 to 20 minutes, or until the croissants are puffed, golden brown, and flaky.
- Remove from the oven and let them cool on the baking sheet for 5 minutes before transferring them to a wire rack. Serve warm for the best bakery-quality experience.
Notes
- For the flakiest result, ensure your puff pastry is cold when you begin rolling, even if it is thawed.
- If you do not have chocolate sticks, you can use chocolate chips, but place them closer together in a line down the center of the strip before rolling.
- This recipe is excellent for a quick weekend brunch or an indulgent breakfast treat.
Nutrition
- Serving Size: 1 croissant
- Calories: 350
- Sugar: 12g
- Sodium: 250mg
- Fat: 22g
- Saturated Fat: 12g
- Unsaturated Fat: 10g
- Trans Fat: 0.5g
- Carbohydrates: 32g
- Fiber: 2g
- Protein: 5g
- Cholesterol: 50mg