

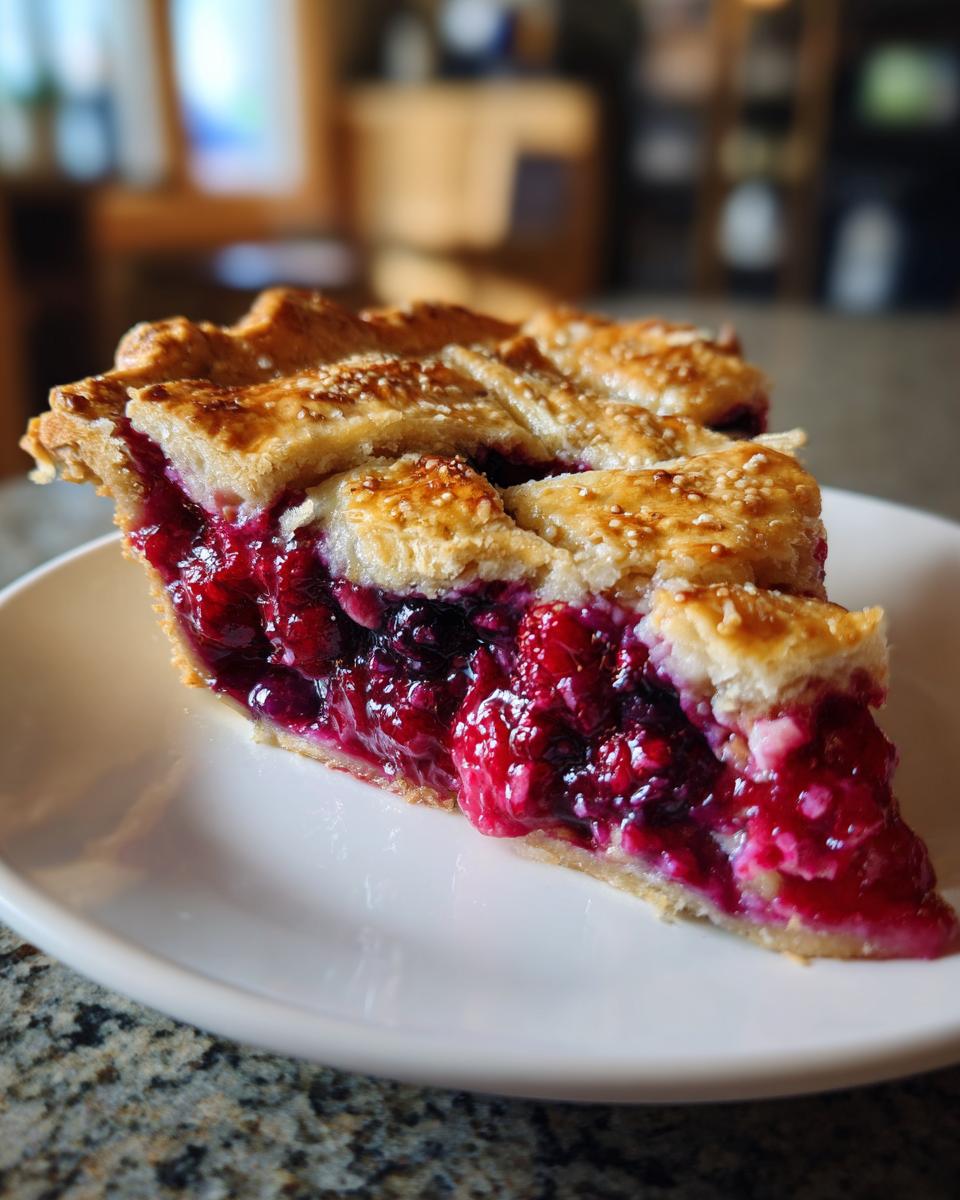
Oh, my friends, when the weather warms up, nothing beats that slice of pure, nostalgic American summer quite like a perfectly baked berry pie. But let’s be real—how many times have you cut into what looked like a masterpiece only to watch all the gorgeous juices spill out onto the plate? It’s a tragedy, right?
That stops today. I’m sharing my absolute favorite, the Foolproof Triple Berry Pie with a Flaky All-Butter Crust, designed specifically to tackle that runny filling problem head-on. This recipe, refined over years from my own busy career where I needed reliable comfort food, gives you that satisfying, tidy slice every single time. Trust me, Maya Thompson knows how to make beautiful food practical for real life!
- Why This Foolproof Triple Berry Pie Recipe Is a Summer Staple
- Ingredients for Your Homemade Berry Pie Recipe
- How to Prepare the Flaky, Buttery Double Crust Pie
- Assembling Your Easy Mixed Berry Pie
- Baking Your Berry Pie to Golden Perfection
- Crucial Cooling Time for Perfect Slices of Berry Pie
- Ingredient Notes and Pie Recipe Using Frozen Berries Guidance
- Frequently Asked Questions About Making Berry Pie
- Storage and Reheating Instructions for Your Classic American Fruit Pie
Why This Foolproof Triple Berry Pie Recipe Is a Summer Staple
If you’re looking for the perfect Summer Berry Dessert Ideas, this is it. I truly developed this recipe with two things in mind: a crust that shatters beautifully, and the absolute end of soggy pie syndrome. We’ve cracked the code on No Runny Pie Filling Secrets, so you can finally serve beautiful slices.
- The crust relies on ice-cold butter for that signature flaky, buttery texture—no shortcuts here!
- We use cornstarch in the filling to guarantee it sets perfectly, even when loaded with juicy fruit.
- And the best part? It works beautifully whether you picked your fruit this morning or pulled it straight from the freezer. Check out how others master similar fillings here.
Achieving the Best Triple Berry Pie Flavor Profile
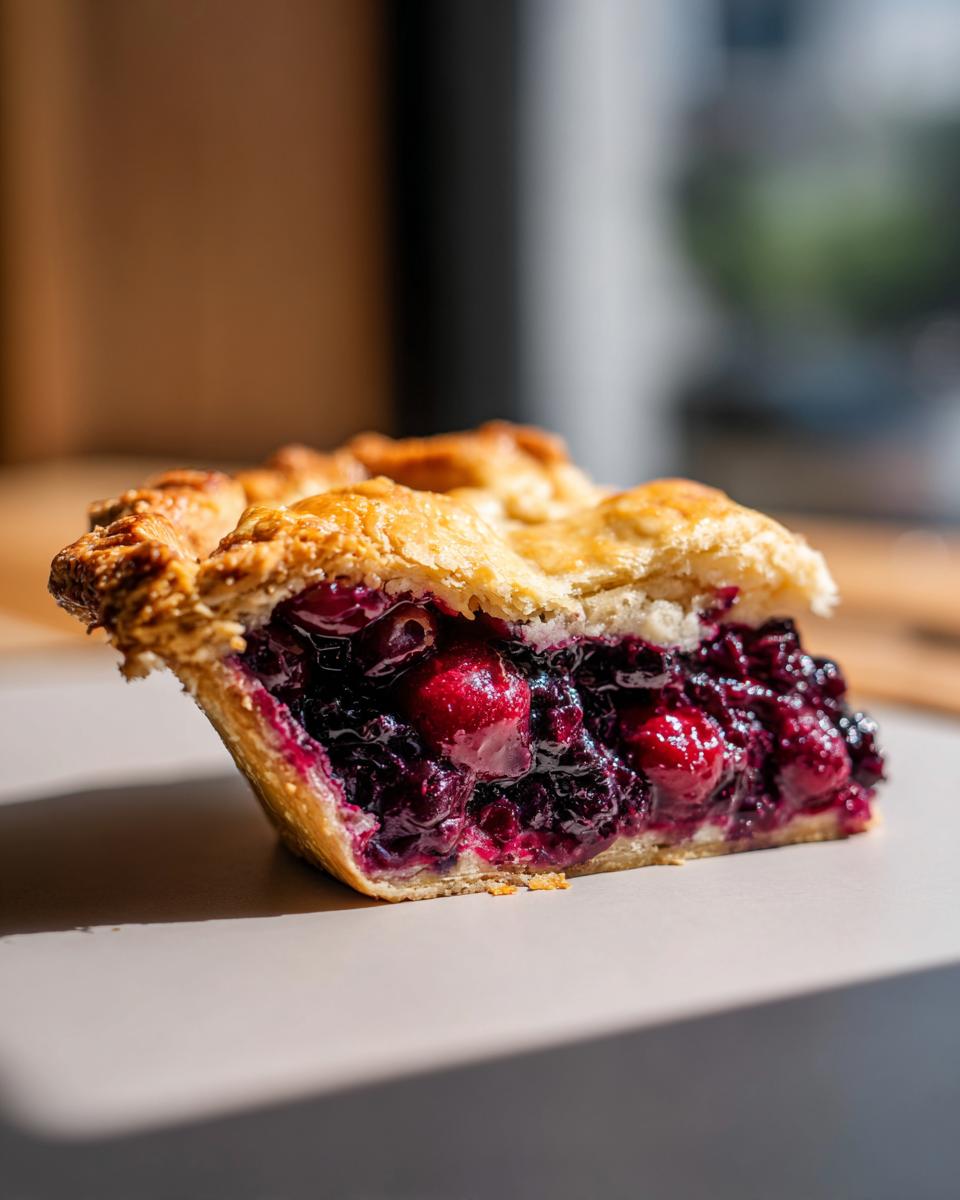
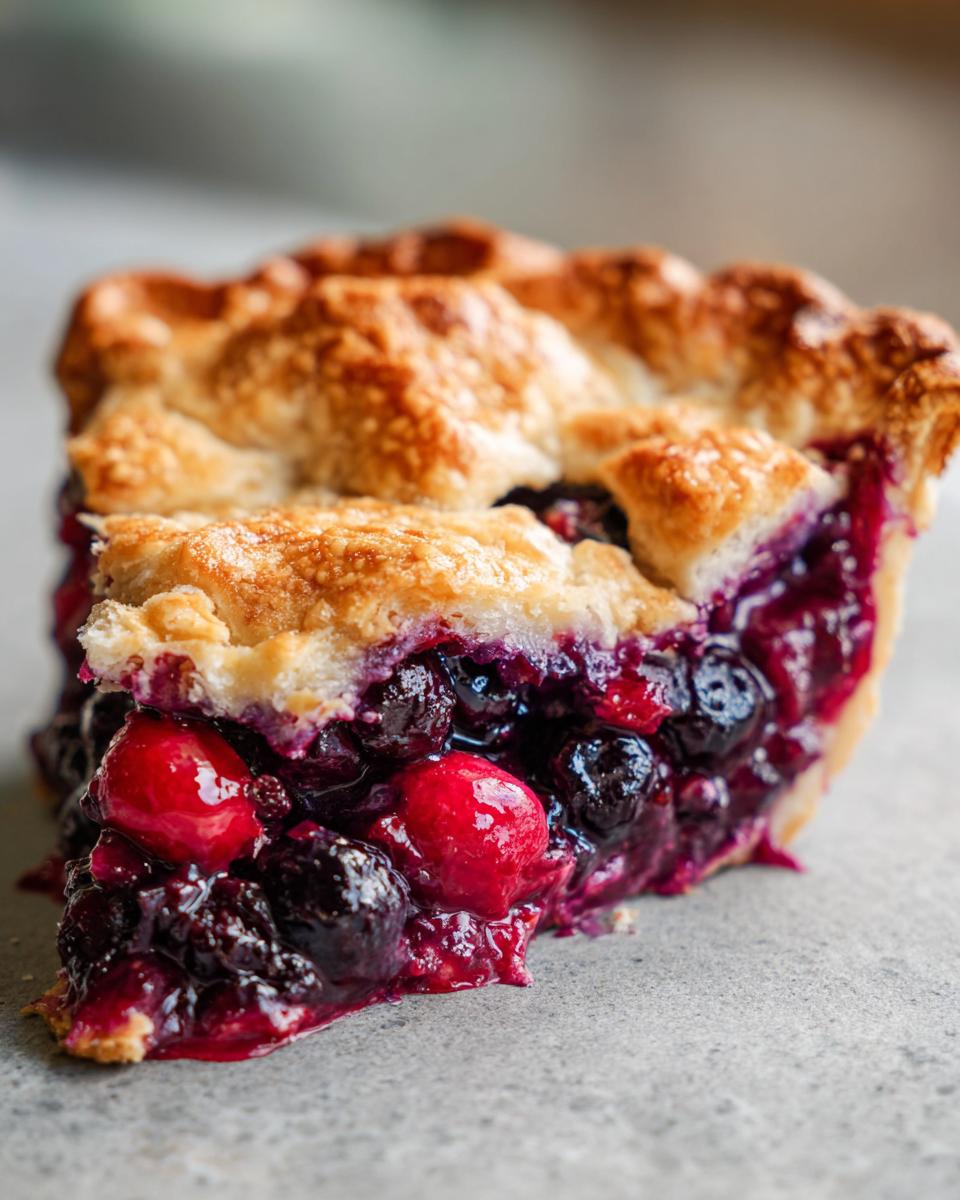
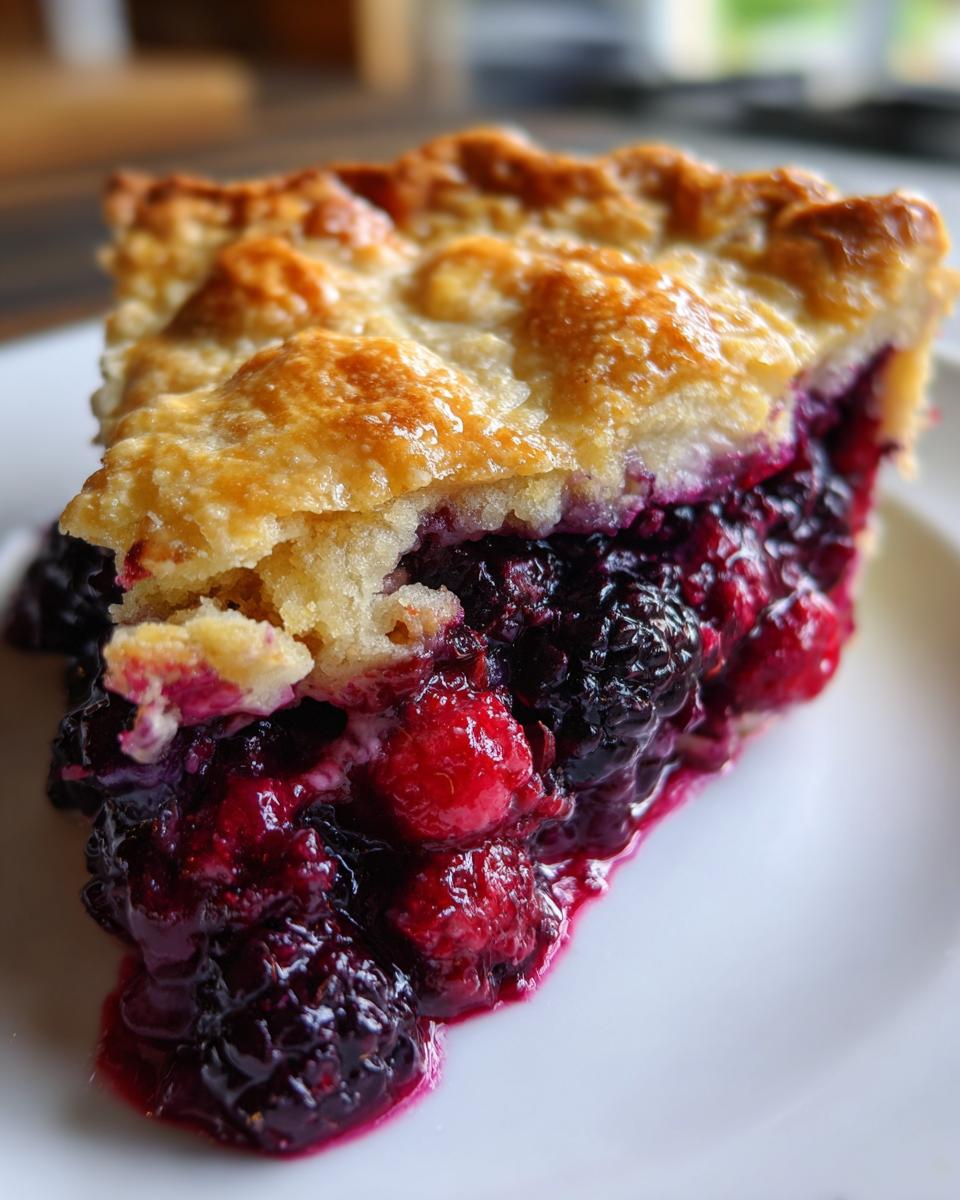
Honestly, the Triple Berry mix—strawberries, blueberries, and raspberries—is my family’s favorite for a reason. Those strawberries bring the sweetness, the blueberries offer that familiar, gentle burst, and the raspberries give you just the right little tart kick. It’s a flavor symphony!
The tiny splash of lemon juice isn’t just for texture, either; it wakes up all those berry flavors so they taste vibrant, not just sugary. When I bake this in July, the smell reminds me exactly of those long afternoons baking with my grandmother, just trying to balance the tartness of whatever was in season.
Ingredients for Your Homemade Berry Pie Recipe
Alright, let’s talk about what you need to gather. For this Homemade Berry Pie Recipe to absolutely shine, the temperature of your components is non-negotiable, especially for that crust! Don’t try to cheat the cold bits; they are the secret sauce for a truly flaky crust.
We’re going to keep this simple by breaking the list into the dough and the filling. Remember, the cornstarch isn’t optional—that’s our insurance policy for a fantastic slice.
Flaky Pie Crust Tutorial Ingredients
- 2 1/2 cups all-purpose flour
- 1 teaspoon salt
- 1 cup (2 sticks) very cold unsalted butter, cut into small cubes
- 1/2 cup ice water, plus more if you need a tiny splash more to bring the dough together
The Fruit Pie Filling That Sets Properly Ingredients
This combination ensures the Fruit Pie Filling That Sets Properly every time.
- 6 cups mixed berries (strawberries, blueberries, and raspberries are my go-to!)
- 1 1/2 cups granulated sugar
- 1/4 cup cornstarch (this is the magic setting agent!)
- 1 tablespoon lemon juice
- 1 teaspoon vanilla extract
- 1 large egg, beaten (just for brushing the top)
- 1 tablespoon coarse sugar (for sprinkling on top for that crunch!)
How to Prepare the Flaky, Buttery Double Crust Pie
Okay, take a deep breath. Making pastry can feel intimidating, but this is where the magic for our Flaky Pie Crust Tutorial happens. Remember, happy butter makes a happy crust, so keep everything cold! In a big bowl, you’ll mix your flour and salt, and then it’s time to incorporate that cold butter. Use a pastry blender, or honestly, your fingertips work great if you’re quick.
We aren’t aiming for a smooth paste here. We want coarse crumbs—think rough ground pepper mixed with some little pea-sized chunks of butter, maybe a bit bigger. Those butter lumps are crucial! When they hit the hot oven, they create steam, which puffs up the dough and gives you those glorious, paper-thin layers.
Making the Buttery Dough Disks
Next up is the ice water. You add it slowly, folks, just tablespoon by tablespoon. Stop adding water the second the dough starts looking shaggy and holding its shape when you squeeze a handful. Seriously, don’t overmix! If you work it too much, you develop gluten, and suddenly, you have a tough, chewy crust instead of a tender one. No thanks!
When it just barely comes together, divide that dough right in half. Flatten each piece into a nice, tight disk, wrap it up tight in plastic wrap, and send it straight to the fridge. That mandatory minimum chill time is one hour. This lets the gluten relax and firms up that butter again. See how much tension that takes out of the dough? You can read more about achieving that super flaky texture over here—it’s worth the read before you roll!
Assembling Your Easy Mixed Berry Pie
Okay, the dough is chilled, the berries are sugared and waiting—it’s time to put this Easy Mixed Berry Pie together! This is where you get to be an artist. Grab one of your chilled dough disks and roll that baby out on a lightly floured counter until it’s a good 12 inches across. Gently ease that into your 9-inch pie plate. Don’t stretch it; just let it settle in nicely. Trim the edges, leaving about an inch hanging over the side.
Now, the filling! Gently pour all those gorgeous, slightly sweetened berries into the bottom crust. Try to keep the juices balanced in the middle. Once it’s in, it’s topping time. You can cut vents into the second sheet, weave a pretty lattice design, or if you’re feeling it, skip the top crust altogether for something more rustic. If you are going for the classic double crust, lay the top over and pinch those edges together. I like to use the tines of a fork to create a nice, tight crimp—it looks professional and really seals the deal!
Tips for a Berry Pie with Crumble Topping Option
Sometimes you just don’t want another layer of pastry, right? That’s totally fair! If you want that amazing textural contrast, swap the top crust for a crumble topping. It gives you this wonderful, crunchy, buttery layer over the juicy berries. It’s so good, especially if you like that mix of soft filling and crispy top!
This is a fantastic way to shake up the classic. If you go that route, you can find my favorite oatmeal crumble measurements detailed in the notes section of the full recipe. Plus, if you’re curious about the philosophy behind making food that connects people, you can read a little about where I’m coming from over here. For the best crumble recipe inspiration, check out this topping tutorial!
Baking Your Berry Pie to Golden Perfection
The moment of truth! We’re going to bake this berry pie a little differently than you might expect, and it’s all about building that perfect golden color without scorching the edges. First thing first: crank that oven up to 400 degrees Fahrenheit. Yes, that hot!
Pop the pie onto a sturdy baking sheet—this is essential for catching any bubbly, glorious juice overflow so it doesn’t smoke up your kitchen. We bake it at that high heat for the first 20 minutes. This shock helps set the bottom crust quickly. Then, drop the temperature down to 375°F and let it go for another 40 to 50 minutes.
Keep an eye on those edges, though! If they look like they are getting too brown before the filling is done, just tear off a small piece of aluminum foil and gently shield the crust edges. You know it’s done when the crust is deep golden brown and you see that filling bubbling, thick and slow, right through your vents. That slow bubble means the cornstarch has fully done its job!
Crucial Cooling Time for Perfect Slices of Berry Pie
Okay, listen up because this next part is slightly painful, but it is the absolute secret to How to Make Berry Pie Slices Perfectly and avoid the dreaded puddle on your plate. You will want to serve this pie warm, I know! But you absolutely must let it cool on a wire rack for a minimum of four hours. Seriously, mark the timer!
Why the wait? It’s all down to that cornstarch we added to the filling. It does the heavy lifting while it bakes, but it needs time to fully firm up as it cools down. If you cut it sooner, all those lovely, thickened berry juices just run right out. Waiting patiently ensures you get neat, beautiful slices that hold their shape, just like you see in the fancy bakery windows. You can see why this step is non-negotiable for a tidy slice over here!
Ingredient Notes and Pie Recipe Using Frozen Berries Guidance
Let’s talk about flexibility for making the Best Triple Berry Pie. Sometimes you’re baking in July, and sometimes you need dessert in December! The beauty of this filling is its versatility. If you’re using frozen berries—and please, don’t bother thawing them!
If they go in frozen, they just need a little extra time in that oven, about five to ten extra minutes usually. Because they start off colder, we want to make sure that cornstarch sets up properly. Also, try to use good quality berries if you can get them; that’s always going to win out in flavor.
If you’re mixing it up, remember that softer fruits like fresh raspberries can release a bit more liquid than your blueberries, so you might want to add just a little extra sprinkle of that cornstarch if you notice your berries seem extra wet. You can find great tips for using that frozen fruit right here!
Frequently Asked Questions About Making Berry Pie
I get so many questions about this recipe—and I love hearing from you all! Whether you’re a baking newbie or you’ve made a hundred fruit pies, it’s good to cover the basics one more time to ensure your next berry pie is a total triumph. Please feel free to reach out via my contact page if you have more!
Can I substitute the berries in this berry pie recipe?
Absolutely, yes! That’s the wonderful thing about a mixed berry pie; you can use whatever looks best at the market or what you have lurking in the freezer. If you are playing around with the three here—strawberry, blueberry, raspberry—you should be fine with the current amount of sugar and cornstarch. However, just a heads-up: if you swap in a lot more soft fruit, like using all fresh raspberries, they tend to release a ton of liquid. If you notice your filling looks a little too soupy before baking, just whisk in an extra teaspoon of cornstarch and toss quickly before pouring it in.
What is the best way to store leftover berry pie?
This is one of those big questions! Because this pie has so much fruit filling, it’s actually best stored covered loosely at room temperature for up to 24 hours if your kitchen isn’t too hot. After that, or if you live somewhere humid, cover it tightly with foil or plastic wrap and keep it in the fridge. When you want to eat leftovers, try to avoid the microwave if possible—it makes the crust sad! Instead, reheat a slice in a 350°F oven for about 10 minutes until the filling is just warm and the crust is crisp again. Delicious!
How do I prevent the bottom crust from getting soggy?
Oh, the dreaded soggy bottom—we’ve fought that battle many times! While the cornstarch in the filling helps immensely, I learned a trick from my grandmother to really lock that bottom crust down. Before pouring in your berry filling, take a tiny bit of that beaten egg wash (just the white part works best!) and lightly brush the entire inside of the bottom pie shell. It creates a thin, impenetrable seal. Also, making sure your oven hits that upper temperature of 400°F initially helps create steam that cooks the bottom crust faster, too. It’s a two-pronged defense system for a beautifully crisp base!
Storage and Reheating Instructions for Your Classic American Fruit Pie
Now that you’ve waited forever for it to cool (and you should have!), let’s talk leftovers. If your kitchen isn’t tropical hot, this Classic American Fruit Pie can sit covered loosely on the counter for a whole day—the high sugar content acts like a natural preservative. After that day, or if it’s humid, wrap it up tightly and tuck it into the fridge where it holds up great for about three more days.
When you are ready for a slice, ditch the microwave! Microwaves steam the crust, and we worked too hard for a soggy bottom! Pop your slice onto a small baking sheet and warm it in a 350°F oven for about 10 minutes. That little bit of dry heat wakes up the buttery crust while warming the filling perfectly. If you need to read up on our policies sometime, you can peek at them here!
PrintFoolproof Triple Berry Pie with Flaky All-Butter Crust

Make the best homemade berry pie with this recipe for Triple Berry Pie. It features strawberries, blueberries, and raspberries in a perfectly set, non-runny filling, all encased in a buttery, flaky crust. This recipe works well with both fresh and frozen berries.
- Prep Time: 45 min
- Cook Time: 70 min
- Total Time: 135 min
- Yield: 8 servings 1x
- Category: Dessert
- Method: Baking
- Cuisine: American
- Diet: Vegetarian
Ingredients
- 2 1/2 cups all-purpose flour
- 1 teaspoon salt
- 1 cup (2 sticks) cold unsalted butter, cut into small cubes
- 1/2 cup ice water, plus more if needed
- 6 cups mixed berries (strawberries, blueberries, raspberries)
- 1 1/2 cups granulated sugar
- 1/4 cup cornstarch (for a set filling)
- 1 tablespoon lemon juice
- 1 teaspoon vanilla extract
- 1 large egg, beaten (for egg wash)
- 1 tablespoon coarse sugar (for topping)
Instructions
- Prepare the Flaky Crust: In a large bowl, whisk together the flour and salt. Cut in the cold butter using a pastry blender or your fingers until the mixture resembles coarse crumbs with some pea-sized pieces of butter remaining.
- Gradually add the ice water, one tablespoon at a time, mixing until the dough just comes together. Do not overmix. Divide the dough in half, form each half into a disk, wrap in plastic, and chill for at least 1 hour.
- Prepare the Filling: In a separate bowl, gently combine the mixed berries, granulated sugar, cornstarch, lemon juice, and vanilla extract. Toss until the berries are evenly coated. This step is key for a fruit pie filling that sets properly.
- Assemble the Pie: On a lightly floured surface, roll out one dough disk into a 12-inch circle. Carefully transfer the dough to a 9-inch pie plate. Trim the edges, leaving a 1-inch overhang.
- Pour the berry filling into the crust.
- Roll out the second dough disk. You can cut vents, create a lattice top, or use a crumble topping if preferred. Place the top crust over the filling. Crimp the edges to seal.
- Brush the top crust with the beaten egg wash and sprinkle with coarse sugar.
- Bake: Preheat your oven to 400°F (200°C). Place the pie on a baking sheet to catch drips. Bake for 20 minutes at 400°F.
- Reduce the oven temperature to 375°F (190°C) and continue baking for another 40 to 50 minutes, or until the crust is golden brown and the filling is bubbling thickly. If the edges brown too quickly, cover them with foil.
- Cool: Let the pie cool completely on a wire rack for at least 4 hours before slicing. This allows the fruit pie filling to set fully, preventing runny slices.
Notes
- For a crumble topping instead of a double crust, combine 1 cup flour, 1/2 cup brown sugar, 1/2 cup rolled oats, and 1/2 cup cold butter until crumbly, then sprinkle over the filling.
- If you use frozen berries, do not thaw them first; use them straight from the freezer. You may need to add 5-10 minutes to the total bake time.
- To achieve a truly flaky, buttery crust, keep all your ingredients, especially the butter and water, very cold.
Nutrition
- Serving Size: 1 slice
- Calories: 410
- Sugar: 35g
- Sodium: 250mg
- Fat: 22g
- Saturated Fat: 14g
- Unsaturated Fat: 8g
- Trans Fat: 0.5g
- Carbohydrates: 52g
- Fiber: 3g
- Protein: 4g
- Cholesterol: 55mg