

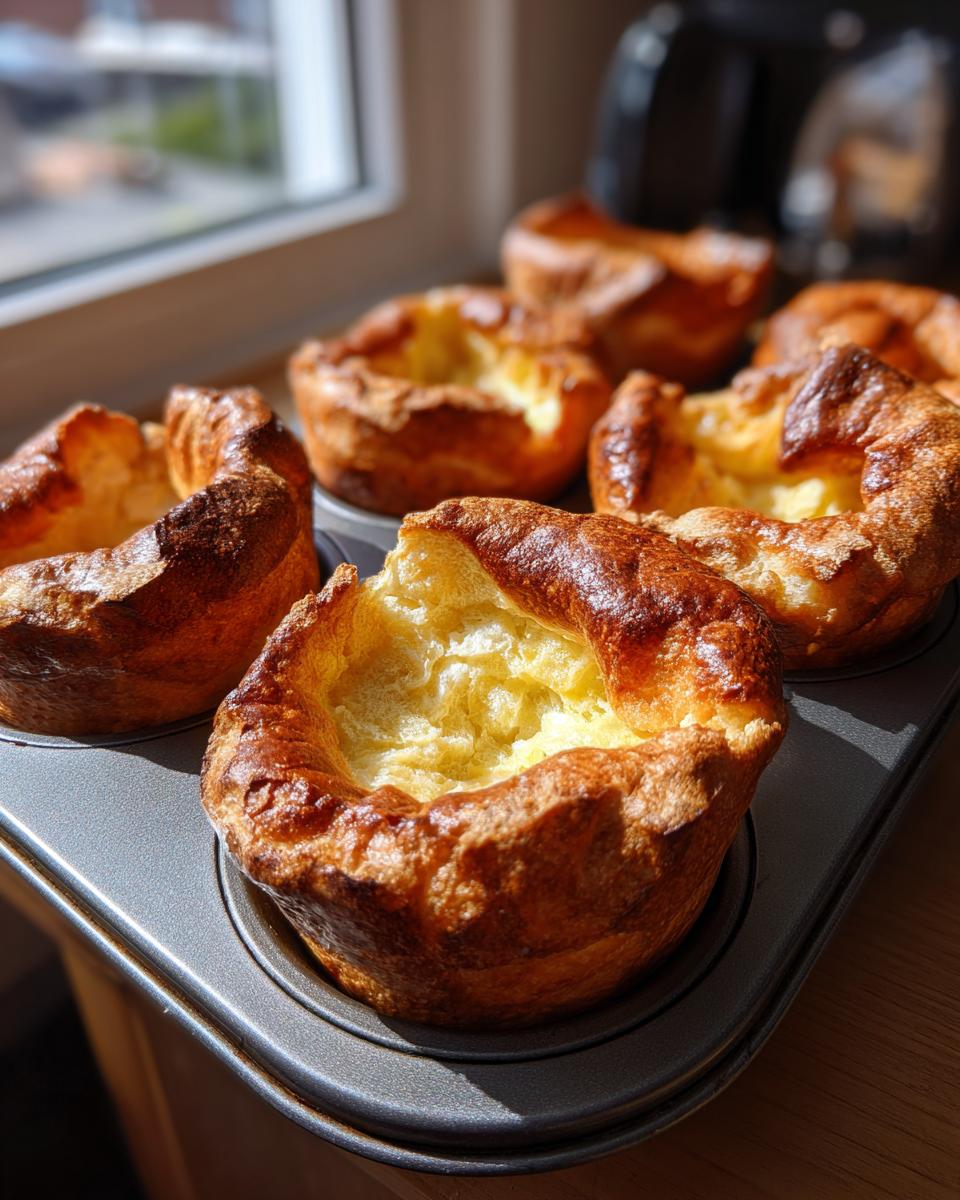
There is absolutely nothing like pulling a tray of perfectly risen Yorkshire puddings out of the oven. Seriously, they are the undeniable star of any proper roast dinner, aren’t they? Forget pale, flat disappointments; I’m here to share the method that guarantees you these tall, golden beauties—crispy shells giving way to that light, fluffy interior you dream about. This foolproof Yorkshire pudding recipe is built right here at Bring Dish on the idea that traditional British comfort food should be accessible to everyone. We’ve tested this formula countless times to ensure that all you need are simple pantry staples to achieve that amazing puff every single time you serve them alongside your roast beef.
- Why This Is the Best Yorkshire Pudding Recipe You Will Ever Use
- Gathering Ingredients for Your Yorkshire Pudding Batter
- Essential Equipment for Making Yorkshire Puddings
- How to Make Foolproof Yorkshire Puddings Step-by-Step
- Expert Yorkshire Pudding Tips and Tricks for Success
- Serving Suggestions for Your Traditional British Side Dish
- Storage and Reheating Instructions for Leftover Yorkshire Pudding
- Variations: Making Individual Yorkshire Puddings or Gluten Free Yorkshire Pudding
- Frequently Asked Questions About Perfect Yorkshire Puddings
- Sharing Your Homemade British Comfort Food Experience
- Sharing Your Homemade British Comfort Food Experience
Why This Is the Best Yorkshire Pudding Recipe You Will Ever Use
I get it—Yorkshire puddings can feel like a gamble. One minute you’re aiming for a stately tower, and the next you’ve got flat, greasy discs staring back at you. That stops today! This recipe has been honed to be the most reliable Yorkshire pudding method I know. Trust me, once you nail the technique, you’ll never look back. We aim for that perfect combination that makes every perfect Yorkshire Puddings moments worthwhile.
- They are genuinely crispy on the outside, which is non-negotiable for soaking up gravy.
- The inside is beautifully light, airy, and hollow—exactly how they should be.
- We stick to a simple, classic ratio that just *works* every single time we make them for a Sunday Roast.
Achieving Maximum Rise: The Secret to Fluffy Yorkshire Puddings
If you want those spectacular, puffy Yorkshire puddings, you only need to worry about two things, and neither of them is in the whisking! First, the fat has to be nearly smoking hot before the batter even touches the tin. Second, you absolutely must let the batter rest. Leaving the batter alone for at least 30 minutes—though longer is better—allows the flour to fully hydrate. That resting time is the true secret ingredient for Fluffy Yorkshire Puddings that hold their structure!
Gathering Ingredients for Your Yorkshire Pudding Batter
One of the loveliest things about making these British classics is that the ingredient list is so delightfully short! This recipe really honors our philosophy here at Bring Dish: extraordinary meals don’t need complex shopping lists. You probably have everything you need in your pantry right now to make perfect Yorkshire pudding. It’s just flour, milk, eggs, salt, and the fat for heating.
Ingredient Clarity and Preparation
Precision matters when you are aiming for that big puff, so let’s make sure we use the right stuff:
You’ll need one cup of all-purpose flour, making sure it’s sifted is a good idea. For the liquid, use one cup of whole milk—don’t swap to anything too low-fat here, as the structure needs the richness! We use three large eggs. Don’t forget half a teaspoon of salt for flavor. And finally, for the hot fat, grab about a quarter cup of beef dripping or a good vegetable oil. That fat choice will make a huge difference!
Essential Equipment for Making Yorkshire Puddings
Before we even think about mixing, let’s talk about what you need to pull this off successfully. You don’t need fancy gadgets, but you do need the right vessels, especially when dealing with screaming hot fat! Think safety first, texture second. A good, sturdy whisk is more important than an electric mixer for the batter—I like the control I get manually.
The pan choice is huge, though. For individual Yorkshire puddings, you’ll want a 12-hole muffin tin, but make sure the cups aren’t super shallow. If you’re making one big one for slicing up with your roast beef, a deep roasting tin works great.
Here’s my quick rundown of what you absolutely need on your counter:
- A large mixing bowl for making the batter; make sure it can handle some vigorous whisking!
- A fine mesh sieve to sift your flour—this tiny step prevents lumps that can weigh down your pudding.
- A reliable whisk or a balloon whisk to get that smooth consistency.
- Your chosen baking tin (a standard 12-cup muffin tin is perfect for everyday family meals).
- Tongs or oven mitts that offer great heat protection. Handling that hot, smoking fat requires serious confidence!
How to Make Foolproof Yorkshire Puddings Step-by-Step
Okay, here’s where the magic—and a touch of drama—happens! Making that Easy Yorkshire Pudding Batter is step one, but the real success is all in the timing and the heat we apply. Honestly, follow these procedures exactly, especially regarding the oven temperature, and you’ll look like a seasoned British baker! We go from mixing bowl to golden puff in just a few major stages. Remember, patience during the setup pays off huge when they pop up in the oven!
Preparing the Batter and Resting Time
First things first, get your batter ready. Remember we sifted that flour? Now, make a little well in the middle. Whisk in the eggs first, just until they start combining, and then slowly, slowly stream in the milk while you whisk continuously. You want a thin, smooth liquid—almost like thin gravy—not thick pancake batter. A few tiny lumps are fine; don’t go crazy trying to beat them all out, or you’ll risk developing too much gluten. Once it’s mixed beautifully, cover it up. Here’s my biggest secret twist: I find resting the batter in the fridge overnight gives the best results for a truly airy texture. If you can’t wait, 30 minutes on the counter is the absolute minimum, but resting is worth it!
The Critical Step: Heating the Fat for Crispy Yorkshire Puddings
This is the make-or-break moment for achieving those high, Crispy Yorkshire Puddings! You need your oven blasting at 450°F (230°C). While that heats up, place your dripping or oil in your muffin tin cavities—about a teaspoon per spot—and put the tin *in* the oven while it preheats. We need that fat to reach its smoking point. When you finally pour the batter in—and you must work fast here so the heat doesn’t escape—that extreme temperature difference between the cold batter and the sizzling hot fat is what creates that explosive steam that pushes your puddings sky-high. It’s physics, baby, and it’s delicious!
Expert Yorkshire Pudding Tips and Tricks for Success
Even with the right recipe, sometimes physics just doesn’t cooperate, right? Don’t fret! After years of wrestling with my own Yorkshire pudding batches, I’ve figured out exactly where things go wrong. This isn’t just about following steps; it’s about understanding why those steps matter for that perfect rise. My grandmother always said that knowing the texture of the fat was more important than stirring the flour, and I’ve found that to be absolutely true when making these traditional British side dishes.
Here are the hard-won lessons that ensure your Yorkshire pudding comes out tall and golden every single time:
Heat is Everything: I can’t stress this enough—the fat needs to be screaming hot. If you pull the tin out and the oil just gently shimmers, it’s not ready. You want to see that hint of smoke. If the fat isn’t hot enough, the batter cools down too quickly when it hits the tin, and you get sad, flat puddings. It’s the instant steam generation that makes the pudding climb the walls of the tin.
Don’t Peek! Seriously, Don’t Touch It: This is where most people lose the battle. Once that batter is in the smoking hot fat and back in the oven, your job is over. Resist the urge to open the door, even for a quick peek, for at least 20 minutes. That rush of cooler air is like hitting the ‘deflate’ button on your rising Yorkshire pudding. Let them bake in peace until they are deeply golden brown!
Batter Consistency Check: Remember how I said the batter should be thin, like cream? If you look at the recipe card here, you’ll see we use a slightly higher ratio of liquid to flour than some American pancake recipes. If your batter seems too thick, thin it out with an extra tablespoon of milk. A thin batter creates the lightness necessary for a truly airy interior, which is perfect for soaking up all that lovely gravy, much like some of the best Popovers.
The Oven Shelf Matters: Place your tin on the lower third rack of your oven. This puts the puddings much closer to the direct heat source, which helps them rise upwards before they start setting sideways. It gives them the best launch pad for getting those massive puffs!
Serving Suggestions for Your Traditional British Side Dish
There is simply no point in making these magnificent, towering little vessels if you don’t have the proper accompaniment waiting! A perfect Yorkshire pudding demands the right partner, and thankfully, this traditional British side dish anchors one of the best meals known to man: the Sunday Roast. Seriously, if you aren’t serving these alongside roast beef, you’re missing out on half the experience.
My family insists that gravy is the main event filler. You need a rich, deeply flavorful gravy—preferably one made from the pan drippings of whatever beautiful meat you roasted. Don’t skimp on the quality here; you want a gravy thick enough to sit beautifully in the hollow of your airy pudding.
But it’s not just beef! These are fantastic with roasted chicken or even lamb. Make sure you load up your plate with classic roasties, roasted root vegetables, and perhaps a side of creamy mashed potatoes. The Yorkshire puddings are there to catch every stray bit of richness that pools at the bottom of your plate. They are the perfect sponges for savory goodness, acting as the best Roast Dinner Accompaniments you could ask for.
Storage and Reheating Instructions for Leftover Yorkshire Pudding
Now, if you’re anything like my family, you’ll rarely have any leftovers because everyone devours them straight from the oven! But, if you manage to save a few of those glorious, crispy cups, you want to know how to bring them back to life because nobody wants a soggy remnant the next day.
The first rule of storing Yorkshire pudding? Do not put them in an airtight container immediately after they cool down. They’ll trap steam, and that steam will turn beautiful crispness into sad, damp mush—we always want to avoid mush!
How to Store Them Safely
If you have leftovers that are still nice and crispy, let them cool completely on a wire rack first. Once they are stone cold, move them quickly into a paper bag or a large, lightly covered container. I usually just pop them in a large Ziploc bag but leave the top slightly open. This lets any lingering moisture escape while keeping them protected from drying out completely. They are generally fine at room temperature for the same day, but to keep them longer, stick them in the fridge for up to three days.
The Best Way to Reheat for Maximum Crispness
Microwaves are the enemy of crispy food, especially puddings! If you put a leftover Yorkshire pudding in the microwave, it will heat up by sucking all the moisture back into itself, and you’ll end up with a rubbery disc. No, thank you!
For the best results, you need to reheat them in a hot oven. Preheat your oven back up to 400°F (200°C). Place the puddings directly onto a baking sheet—don’t overlap them!—and pop them in for about five to eight minutes. You’ll know they are ready when the outside is hot, golden again, and gives a little crackle when you squeeze it gently. That heat blast dries out any residual dampness and restores that wonderful crunchy exterior we worked so hard for!
Variations: Making Individual Yorkshire Puddings or Gluten Free Yorkshire Pudding
This recipe is so robust that you can actually play around with the format, which is fantastic! While my heart belongs to the big, glorious pudding that pools gravy beautifully, I know sometimes you need those perfectly portioned treats. Whether you’re aiming for individual Yorkshire puddings for a dinner party or trying to accommodate dietary needs, this batter handles it like a champ.
Scaling Down for Individual Yorkshire Puddings
If you want to make gorgeous, tall individual Yorkshire puddings instead of one large one, the swap is really easy. The main adjustment is the pan you use. Ditch the big roasting tray and use a standard 12-hole muffin tin—the kind you use for cupcakes! You might need to reduce the amount of fat you put in each cup slightly, maybe just half a teaspoon, because you’re not trying to fill a deep cavity, just a smaller one. The baking time is usually much faster, too! Keep a close eye on them; they go from perfect to overdone quickly when they’re small. I’d check them around 18 minutes, looking for that deep golden color that tells you they are done.
Adapting for Gluten Free Yorkshire Pudding
I always have friends who need to avoid gluten, and thankfully, making a Gluten Free Yorkshire Pudding version is totally possible without changing the fundamental physics of the rise. The absolute key here is to substitute the all-purpose flour with a good 1-to-1 gluten-free baking blend that already contains xanthan gum. If you use a blend that *doesn’t* have xanthan gum, you’ll want to add just a quarter teaspoon to your dry mix, as that gum helps mimic the structure that wheat gluten usually provides.
Now, listen close: everything else stays exactly the same! The milk, the eggs, the salt, and most importantly, you must still use smoking hot fat and rest that batter. The best recipe for maintaining that truly authentic rise using GF flour is over at this wonderful resource if you want exact measurements for a specialized blend, but trust me, your basic four-ingredient batter transforms easily!
Using Different Fats for Flavor
While nothing beats beef dripping for that deep, savory flavor that truly screams ‘Roast Dinner’—and it really helps the Yorkshire pudding achieve that crispness—I know not everyone keeps animal fats on hand. You can absolutely use a neutral oil like sunflower or canola oil; they have high smoke points which is crucial. Just know that the flavor won’t be quite as rich as the traditional version. If you want a slightly stronger flavor profile but still need to keep things vegetarian, I’ve occasionally used clarified butter (ghee), but it burns a tiny bit faster, so watch that temperature!
Frequently Asked Questions About Perfect Yorkshire Puddings
I know you’ve probably got questions bubbling up, just like our batter! That’s totally normal when you’re chasing that perfect rise. Since my goal here is to make sure you get the best Yorkshire pudding possible for your Sunday Roast, I’ve gathered up the most common worries people have when learning this classic technique. Don’t be shy; if you’re thinking it, someone else probably is too!
Can I use vegetable oil instead of beef dripping for my Yorkshire pudding?
Oh, absolutely you can! Beef dripping is traditional, and honestly, it gives you the absolute richest flavor—that savory depth that just makes the whole dish sing. But, if you don’t keep dripping on hand, vegetable oil works great because you need a fat that can handle serious heat. A high smoke point is the key here. So yes, grab canola, sunflower, or even vegetable oil. Just know that you might lose a little bit of that deep, traditional flavor boost. For the best rise, make sure whatever fat you use is smoking hot before the batter goes in!
What is the difference between Yorkshire Puddings and Popovers?
That’s a great question! If you’ve seen American recipes for Popovers, you’ll notice they look really similar to our glorious Yorkshire puddings, and fundamentally, they are cousins! The main difference usually comes down to the fat used, and sometimes the liquid ratio. Popovers are often made in taller, specialized cups and sometimes use slightly more egg or less liquid overall compared to our classic British recipe. But here’s the thing: the core technique for achieving that spectacular height—the super hot oven and the thin batter—is exactly the same for making those wonderful Puffy Popovers as it is for our traditional side dish.
Why did my Yorkshire pudding batter separate after resting?
If you rested your batter, especially overnight in the fridge like I suggested, you might notice it looks separated sometime later—maybe the heavy milk settled on the bottom. Honestly? That’s generally totally fine! It means the starch in the flour has had plenty of time to drink up the liquid, which is exactly what we want for that airy texture. Just grab your whisk and give the batter a quick, gentle churn until it comes back together. Do not over-whisk it trying to get it perfectly uniform again, though! Overmixing after resting develops gluten and will deflate your beautiful rise when baking.
If you’ve tried this recipe and are buzzing about your puffy results, please let me know! We love connecting with folks who are enjoying homemade food, so don’t hesitate to drop us a line over at our contact page!
Sharing Your Homemade British Comfort Food Experience
Now that you know the secrets to that perfect, tall, crispy Yorkshire pudding, I just want to see what you’ve made! Seriously, nothing brings me more joy than knowing this recipe is hitting dinner tables across the country. Once you pull those golden beauties out of the oven, snap a picture! Tag us, rate the recipe, or tell us how you ate them—drowned in gravy, stuffed with sausages, or just plain? We are so glad you joined our table and hope this recipe becomes a treasured part of your own family meals. Head over to check out our policy page if you have any site questions!
PrintThe Perfect Foolproof Yorkshire Pudding: Crispy Outside, Fluffy Inside

Make light, airy, and perfectly crisp Yorkshire puddings from scratch. This simple recipe delivers tall, golden-brown puddings ideal for your Sunday roast or any hearty meal.
- Prep Time: 10 min
- Cook Time: 25 min
- Total Time: 35 min
- Yield: 12 small puddings 1x
- Category: Side Dish
- Method: Baking
- Cuisine: British
- Diet: Vegetarian
Ingredients
- 1 cup all-purpose flour
- 1 cup whole milk
- 3 large eggs
- 1/2 teaspoon salt
- 1/4 cup beef dripping or vegetable oil (for heating)
Instructions
- Place a 12-hole muffin tin or a deep roasting tin into the oven. Add about 1 teaspoon of beef dripping or oil into each cup. Heat the oven to 450°F (230°C).
- While the fat heats, prepare the batter. Sift the flour and salt into a large bowl. Make a well in the center.
- Crack the eggs into the well. Begin whisking the eggs, gradually incorporating the flour from the sides.
- Slowly pour in the milk while continuously whisking until you have a smooth, thin batter, similar in consistency to thin cream. Do not overmix; a few small lumps are acceptable.
- Let the batter rest at room temperature for at least 30 minutes, or chill for up to 24 hours for best results.
- Once the oven and fat are very hot, carefully remove the tin from the oven. The fat should be smoking slightly. Work quickly to avoid losing heat.
- Pour the batter evenly into the hot fat, filling each cup about one-third full.
- Immediately place the tin back into the hot oven. Do not open the oven door for at least 20 minutes.
- Bake for 20 to 25 minutes, or until the puddings are well-risen, golden brown, and crisp. Serve immediately with gravy and your roast dinner.
Notes
- The secret to a good rise is very hot fat. The fat must be smoking hot before you add the batter.
- Resting the batter is key. A longer rest allows the starch to fully hydrate, leading to a better texture.
- Do not open the oven door while the puddings are rising. The rush of cool air will cause them to collapse.
- For individual puddings, use a 12-hole muffin tin. For larger puddings (like those served with roast beef), use a deep roasting pan.
Nutrition
- Serving Size: 1 pudding
- Calories: 120
- Sugar: 1
- Sodium: 150
- Fat: 6
- Saturated Fat: 2
- Unsaturated Fat: 4
- Trans Fat: 0
- Carbohydrates: 13
- Fiber: 0
- Protein: 5
- Cholesterol: 75