
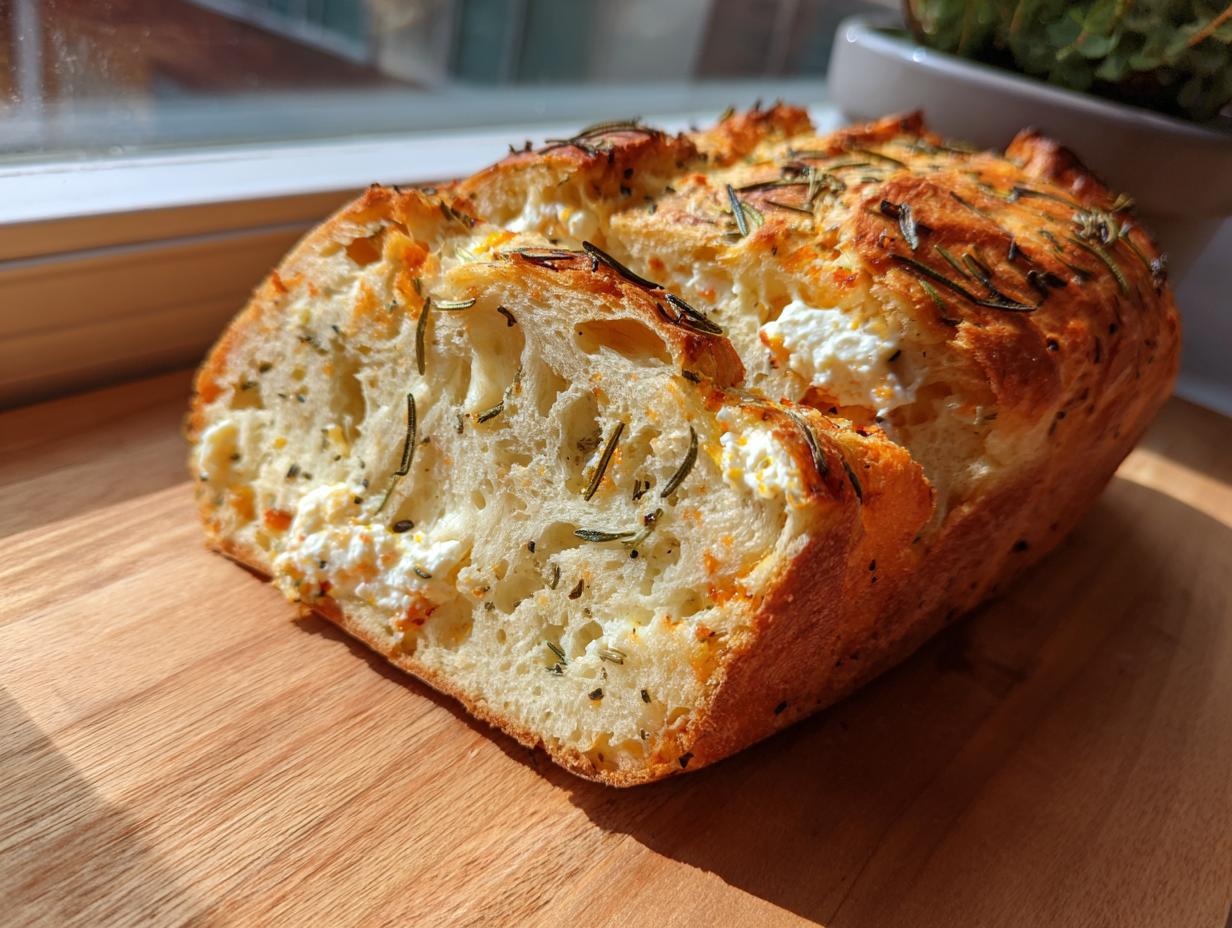
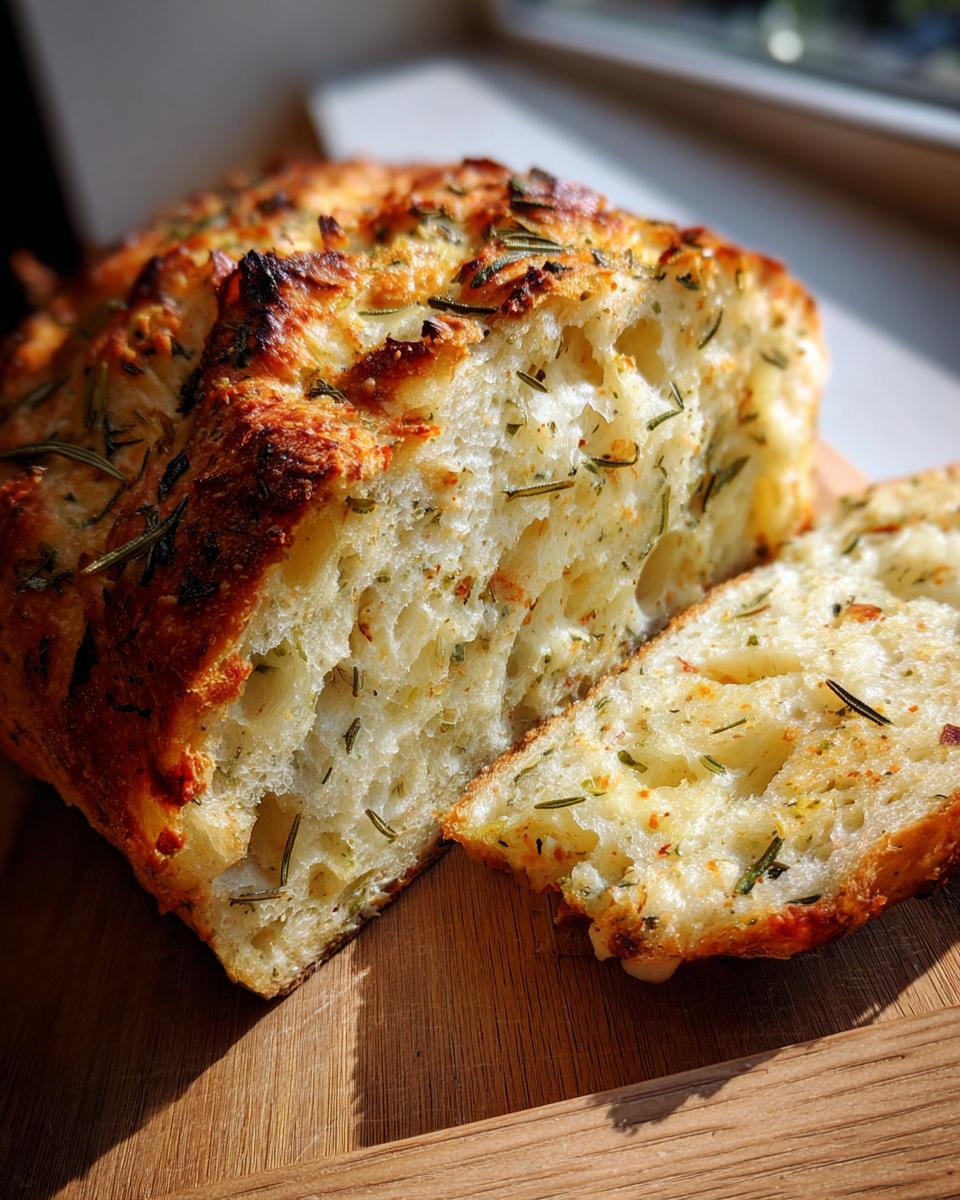
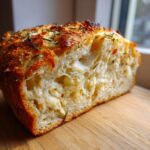
There is just nothing that beats the smell of homemade bread filling your kitchen, right? But when life gets hectic—and believe me, I know how that feels after years in a fast-paced corporate world—who has time for kneading and shaping? That’s why I love this recipe for Italian herb and cheese bread. It brings all those rich, savory, comforting Italian flavors into a perfect loaf without requiring complicated oven steps. We’re using the trusty bread machine to handle all the heavy lifting, making this one of the easiest and most flavorful easy bread machine recipes you’ll ever try. It turns out sturdy enough for a great sandwich loaf but tender enough for dinner.
- Why This Italian Herb and Cheese Bread Recipe Works for You
- Ingredients for the Ultimate Italian Herb and Cheese Bread
- Step-by-Step Instructions for Bread Machine Herb Bread
- Tips for Perfect Rosemary Oregano Bread Every Time
- Make-Ahead and Storage for Your Italian Herb and Cheese Bread
- Serving Suggestions for Garlic Herb Bread
- Frequently Asked Questions About Easy Bread Machine Recipes
- Estimated Nutritional Data for This Sandwich Loaf
- Share Your Homemade Italian Cheese Bread Experience
Why This Italian Herb and Cheese Bread Recipe Works for You
When I left my old marketing job, it was because I craved simplicity and real connection in my kitchen. This recipe is the perfect example of marrying those two needs! You get incredible flavor—that blast of rosemary, oregano, and salty Parmesan—with almost zero hands-on time. It’s truly fantastic for what I call “real life” baking.
- It creates a beautifully structured sandwich loaf that holds up perfectly to hearty fillings.
- The blend of savory herbs and robust cheese means no extra dishes are needed when you serve it as a cheesy dinner bread.
- It’s incredibly forgiving—perfect for those of us who just need one less thing to worry about at dinner time.
Perfect Results with Your Beginner Bread Machine
If you just pulled that bread maker out of the closet, don’t panic! This is seriously one of the best easy bread machine recipes for newcomers. You aren’t fiddling with complex settings at all. Honestly, the hardest part is remembering to open the lid when it tells you to add the cheese! We stick strictly to the Basic or White Bread cycle, which is designed to handle nearly any simple yeast dough you throw at it. You’ve got this!
Ingredients for the Ultimate Italian Herb and Cheese Bread
When I started Bring Dish, I wanted recipes that worked with what you probably already have in your pantry, but I never compromise on the flavor boosters! Having all the right measurements is how we ensure this Italian cheese bread comes out perfectly structured for slicing. You’ll need to measure carefully, especially with the liquids and the yeast. Getting the water temperature right is key for happy yeast; aim for that warm, but not hot, 105–115°F range.
Here’s what you’ll gather together for one incredible loaf:
- 1 1/4 cups water, warm (105-115°F)
- 2 tablespoons olive oil
- 3 cups bread flour (this is important, trust me!)
- 1 1/2 teaspoons salt
- 2 tablespoons granulated sugar
- 1 tablespoon dried Italian seasoning blend
- 1 teaspoon garlic powder
- 1/2 cup grated Parmesan cheese, plus extra for topping
- 1 teaspoon dried rosemary
- 1 teaspoon dried oregano
- 2 teaspoons active dry yeast
- 1/2 cup shredded mozzarella cheese
Ingredient Notes and Substitutions for Parmesan Herb Bread
Bread flour is non-negotiable here if you want that wonderful texture for slicing; its higher protein content gives our Parmesan herb bread the strength to hold up the cheese and herbs without crumbling. If you don’t have Italian seasoning, just mix equal parts dried basil, marjoram, and a pinch of thyme for a similar effect. I call this the best of my easy bread machine recipes because it relies on dried herbs, which are perfect for the machine’s mixing environment.
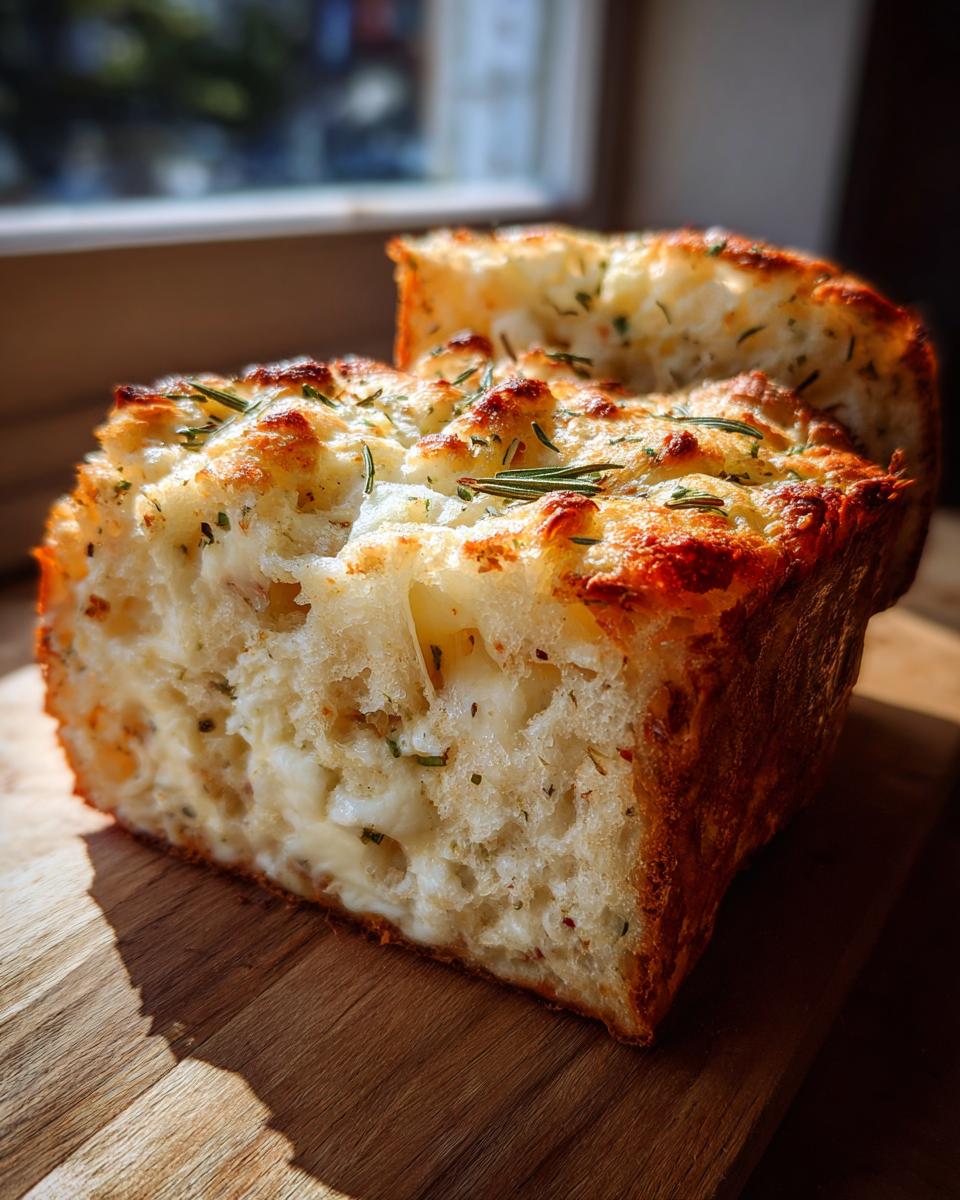
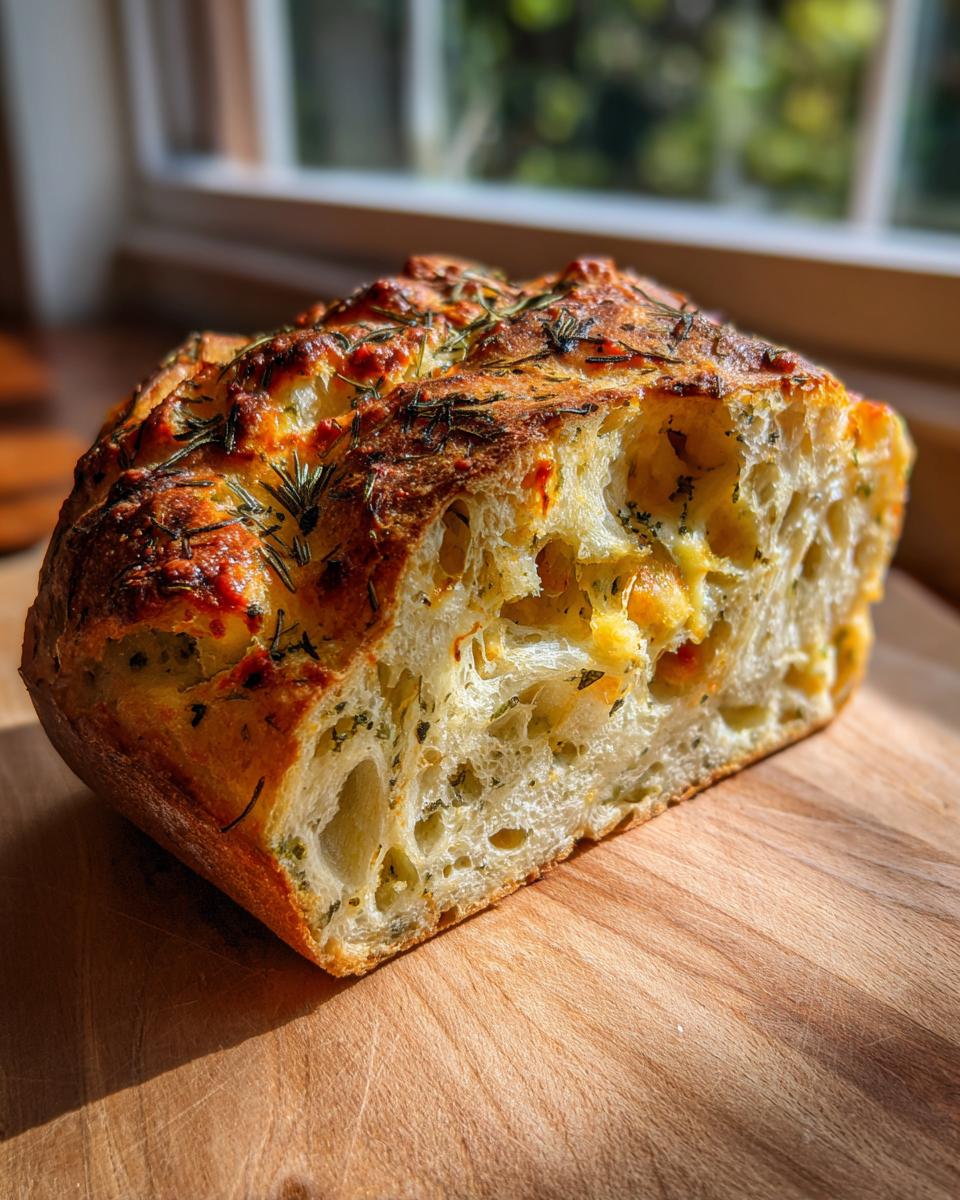
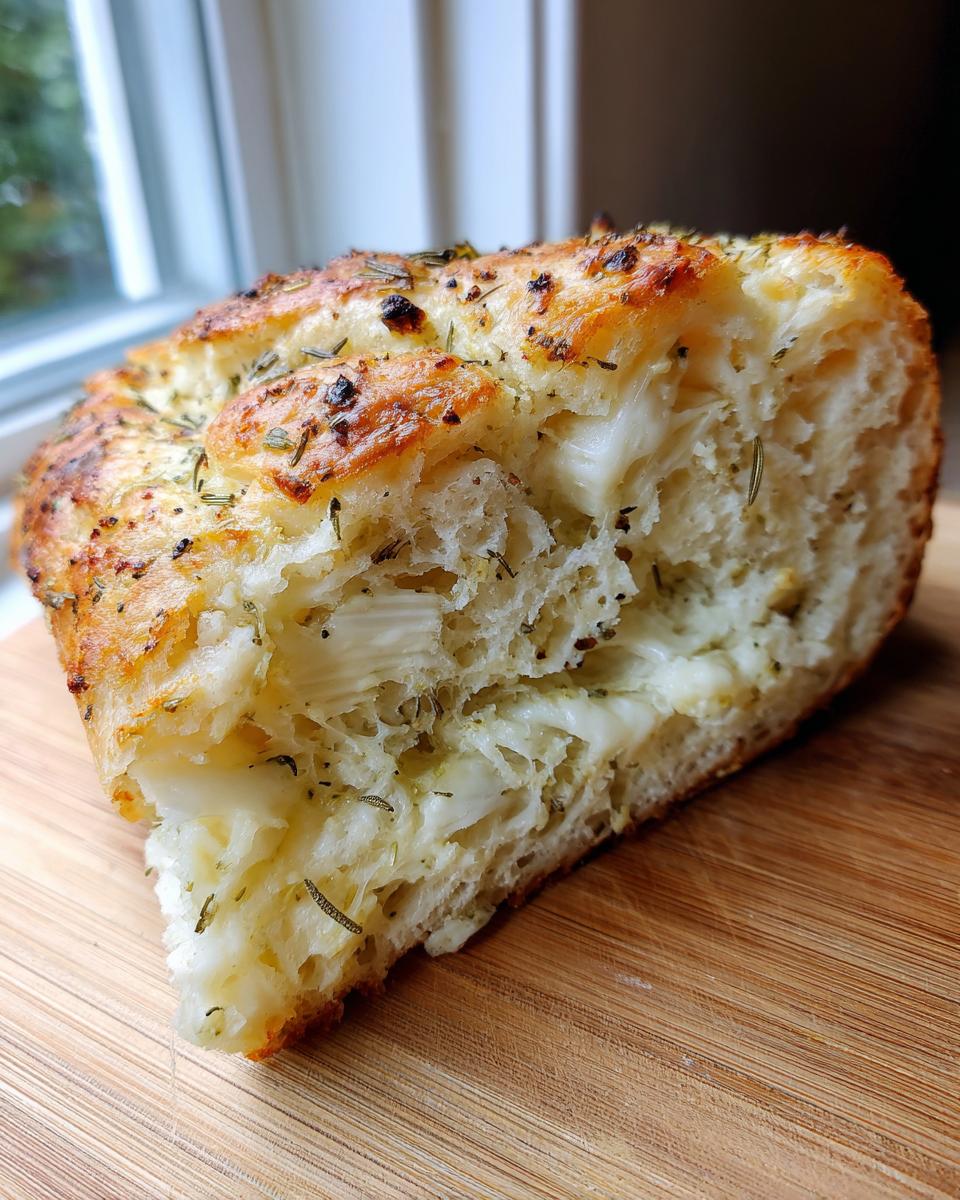
Never skip the mozzarella if you want that gooey pocket of goodness inside! It melts beautifully during the rise and bake cycle, but remember we are adding it later so it doesn’t get overworked during the initial kneading phase.
Step-by-Step Instructions for Bread Machine Herb Bread
Now for the fun part! This is where the machine earns its keep. My grandmother always used to say that preparation is half the battle, and with the bread machine, that preparation means layering your ingredients just right. We want to protect the yeast from getting shocked by the salt or submerged too early in the oil. For this amazing Italian herb and cheese bread, always start with your liquids first. Get that warm water and olive oil settled in the pan. This focus on practicality, which is what I built Bring Dish around after leaving the corporate world, means we follow the liquid-first rule found in many great baking traditions.
Next, dump in all your dry ingredients—the bread flour, salt, sugar, and all those fantastic herbs like rosemary and oregano. Once everything is in, make a little shallow indentation in the flour mound, put your yeast in that little well, and try to make sure it doesn’t touch the sides of the pan or the liquid just yet. Once the pan is secure in the machine, we let it do the initial mixing. This whole layering process is critical for a successful bread machine herb bread.
Setting Up Your Machine for Italian Cheese Bread
Go ahead and select the Basic or White Bread cycle. For the crust, I usually lean toward Medium, but if you like a slightly softer crust, Light is fine. The most critical moment comes after the machine starts mixing; listen for that beep that signals the end of the pre-mix and the start of the kneading phase. Open the lid quickly! This is when you toss in the Parmesan and the mozzarella. If your machine has a dispenser chute, use it now; otherwise, sprinkle them in gently over the dough before closing up shop.
Cooling the Cheesy Dinner Bread Properly
Once that cycle finishes, you need to act fast! Don’t let that cheesy dinner bread sit in the hot pan—it’ll steam itself soggy. Carefully lift the entire pan out of the machine, holding it by the handle, and immediately turn the loaf out onto a plain wire cooling rack. It smells incredible right now, I know, but you have to resist temptation! Resist slicing until it is fully cooled; this is the final secret to a perfect, non-gummy sandwich loaf.
Tips for Perfect Rosemary Oregano Bread Every Time
Even though the bread machine does most of the work, those little details can turn a good loaf into a truly great rosemary oregano bread. First, let’s talk water temperature again. It needs to be warm enough to wake up that yeast, but if it’s too hot, you’ll kill it dead! 110°F feels just right by the time you measure it, but using a thermometer ensures you aren’t stressing your yeast out before it even gets mixed with that flour.
When you add your yeast into that little flour divot, make sure it stays dry until the machine starts sensing the ingredients and gently begins stirring. Salt and yeast are natural enemies in high concentrations, so keeping them briefly separated works wonders for a strong rise. The best part, though? Right when the loaf comes out, if you want a slightly richer crust, brush the top immediately with just a teaspoon of melted butter. It gives this savory italian herb and cheese bread a beautiful sheen and seals in the moisture!
Make-Ahead and Storage for Your Italian Herb and Cheese Bread
Since this is such a handy sandwich loaf, I always look for ways to make life easier later in the week. The good news is this bread stores beautifully! Once the loaf is completely cooled—and that’s the most important step—wrap it tightly in plastic wrap first, and then tuck it into an airtight container or a heavy-duty zip-top bag. At room temperature, it stays fantastic for about three days. It’s still great toasted after that, though!
If you want to bake it completely later, you can totally use the Dough cycle. I use this trick for my garlic herb bread all the time! After the Dough cycle finishes kneading and proofing the dough, pull it out. You can shape it into a standard loaf, place it in a greased 9×5 inch loaf pan, let it rise one more time in a warm spot for about 45 minutes, and then bake it in your conventional oven at 375°F for about 30 minutes. That way, you get to enjoy that amazing fresh-baked aroma on *your* schedule!
Serving Suggestions for Garlic Herb Bread
While this makes the most marvelous sandwich loaf—seriously, try it with roast chicken—it’s too delicious to keep just for lunch! This garlic herb bread is absolutely mandatory when we have a pot of tomato sauce simmering on the stove. Don’t be shy; use thick slices to sop up every last bit of sauce. It’s also incredible served warm with a drizzle of good olive oil alongside an Italian wedding soup. My personal favorite way to serve this parmesan herb bread is simply toasted and brushed with a little extra melted butter right before serving it alongside lasagna. It eats just like that bakery bread you pay extra for!
Frequently Asked Questions About Easy Bread Machine Recipes
I get so many questions about this loaf since everyone loves how easy these easy bread machine recipes are! It’s wonderful that so many of you are using your machines to bring great food to the table. Here are a few things people often ask me when they are baking this specific bread machine herb bread for the first time.
Can I use whole wheat flour in this Italian herb and cheese bread?
That’s a great question regarding substitution! You certainly *can* replace some of the bread flour with whole wheat, but you can’t do a direct one-for-one swap or your structure will suffer. Whole wheat absorbs liquid much differently, and it doesn’t have the same gluten strength needed for this tall sandwich loaf. I’d suggest starting by swapping out no more than half a cup of the bread flour for whole wheat. If you use too much, you might end up with a dense brick instead of our lovely italian herb and cheese bread!
Why did my bread machine herb bread sink in the middle?
Oh, that sinking feeling! It usually comes down to two things when making any bread machine herb bread. First, check your yeast! Old yeast won’t generate the lift it needs, especially when weighing down dough with cheese. Measure your liquids precisely; if you accidentally added too much water or oil, the dough becomes too heavy for the gluten structure to support during the final rise. It’s a common error, so just double-check those measurements next time!
If you have other questions about getting the best results from this recipe, please feel free to reach out to me at our contact page anytime!
Estimated Nutritional Data for This Sandwich Loaf
I always say that focusing too much on numbers can take the joy out of cooking, but sometimes we just need a baseline, right? Especially if you are planning this for weekly lunches. Here are the estimated nutrition facts for one serving slice of our wonderful Italian herb and cheese bread. I always remind folks that since we are dealing with yeast, oil, and cheese additions, these are solid estimates based on standard ingredient sizes, not guarantees!
- Serving Size: 1 slice
- Calories: 180
- Protein: 7g
- Fat: 5g
- Carbohydrates: 28g
If you are keeping track of what you eat, you can find our full commitment to data security and privacy on our Privacy Policy page. Enjoy this savory loaf!
Share Your Homemade Italian Cheese Bread Experience
I truly hope this Italian cheese bread simplifies a meal for you this week! When you make this recipe, please come back and leave me a star rating—I love hearing what you think. If you snap a picture of your gorgeous new cheesy dinner bread, share it with us on social media! We read every comment, and seeing your kitchen triumphs makes my day. You can review the full Terms of Use anytime. Happy baking!
PrintEasy Bread Machine Italian Herb and Cheese Loaf
Make a flavorful Italian herb and cheese bread using your bread machine. This recipe yields a perfect sandwich loaf with rosemary, oregano, and Parmesan cheese.
- Prep Time: 10 min
- Cook Time: 3 hr 30 min (machine cycle)
- Total Time: 3 hr 40 min
- Yield: 1 loaf 1x
- Category: Baking
- Method: Bread Machine
- Cuisine: Italian
- Diet: Vegetarian
Ingredients
- 1 1/4 cups water, warm (105-115°F)
- 2 tablespoons olive oil
- 3 cups bread flour
- 1 1/2 teaspoons salt
- 2 tablespoons granulated sugar
- 1 tablespoon dried Italian seasoning blend
- 1 teaspoon garlic powder
- 1/2 cup grated Parmesan cheese, plus extra for topping
- 1 teaspoon dried rosemary
- 1 teaspoon dried oregano
- 2 teaspoons active dry yeast
- 1/2 cup shredded mozzarella cheese
Instructions
- Add the warm water and olive oil to your bread machine pan in the order recommended by your manufacturer.
- Add the bread flour, salt, sugar, Italian seasoning, garlic powder, rosemary, and oregano on top of the liquid. Make a small indentation in the flour and add the yeast there. Do not let the yeast touch the salt or liquid yet.
- Place the pan into your bread machine and secure it.
- Select the Basic or White Bread cycle and choose the Light or Medium crust setting. Start the machine.
- When the machine signals the beginning of the kneading cycle (usually after the first 5-10 minutes), open the lid.
- Add the 1/2 cup of grated Parmesan cheese and the shredded mozzarella cheese through the dispenser chute, if you have one, or carefully sprinkle them over the dough.
- Close the lid and allow the machine to complete the cycle.
- When the cycle finishes, carefully remove the bread pan from the machine.
- Remove the loaf from the pan immediately and place it on a wire rack to cool completely before slicing.
Notes
- For a better crust, brush the top of the loaf with a little melted butter immediately after removing it from the pan.
- If you are making this as a dinner bread, consider using the Dough cycle and then baking it in a standard oven at 375°F for 30 minutes.
- This cheesy dinner bread slices well for sandwiches once fully cooled.
Nutrition
- Serving Size: 1 slice
- Calories: 180
- Sugar: 2
- Sodium: 350
- Fat: 5
- Saturated Fat: 2
- Unsaturated Fat: 3
- Trans Fat: 0
- Carbohydrates: 28
- Fiber: 1
- Protein: 7
- Cholesterol: 10