
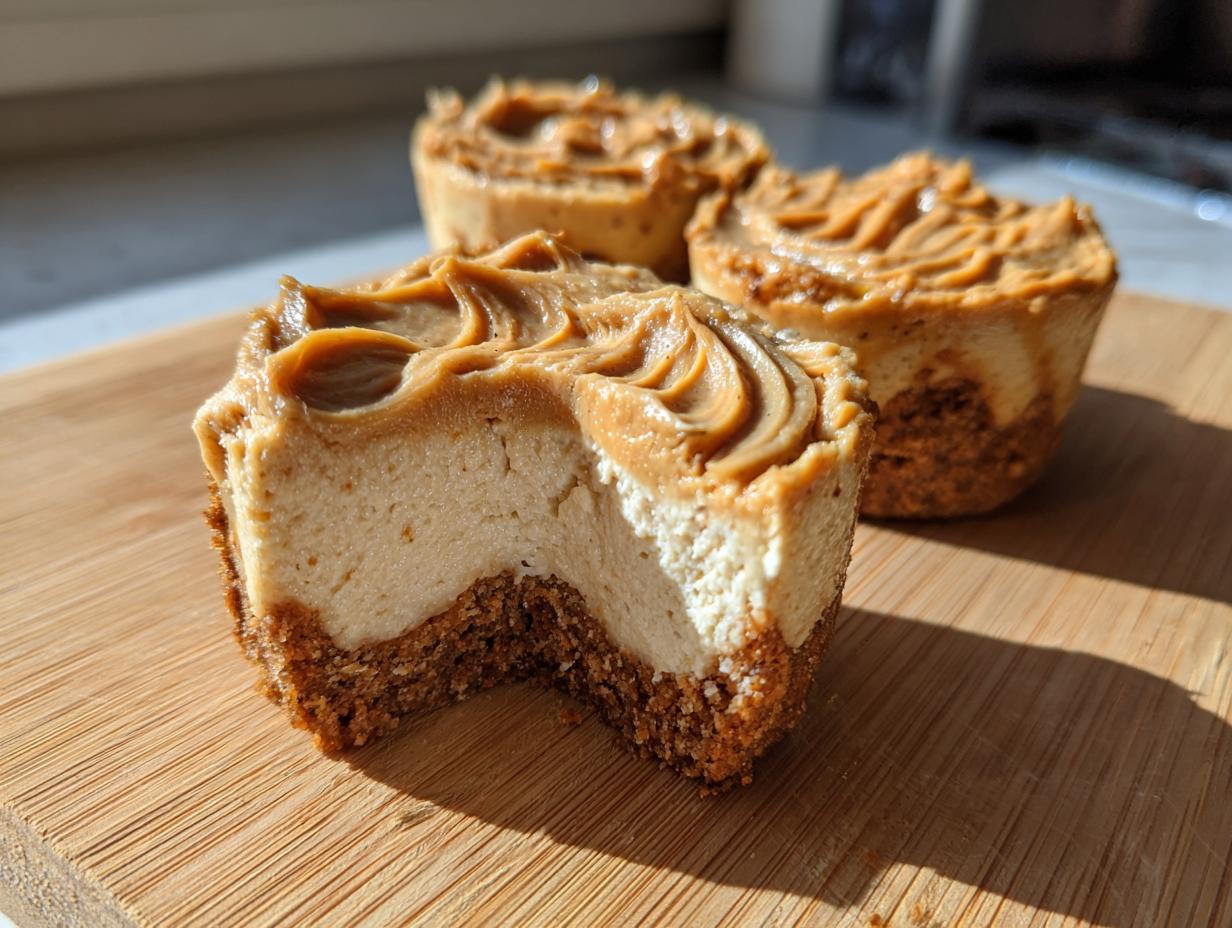
When life gets busy—and let’s be honest, it always seems to be busy—one of the greatest little comforts is having a decadent dessert ready to go without ever turning on the oven. That’s the philosophy I carry here at Bring Dish; we focus on honest, accessible food that connects people. That’s why I’m so thrilled to share this recipe for cookie butter cheesecake cups. They come together fast, they’re perfectly portioned for sharing (or keeping all to yourself, I won’t tell!), and that rich, spiced flavor from the cookie butter makes these no-bake treats absolutely unforgettable. If you love simple, impressive desserts, stick around!
- Why You Will Love These Easy No-Bake Cookie Butter Cheesecake Cups
- Gathering Ingredients for Your Cookie Butter Cheesecake Cups
- Step-by-Step Guide to Making No Bake Cookie Butter Cheesecake Cups
- Tips for Perfect Cookie Butter Cheesecake Cups Every Time
- Making Ahead and Storing Your Individual Cheesecake Portions
- Variations on the Classic Cookie Butter Cheesecake Cups
- Serving Suggestions for Your Cookie Butter Dessert Cups
- Frequently Asked Questions About Cookie Butter Cheesecake Cups
- Understanding the Nutrition in Your Cookie Butter Cheesecake Cups
- Share Your Creamy Cookie Butter Dessert Creations
Why You Will Love These Easy No-Bake Cookie Butter Cheesecake Cups
Listen, I developed this recipe because I needed something showstopping that wouldn’t melt my basement cooking the summer heat! These are truly the best little sweet treats for any scenario. They tick all the boxes busy home cooks like me look for. Trust me, once you try these, they’ll become your go-to when you need something quick!
- Zero Oven Time: Yep, these are totally no-bake! Pop them in the fridge, and that’s it. No worrying about oven temperatures or timing. We all need more simple homemade sauces and toppings ready for when inspiration strikes, even if it’s just for topping these cups!
- Perfectly Portioned: Who needs a whole cake? These are ideal easy cheesecake cups, meaning serving is a breeze and clean-up is minimal.
- Incredible Flavor: That warm, spiced note from the cookie butter combined with smooth, tangy cheesecake? It’s pure magic! They always disappear first at any gathering.
- Party Powerhouse: They look gorgeous lined up, making them perfect party dessert cups guaranteed to get compliments.
Gathering Ingredients for Your Cookie Butter Cheesecake Cups
Okay, friend, let’s talk about what you need because the secret to these cookie butter cheesecake cups being so ridiculously easy is that the ingredient list is super straightforward. We are relying on that wonderful spiced cookie butter flavor doing most of the heavy lifting here, so quality matters!
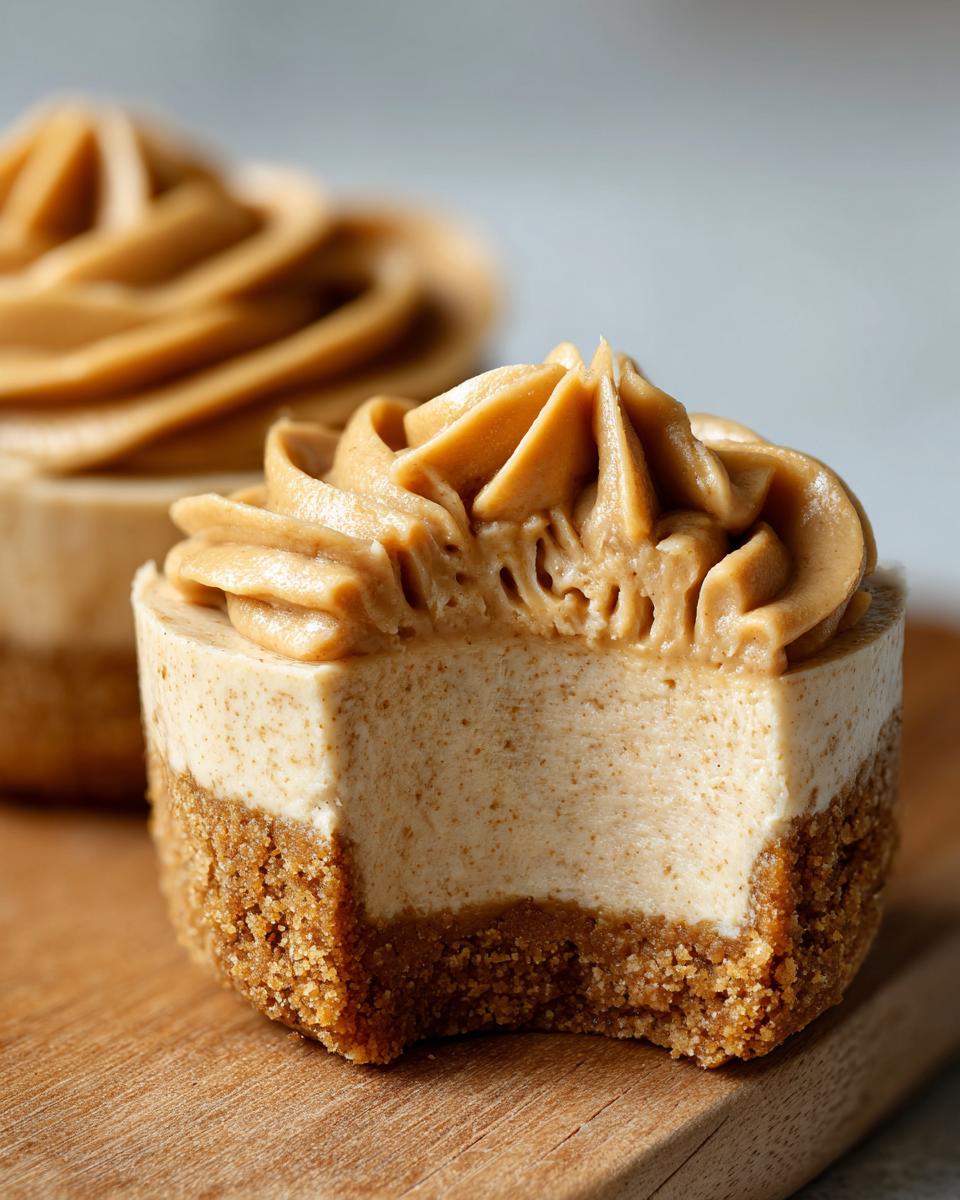
First and foremost, you need about 1 1/2 cups of finely crushed Biscoff cookies—or whatever speculoos brand you love most—to make our crust. Mix that with 6 tablespoons of unsalted butter that’s been melted down. Remember what my grandmother always said about using real butter? It’s true for crusts too; it just binds better!
For the cheesecake filling, make sure your 8 ounces of cream cheese is softened. I mean soft, like leave it on the counter for an hour soft. You’ll also need powdered sugar (1/2 cup) and 1 teaspoon of vanilla extract. Then, the star: 1/2 cup of that glorious cookie butter spread, plus extra for drizzling later. Finally, for the lightness we need, grab 1 cup of heavy whipping cream—and this has to be cold, cold, cold—with 1/4 cup of granulated sugar to whip up.
That’s it! Grab these simple things, and we can get straight to assembling these amazing butter cookies inspired treats!
Step-by-Step Guide to Making No Bake Cookie Butter Cheesecake Cups
This is where the magic happens, and honestly, it’s all about timing and gentle hands! Since we aren’t baking, texture control is everything to getting that wonderfully rich and creamy cheesecake texture everyone craves. Don’t rush the chilling steps, but the active work comes together so quickly. Follow me through these stages for perfect cookie butter cheesecake cups every single time.
Creating the Cookie Butter Crust and Chilling
First things first, we need that delicious base! Take your finely crushed Biscoff cookies and pour them into a bowl with your melted butter. Give it a good stir until it looks like wet sand—you want every crumb coated! This is the foundation, so press it down firmly and evenly into the bottom of your 12 lined muffin cups. I really press mine down with the back of a small glass to make sure it’s dense enough to hold up to the creamy filling. Pop those pans into the freezer for just 10 minutes. That quick chill helps lock the crust in place while we move on to the filling, which is much faster than baking! Thinking about other crumb crusts? You might enjoy the process for these easy sugar cookie bars too!
Mixing the Rich and Creamy Cheesecake Filling
Now, grab your stand mixer or your hand mixer. Remember how I stressed the cream cheese needed to be totally soft? This is why! Beat the softened cream cheese with the powdered sugar and vanilla extract until it is completely homogenous and smooth—no tiny lumps allowed! If you see any tiny mountains of cream cheese still there, keep beating. Once that’s perfect, slowly mix in your half cup of cookie butter. You’ll notice the color deepening and the mixture becoming incredibly fragrant. Keep mixing until it’s fully incorporated. These rich, decadent desserts start right here!
Folding in the Whipped Cream for Lightness
This next part is crucial for avoiding a dense, heavy filling. In a completely separate, clean bowl, whip your cold heavy cream and the granulated sugar until you reach stiff peaks. You want peaks that stand up straight when you lift the whisk—that means you have lovely air incorporated. Now, take about a third of that glorious whipped cream and fold it into your cookie butter base quickly just to lighten things up. Then, gently fold in the rest. I always use big, sweeping motions with a spatula here. Seriously, be gentle! Overmixing at this stage deflates the air we just worked so hard to create, and we want that signature creamy cookie butter dessert feel. Patience here pays off, kind of like when you’re working on a sticky, perfectly layered treat like my chocolate cinnamon rolls.
Assembling, Chilling, and Topping Your Cookie Butter Cheesecake Cups
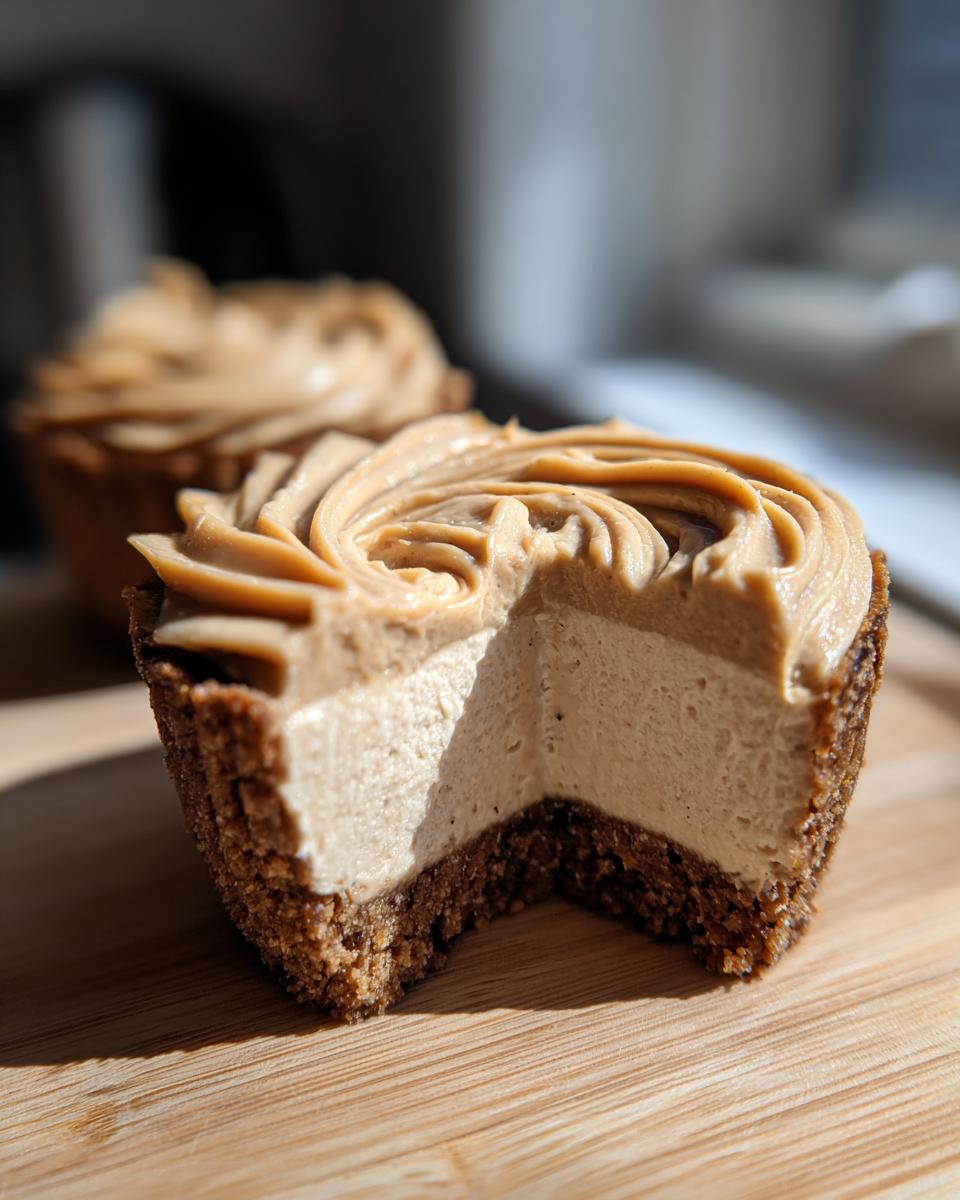
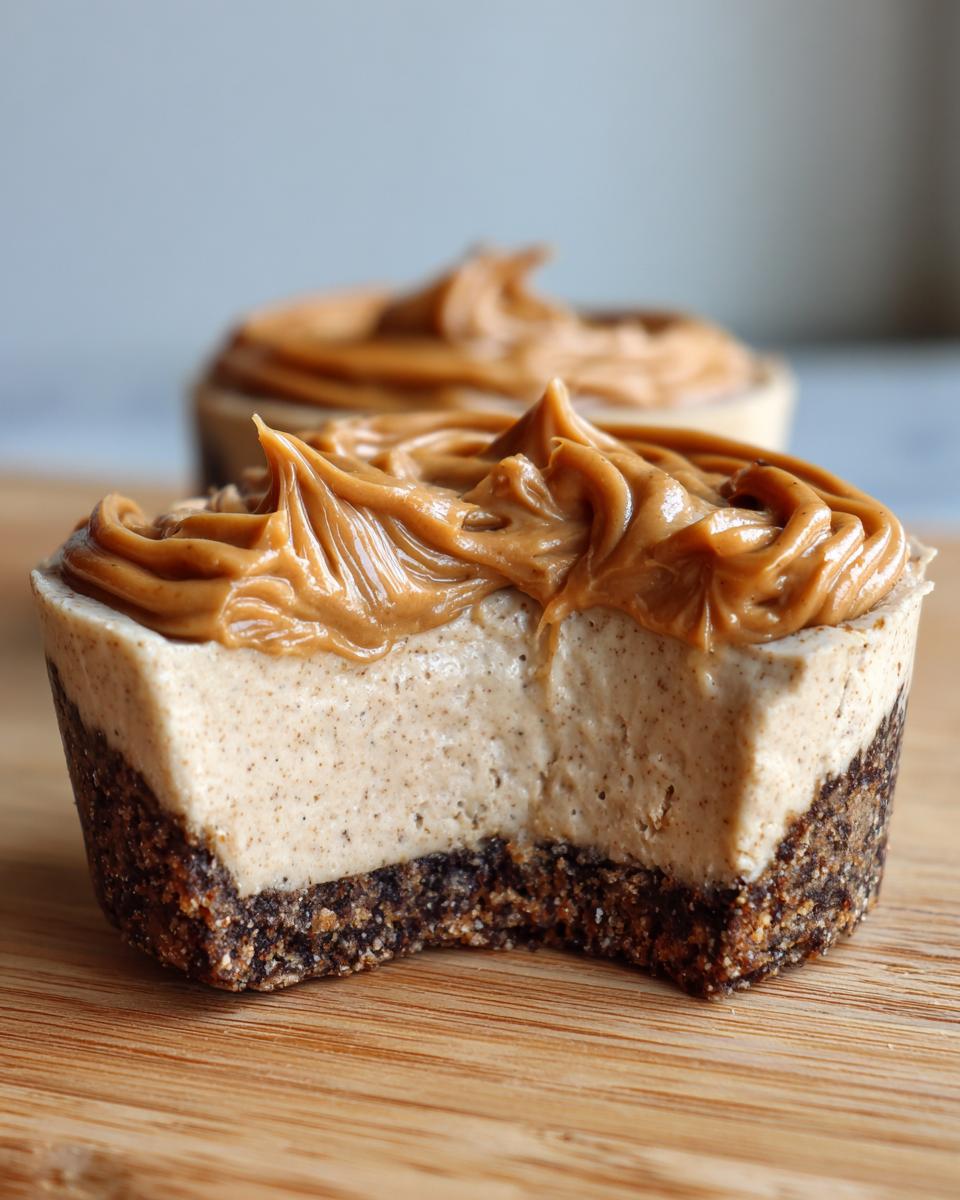
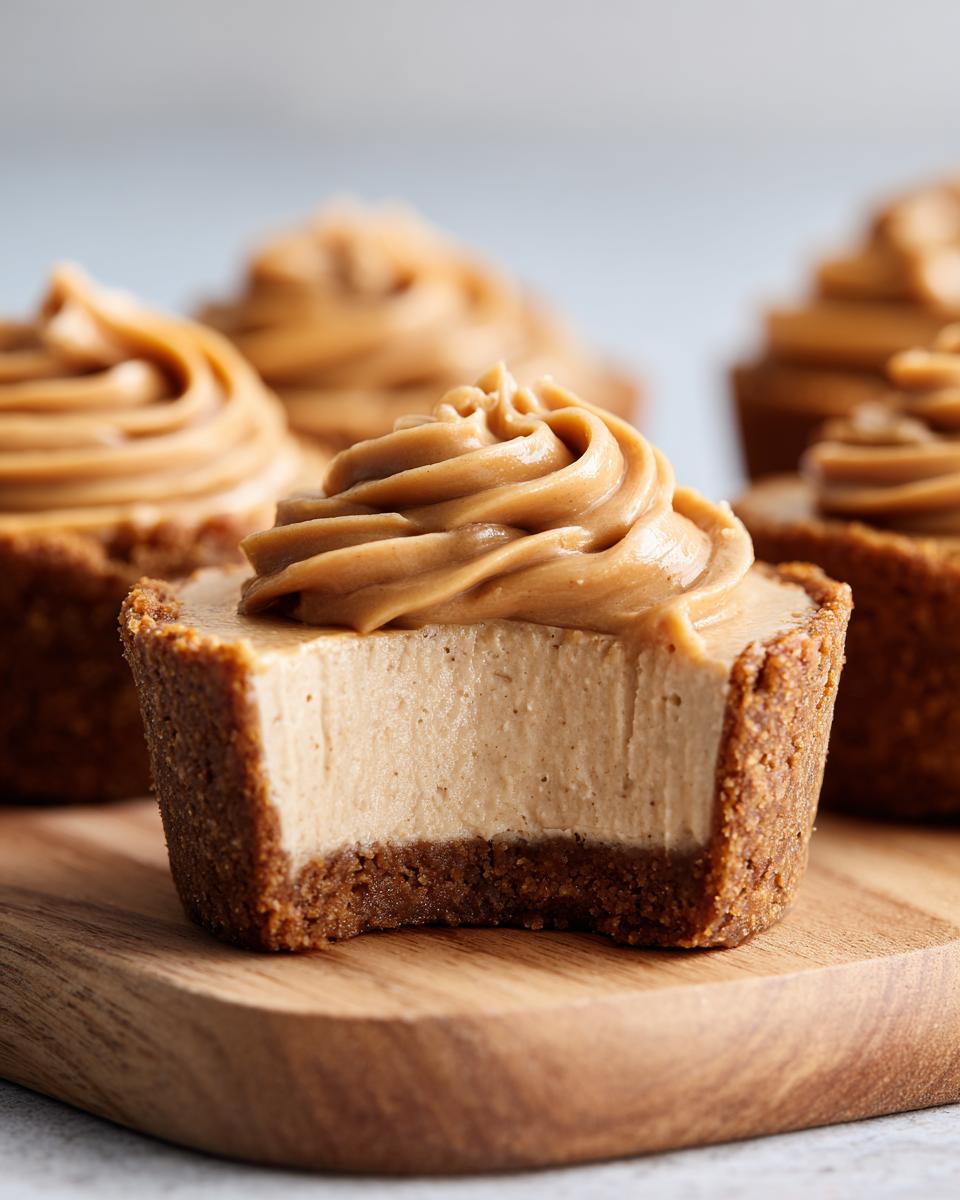
Time to assemble your beautiful cookie butter cheesecake cups! Carefully spoon or pipe that luscious filling over your chilled crusts. Try to keep them level—they look much nicer that way when serving them at a party! Once they are all filled, they need a good long chill time to truly firm up. I always recommend at least 4 hours in the refrigerator, but honestly, overnight is even better if you can wait. Before you serve them, take that extra cookie butter spread and warm it up for just 10 seconds in the microwave so it’s runny. Drizzle a little bit over the top of each cup for that final, irresistible touch. Everyone will be raving about these easy treats!
Tips for Perfect Cookie Butter Cheesecake Cups Every Time
Even with a no-bake recipe, a few little habits in the kitchen make a huge difference between good and absolutely fantastic! Since these cookie butter cheesecake cups rely on creamy texture so much, we have to treat our ingredients right. My biggest non-negotiable, which I learned the hard way making these for a huge holiday dessert spread, is the temperature of the cream cheese.
Your cream cheese must be truly room temperature. If it’s cold when you start, you’ll never get that smooth base we need. If you’re in a rush, try cutting it into cubes and microwaving it on 20% power for about 15-second intervals—just until soft, not melty!
Also, while I adore Biscoff, if you run out, you can certainly use graham crackers for the crust, but you’ll want to add a tiny pinch of cinnamon and a touch more sugar to mimic that spiced flavor. It won’t be *quite* the same, but it’s still delicious! If you love cheesecake cookies, you should also check out my recipe for raspberry cheesecake cookies for another great dessert idea!
Finally, remember the heavy cream has to be COLD when you whip it. That’s the only way it stiffens up enough to keep the filling light and airy during those crucial folding moments.
Making Ahead and Storing Your Individual Cheesecake Portions
One of the things I absolutely love about these cookie butter cheesecake cups is how brilliant they are for planning ahead. I’m a big believer in getting things done early, especially if you’re cooking for a crowd! Since these are no-bake, they act like wonderful make ahead desserts that just need fridge time.
You can safely store these filled cups, still in their muffin tin or under plastic wrap, in the refrigerator for up to 4 days. The crust stays nice and firm, and the filling actually gets even better as the cookie butter flavor really seeps into the whole dessert. They are perfect to make Thursday night for a weekend party!
Now, can you freeze them? Yes, you can, but there’s a trick, especially because of the whipped cream. If you decide to freeze them, make sure they are completely set—at least 6 hours in the fridge first. Freeze them uncovered on a tray until solid, then wrap each cup tightly in plastic wrap and then foil. This prevents freezer burn and any weird flavors from sneaking in.
When you want to eat them after freezing, just move them straight to the fridge the night before you plan to serve them. They thaw beautifully, remaining incredibly creamy. They are fantastic for making a large batch early when you know you have a busy week coming up. It’s always nice to know you have a spectacular dessert ready to go, just like this amazing caramel apple trifle!
Variations on the Classic Cookie Butter Cheesecake Cups
While the basic framework for these cookie butter cheesecake cups is perfect as is, sometimes I like to jazz things up just a little bit! Since cookie butter has that wonderful inherent spice profile, you can lean into those warm flavors. For the crust, try adding a tiny pinch of ground cloves or even a sprinkle of instant espresso powder when you mix the crumbs and butter. It deepens the cookie flavor beautifully.
If you want a bit of flair on top that isn’t just more cookie butter drizzle, try this: either sprinkle a tiny pinch of flaky sea salt right over the added cookie butter topping—the salt really makes the caramel notes pop—or shave some good quality dark chocolate over the top before chilling. My absolute favorite way to switch it up is adding a dash of cinnamon sugar, almost like making them taste like my cinnamon-sugar pecans! They are just so versatile.
Serving Suggestions for Your Cookie Butter Dessert Cups
These cookie butter dessert cups are undeniably rich. That’s a good thing, of course, because who doesn’t want an indulgent treat that feels like a hug in a little wrapper? But because the filling is so creamy and decadent, I like to pair them with something that offers a little contrast. You don’t want the richness to completely overwhelm your palate!
For a simpler, everyday pairing, they go perfectly alongside a strong, hot cup of coffee. The slight bitterness of the coffee cuts right through the sweetness of the cookie butter and the cream cheese base. If you serve these as a brunch finisher or lighter dessert, a simple black tea or Earl Grey is also a wonderful choice.
If you’re planning a larger spread and want to balance out the heavier chocolate or caramel elements that often accompany these treats, bring in some freshness. A small bowl of mixed fresh red berries—strawberries, raspberries—can provide a little tartness that cleanses the palate between bites. Remember, we want the speculoos dessert flavor to shine, and balance helps that happen!
They also pair beautifully with drinks that have a little fizz. I love making a big batch of my easy champagne punch when I bring these to gatherings. The bright, bubbly nature of the punch is a fantastic contrast to the creamy texture of the cold cheesecake cup. It always feels like a complete party when those two are sitting side-by-side on the table!
Frequently Asked Questions About Cookie Butter Cheesecake Cups
I know you might have a few questions swirling around, especially if you’ve never worked with cookie butter before or if you’re trying to make these easy cheesecake cups work around your specific equipment. That’s totally normal! Baking should feel fun, not stressful. Here are some quick answers to the most common things I hear about this recipe:
What exactly IS cookie butter, and can I substitute it?
Oh, that rich flavor! Cookie butter, often sold under names like Biscoff or Speculoos, is essentially butter made from ground-up spiced shortbread cookies mixed with oil and sugar until it becomes a creamy, spreadable paste—think peanut butter, but made of delicious, spiced cookies. It’s the star of this show!
Can you substitute it? You definitely can if you absolutely must, but it changes the game. If you can’t find a jar, you could try using a very generous amount of creamy peanut butter, but you’ll want to add an extra 1/2 teaspoon of cinnamon and maybe 2 tablespoons of powdered sugar to the peanut butter mix to compensate for the flavor. However, for that perfect Lotus cheesecake cups flavor, stick to the cookie butter if you can find it!
Do I have to use paper liners in the muffin tin?
I strongly recommend using them! Paper liners make peeling the paper away from the crumb crust so much easier once the cups are set. Since these are no bake cheesecake cups, they are very soft until they are fully chilled, and fighting to get them out of the bare tin can sometimes destroy the sides.
If you skip the liners, make sure you aggressively spray the entire inside of the muffin tin—bottom and sides—with a non-stick spray that contains flour. Even then, you’ll have to use a small offset spatula or butter knife to gently go around the edges before trying to lift them out. For a stress-free experience, stick to the liners!
Can I use pre-made whipped topping instead of whipping my own cream?
This is a great question for anyone looking for faster quick cheesecake treats. You certainly *can* substitute thawed, cool whip-style topping for the homemade whipped heavy cream. It will save you about 5-7 minutes of mixing time, which is nice!
However, I have to caution you: the homemade whipped cream is what gives you that truly light, airy texture in the filling. Store-bought topping tends to be much denser and sweeter. If you use the substitute, fold it in extra gently, and know that your individual cheesecake portions might set up a bit more solidly than mine did. No judgment, though—it will still taste fantastic!
How long do these need to chill before they are ready to eat?
Because we aren’t baking them, they need dedicated chilling time to set up properly. I tell everyone a minimum of 4 hours, but honestly, if you can make them the day before—which is perfect for make ahead desserts—they are always better the next day. When they are fully chilled and firm, they slice out of the paper liner so beautifully. If you’re testing early, don’t panic if the sides feel wiggle-y; just pop them back into the fridge!
For more great ideas on recipes that don’t need the oven, check out this helpful guide on making irresistible desserts!
Understanding the Nutrition in Your Cookie Butter Cheesecake Cups
Now, I know that for us home cooks, tracking every single calorie isn’t always the main goal—we are focused on flavor and bringing people together! But because I always want you to feel informed about the wonderful treats you’re making, I collected the estimated nutritional information for these cookie butter cheesecake cups. These numbers are super helpful if you’re planning a dessert spread or just curious about what’s in your indulgent treat.
Keep in mind, these are just estimates! The actual calorie and sugar content can shift depending on the brand of cookie butter you use or exactly how much extra drizzle you decide to add on top (and I usually add extra, so, you know).
- Serving Size: 1 cup
- Calories: around 350 (A nice, rich treat!)
- Sugar: Approximately 28g
- Fat: Roughly 22g (Hello, butter and cream cheese!)
- Protein: About 4g
- Carbohydrates: Around 33g
This data is based on standard recipes and assumes you are using the ingredients listed above. It’s a delicious dessert, and knowing the macros helps you serve it confidently. Just remember that the joy of sharing these individual cheesecake portions far outweighs any need to count every little thing!
Share Your Creamy Cookie Butter Dessert Creations
Well, that’s it! You’ve made a batch of truly spectacular, fuss-free cookie butter cheesecake cups, and I hope your kitchen smells wonderfully of spiced cookies right now. This is the part I love the absolute most—seeing how these recipes connect with you and become part of your own gatherings and traditions. That’s what Bring Dish is all about, right? Sharing the joy over simple, amazing food.
I really want to know how these turned out for you! Did they disappear instantly at your potluck? Did you get adventurous with a sea salt topping? Please jump down to the comments section below and leave a rating. Your feedback genuinely helps other home cooks decide to tackle this delicious recipe, and hearing about your successes makes my day!
If you made these rich and creamy cookie butter desserts and took a gorgeous photo—and I bet you did!—please share it on social media. Tag me so I can celebrate alongside you! Seeing your beautiful individual portions makes me feel like we are all gathered around the table together, even if we are miles apart. You can also check out what some other bakers made over at Melissa’s kitchen for more inspiration.
Thank you so much for joining me in my kitchen today. If you ever have questions about this recipe or anything else, don’t hesitate to reach out through the contact page. Happy baking (or, well, happy chilling)!
PrintEasy No-Bake Cookie Butter Cheesecake Cups
Make these simple, creamy cookie butter cheesecake cups without turning on your oven. They feature a spiced cookie crust and a rich, decadent filling, perfect for parties or a quick sweet treat.
- Prep Time: 20 min
- Cook Time: 0 min
- Total Time: 4 hr 20 min
- Yield: 12 cups 1x
- Category: Dessert
- Method: No-Bake
- Cuisine: American
- Diet: Vegetarian
Ingredients
- 1 1/2 cups finely crushed Biscoff cookies (or similar speculoos cookies)
- 6 tablespoons unsalted butter, melted
- 8 ounces cream cheese, softened
- 1/2 cup powdered sugar
- 1 teaspoon vanilla extract
- 1/2 cup cookie butter (like Biscoff spread), plus extra for topping
- 1 cup heavy whipping cream, cold
- 1/4 cup granulated sugar (for whipped cream)
Instructions
- Prepare the crust: In a medium bowl, mix the crushed cookies and melted butter until fully combined.
- Press the crust mixture evenly into the bottoms of 12 standard muffin cups lined with paper liners or placed in a muffin tin. Chill in the freezer for 10 minutes while you prepare the filling.
- Make the cheesecake filling: In a large bowl, beat the softened cream cheese, powdered sugar, and vanilla extract until smooth.
- Beat in the 1/2 cup of cookie butter until the mixture is fully incorporated and creamy. Set aside.
- In a separate, clean bowl, whip the cold heavy cream and 1/4 cup granulated sugar until stiff peaks form.
- Gently fold the whipped cream into the cookie butter cream cheese mixture until just combined. Do not overmix.
- Spoon or pipe the cheesecake filling evenly over the chilled crusts in the muffin cups.
- Refrigerate the cheesecake cups for at least 4 hours, or until firm.
- Before serving, top each cup with a small spoonful of extra cookie butter.
Notes
- For the best texture, ensure your cream cheese is fully softened to room temperature before mixing.
- If you do not have paper liners, lightly spray the muffin tin cups with non-stick spray for easier removal.
- You can substitute graham crackers for the Biscoff cookies in the crust if needed, but the flavor will change.
Nutrition
- Serving Size: 1 cup
- Calories: 350
- Sugar: 28g
- Sodium: 210mg
- Fat: 22g
- Saturated Fat: 13g
- Unsaturated Fat: 9g
- Trans Fat: 0g
- Carbohydrates: 33g
- Fiber: 1g
- Protein: 4g
- Cholesterol: 55mg