
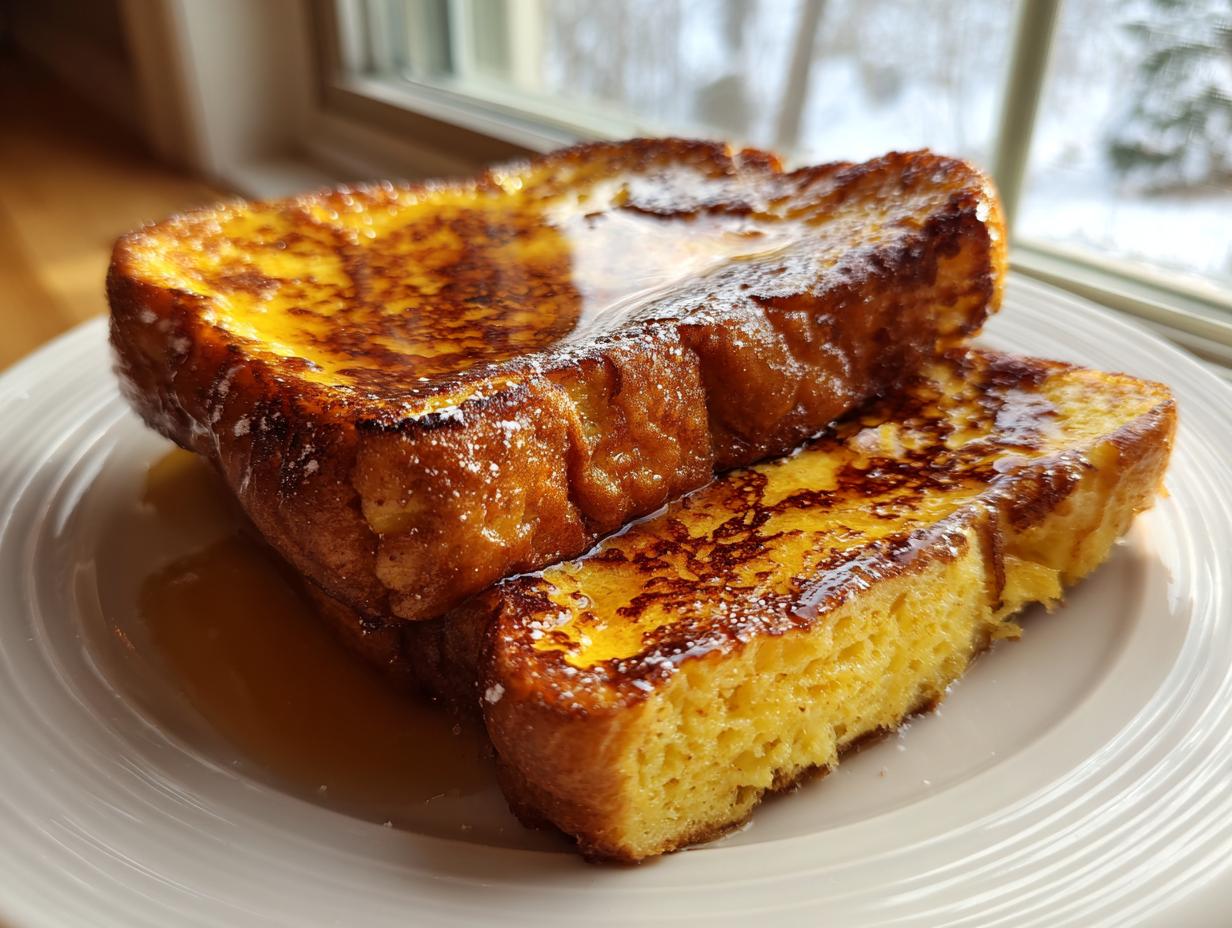
There’s just something about a weekend morning when you know you’re making something truly special, right? For me, that’s always been about the perfect slice of French toast. Forget those sad, dry versions you sometimes get! I’m here to show you how to nail the technique so you get those divine, custardy centers wrapped up in buttery, crispy edges every single time. This isn’t just a recipe; it’s a morning ritual that brings my family right to the table, just like my grandmother taught me that good food is our best way of connecting. You can read more about why sharing food matters so much to me over at our About Us page. Whether you’re feeding a crowd or just treating yourself, mastering this classic French toast recipe is going to elevate your brunch game permanently. I promise, once you try this method, you won’t look back.
- Why This is the Best Classic French Toast Recipe
- Ingredients for Perfect French Toast
- How to Prepare This Easy French Toast Recipe
- Tips for Success Making Gourmet French Toast
- Variations on Classic French Toast
- Make Ahead French Toast Casserole Options
- Serving Suggestions for Your French Toast
- Storage and Reheating Instructions for French Toast
- Frequently Asked Questions About Making French Toast
- Nutrition Information for This French Toast
- Share Your Perfect French Toast Experience
Why This is the Best Classic French Toast Recipe
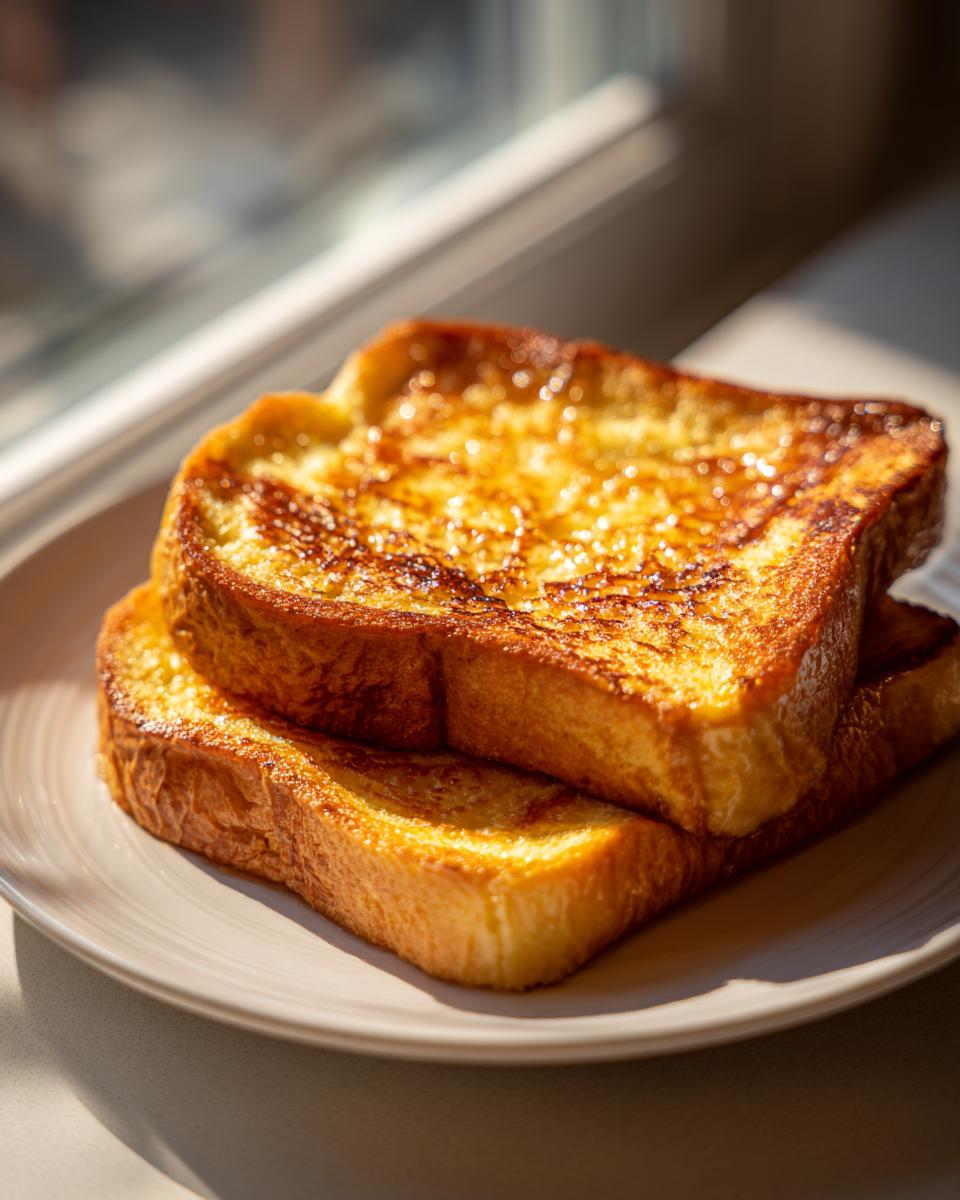
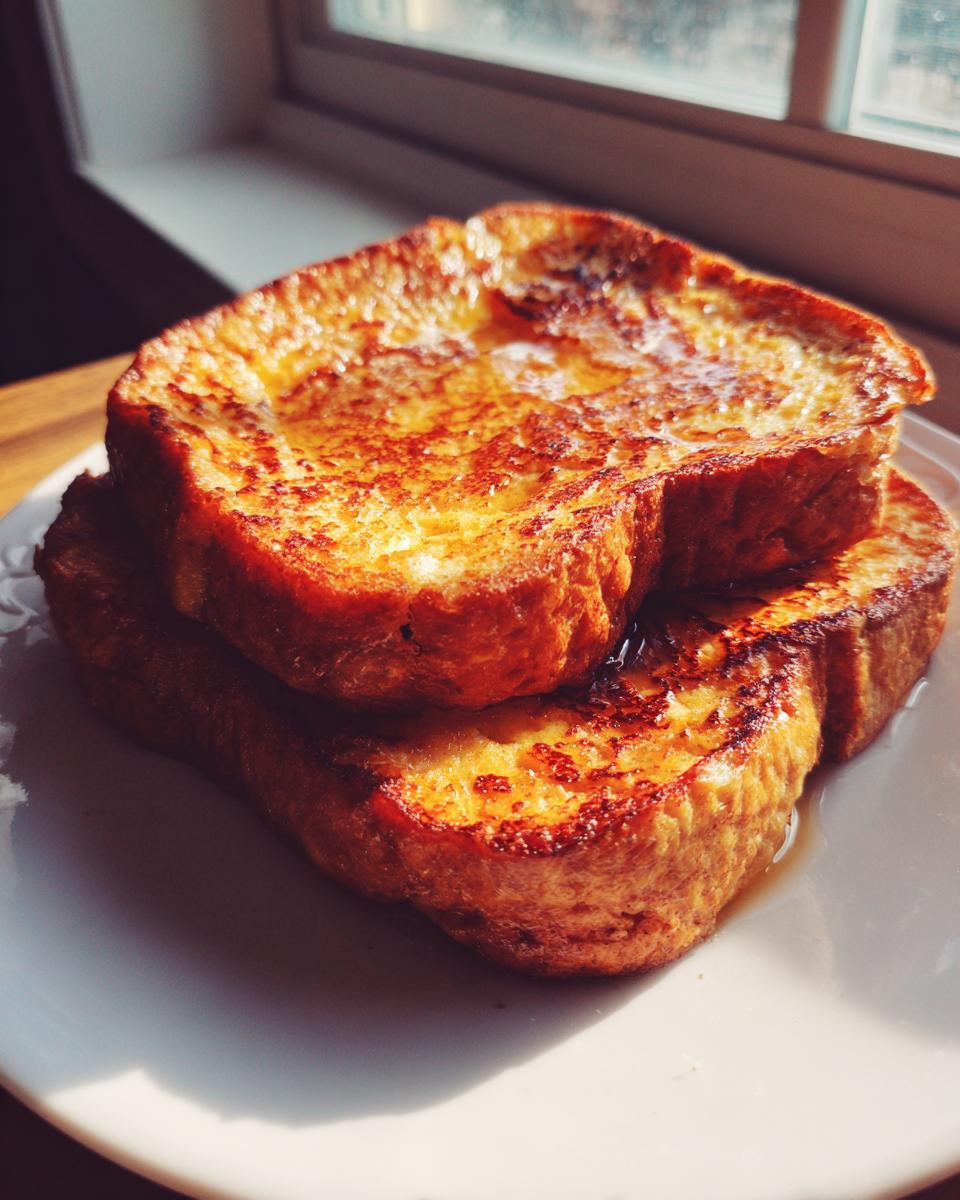
Honestly, what sets this classic french toast recipe apart isn’t some rare spice—it’s all about the texture we chase. We are aiming for a true gourmet breakfast experience here: deep golden exterior and pudding-like interior. I tested batches for months, perfecting the ratio of cream to milk, to get those perfect **custardy french toast centers** and incredible **crispy french toast edges**. These fundamental **best french toast tips** are the difference between good and unforgettable.

Achieving Custardy French Toast Centers
The magic starts in the shallow dish. We use a mix of milk AND heavy cream because that fat content keeps the inside unbelievably soft. You must soak your bread for a solid 20 to 30 seconds per side. Don’t rush this! That soak time is what lets the bread absorb enough custard to feel decadent, not just like soggy bread.
Tips for Crispy French Toast Edges
Temperature control is everything. You have to resist that urge to crank the heat up! We cook low and slow over medium-low heat. I swear by adding a fresh knob of butter for every two pieces of toast, too. My personal trick? Just before adding the bread, sprinkle a tiny pinch of sugar directly onto the melted butter in the pan. That sugar caramelizes instantly and gives you those beautifully browned, **crispy french toast edges**.
Ingredients for Perfect French Toast
Okay, let’s talk about what you need to pull this off. Don’t stress—this recipe is incredibly simple, but the ingredients count! We need about 8 nice, thick slices of bread; trust me, you can’t skimp on thickness if you want that fluffy result. Then we have the custard base: eggs, the whole milk, some heavy cream for richness, vanilla, and those warm spices like cinnamon and salt. That’s it! These specific amounts make the best batch of french toast right in the skillet.
Bread Selection for Superior French Toast
If you take only one thing away from this, please let it be this: stale bread wins. You absolutely must use bread that’s at least a day old. When it comes to the best bread, I always lean towards thick slices of Challah or Brioche. These breads have the perfect structure; they soak up all that wonderful custard without collapsing into mush. Anything less than day-old bread just won’t hold up to make that amazing challah french toast or brioche french toast we are aiming for.
How to Prepare This Easy French Toast Recipe
Alright, let’s get down to business. Making this easy french toast is all about a few specific actions taken in the right order. First things first, make sure your bread is ready—slightly stale is key! Then we move straight into turning our simple ingredients into magic custard. We need a systematic approach to ensure every slice comes out perfectly cooked, not just quickly fried.
Mixing the Custard for Fluffy French Toast
Grab your shallow dish. Seriously, whisk everything—eggs, milk, cream, vanilla, the spices, and that tiny pinch of salt—until it looks totally uniform. You want zero streaks of egg white left behind! This thorough mixing is what guarantees that rich, **fluffy french toast** interior we dream about.
Cooking Technique for Perfect French Toast
Get your skillet over medium-low heat—and I mean low! Melt half your butter until it foams. Now dip your bread for that necessary 20-30 seconds on each side. Lay the slices gently onto the hot pan so they don’t crowd each other. Cook them for a full 4 to 5 minutes per side. Cooking low and slow is the secret handshake here for that rich texture. While that bakes, you can review our privacy commitment here: Read our Privacy Policy.
Tips for Success Making Gourmet French Toast
Honestly, getting that “gourmet breakfast” feeling comes down to honoring a few small rules. My grandmother always said a good cook respects the ingredients, and that’s true for making the absolute best french toast. You’ll notice the notes section mentioned a few things that aren’t in the main steps, but they are game-changers!
First, I cannot stress this enough: use bread that is at least one day old. If you try using super fresh bread, it gets messy and falls apart when you soak it. Think of day-old bread as being ready to soak up that creamy custard without turning into soup!
Secondly, for that extra layer of caramelized crunch we love—that beautiful crust—try sprinkling just a bit of regular granulated sugar right into the foaming butter on your pan just before you lay the bread down. That little bit of sugar hits the heat and immediately creates a thin, sugary shell. It’s instant magic; that’s one of my favorite little secrets for achieving stellar results every time.
Variations on Classic French Toast
Now that you’ve mastered the absolute core french toast recipe, you might be ready to switch things up just a little bit for your next weekend breakfast ideas! You can easily transform this base into a phenomenal **cinnamon french toast** by adding an extra half teaspoon of cinnamon to the custard mix—it deepens that cozy, warm flavor profile we all love.
For a real showstopper, you can even adapt this concept into something truly impressive like **stuffed french toast**. You’d just slice a pocket into the side of your thick bread slices *before* soaking, fill it lightly with a softened cream cheese mixture, and then dip and cook as normal. It turns into a whole different experience! If you want to try something truly decadent, you have to see this amazing Crème Brûlée version linked here: Crème Brûlée French Toast. Wow!
Make Ahead French Toast Casserole Options
I know, I know, this recipe is geared toward that immediate, pan-fried satisfaction, which is perfect for a quick breakfast. But Sundays are long, and sometimes you need a trick up your sleeve! I get tons of questions about how to turn this idea into something you can prep the night before—that’s where the magic of an **overnight french toast bake** comes in.
Think about it: assembly is fast. You just prepare your custard, cube up that day-old bread (Challah works beautifully for this!), toss it all in a casserole dish, cover it, and let it chill. The next morning? All you do is pull it out, maybe sprinkle some cinnamon sugar on top, and pop it right in the oven. It makes those busy mornings so much calmer, turning this into one of the best **make ahead french toast** strategies. If you want to see a brilliant example of how this works, check out this great French Toast Bake tutorial. It’s seriously a lifesaver when you’re hosting!
Serving Suggestions for Your French Toast
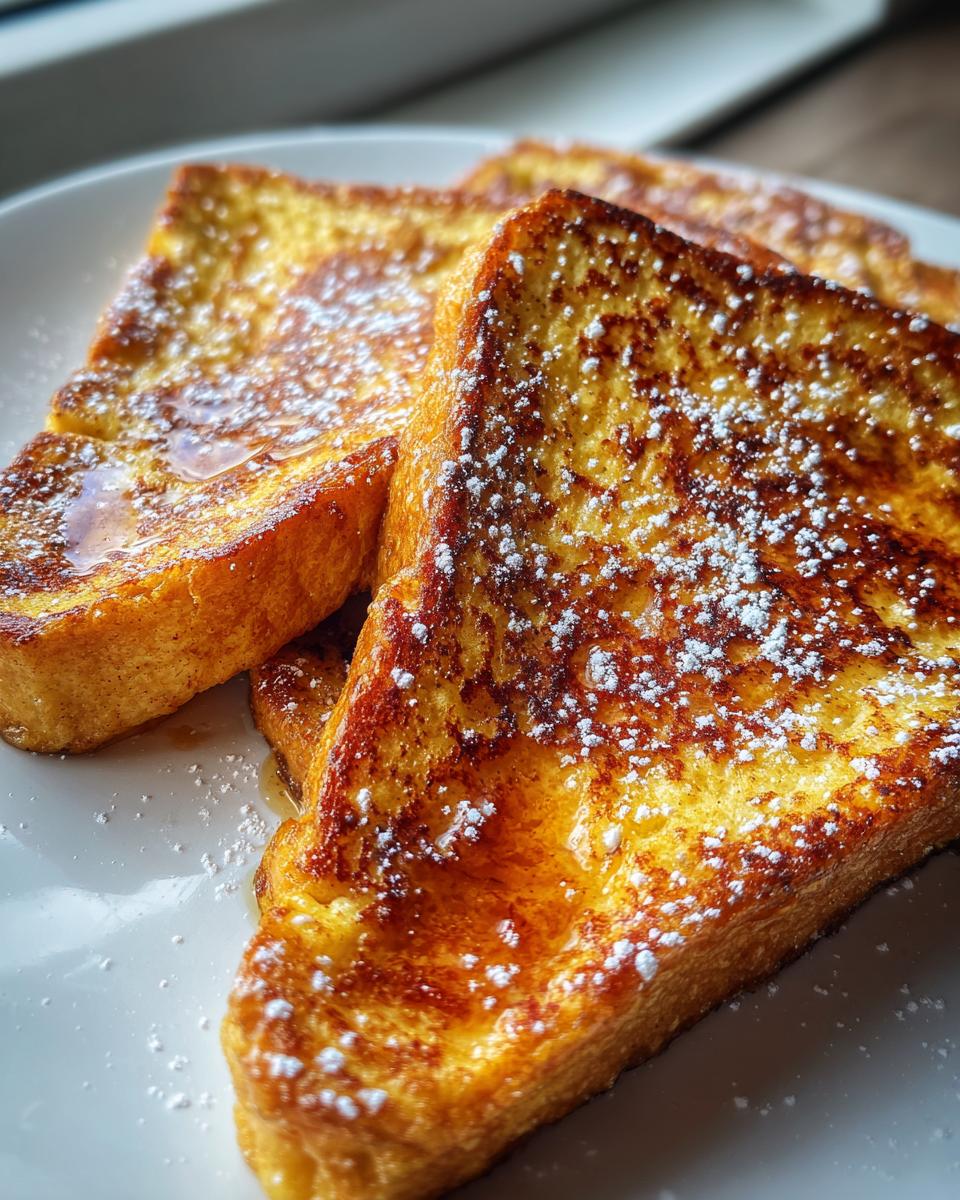
You’ve nailed the texture, now for the fun part: dressing up your beautiful, **custardy french toast centers**! This is where your **weekend breakfast ideas** truly shine. Naturally, you need real maple syrup—don’t settle for the pancake stuff! I love topping mine with fresh berries, like sliced strawberries or maybe a handful of raspberries, for a pop of fresh flavor.
If you want to bump it up into the **gourmet breakfast** category without much effort, try mixing a tiny bit of lemon zest into your powdered sugar before dusting. It brightens everything up! A dollop of good whipped cream makes any morning feel like a holiday.
Storage and Reheating Instructions for French Toast
We all hope it lasts, but sometimes you have leftovers! If that happens, promise me you won’t touch the microwave—it turns everything rubbery. Store any extra slices of your perfect french toast in a single layer on a wire rack inside an airtight container in the fridge for up to two days.
To reheat and keep those **crispy french toast edges**, pop them straight onto a sheet pan and bake at about 350°F until warmed through and slightly crisp again. That’s the only way to revive the texture we worked so hard to achieve!
Frequently Asked Questions About Making French Toast
I always get emails asking about the nitty-gritty details of making the absolute best french toast, so I wanted to put some of the most common questions right here. Getting that perfect texture means understanding why we do things a certain way. We want that ideal balance between **fluffy french toast** and beautifully crisp sides, every single time!
Can I use fresh bread for this french toast recipe?
Oh, I see this question all the time! And the answer is a firm no, if you want that perfect texture. Fresh bread is just too soft. It turns into mush almost instantly when it hits our rich egg mixture because it can’t hold the liquid. You really need that slightly stale, day-old bread—like the end of your challah french toast loaf—so it soaks up exactly the right amount of custard without falling apart.
What is the best way to keep cooked french toast warm?
This is crucial, especially when you’re making a large batch for a family breakfast! You can’t just stack them up on a plate; they steam each other and lose that beautiful crispness. Once a batch is perfectly golden, slide those slices onto a wire rack resting inside a baking sheet. Then, stick that sheet into a very low oven—around 200°F. This keeps them wonderfully warm while you finish cooking the next batch, ensuring everyone gets perfectly hot **french toast**.
If you have any other burning questions about substitutions or need help planning your next **easy brunch recipes**, please don’t hesitate to reach out and contact us!
Nutrition Information for This French Toast
I always get asked about the macros, especially when serving this up for a special weekend breakfast ideas gathering! Keep in mind these numbers are just estimates based on using ingredients like whole milk and brioche slices, so they will shift slightly depending on what bread you choose. You’ve made yourself a wonderful, satisfying plate of french toast!
- Serving Size: 2 slices
- Calories: 350
- Total Fat: 18g
- Carbohydrates: 35g
- Protein: 14g
Think of these values as a general guide. If you lighten up the custard or use sourdough instead of brioche, the estimates change! But for a truly decadent, satisfying breakfast, these numbers reflect the richness we are aiming for in this classic french toast recipe.
Share Your Perfect French Toast Experience
Now that you’ve mastered the technique for that wonderfully custardy french toast centers and those golden edges, I’d absolutely love to hear about it! Did you stick with the Challah, or did you try a Stuffed French Toast variation?
Please leave a rating below and let me know in the comments what toppings you chose. Sharing your success stories really builds up our whole cooking community here at the table. Happy cooking, and enjoy that perfect weekend breakfast!
PrintThe Absolute Best Classic French Toast Recipe

This recipe guides you to make the best French toast with crispy edges and a custardy center. It uses simple techniques to achieve a gourmet breakfast experience.
- Prep Time: 10 min
- Cook Time: 15 min
- Total Time: 25 min
- Yield: 4 servings 1x
- Category: Breakfast
- Method: Pan Frying
- Cuisine: American
- Diet: Vegetarian
Ingredients
- 8 thick slices of day-old bread (Challah or Brioche recommended)
- 4 large eggs
- 1/2 cup whole milk or half-and-half
- 1/4 cup heavy cream
- 1 teaspoon vanilla extract
- 1 teaspoon ground cinnamon
- 1/4 teaspoon ground nutmeg
- Pinch of salt
- 2 tablespoons butter, for cooking
Instructions
- Prepare your bread: Use thick slices of bread that are slightly stale. This helps the bread absorb the custard without falling apart.
- Mix the custard: In a shallow dish, whisk together the eggs, milk, heavy cream, vanilla extract, cinnamon, nutmeg, and salt until fully combined.
- Soak the bread: Dip each slice of bread into the custard mixture. Let it soak for about 20 to 30 seconds per side. You want the bread saturated but not soggy.
- Heat the pan: Place a large skillet or griddle over medium-low heat. Add half of the butter and let it melt until it foams slightly. Cooking low and slow helps achieve the custardy center.
- Cook the toast: Place the soaked bread slices onto the hot skillet, ensuring they do not touch. Cook for 4 to 5 minutes per side until golden brown and crisp on the edges.
- Keep warm: Transfer cooked French toast to a wire rack set over a baking sheet and keep warm in a low oven (about 200°F) while you cook the remaining slices.
- Serve immediately with your favorite toppings like maple syrup and powdered sugar.
Notes
- For the best texture, use bread that is at least one day old. Fresh bread becomes too soft when soaked.
- If you prefer a richer flavor, substitute half of the milk with heavy cream in the custard mixture.
- To achieve a caramelized crust, sprinkle a small amount of granulated sugar onto the buttered pan just before placing the bread down.
Nutrition
- Serving Size: 2 slices
- Calories: 350
- Sugar: 12
- Sodium: 350
- Fat: 18
- Saturated Fat: 9
- Unsaturated Fat: 9
- Trans Fat: 0
- Carbohydrates: 35
- Fiber: 2
- Protein: 14
- Cholesterol: 180