
You know that moment—you’ve finished your day, the couch is calling, and the thought of ordering takeout for the third time this week creeps in? I’ve been there so many times! But here’s the secret I discovered: getting that amazing, intensely flavorful, slightly smoky punch from your favorite Chinese spot is actually incredibly fast. We’re talking about making the best chinese green beans with garlic sauce in about 20 minutes total, max. Forget waiting for delivery; we’re concentrating on getting that perfect, blistered texture we all crave right in our own kitchen. It proves that even busy weeknights deserve food that feels special and honestly tastes better than delivery!
- Why You Will Make These Chinese Green Beans with Garlic Sauce Every Week
- Essential Ingredients for Perfect Chinese Green Beans with Garlic Sauce
- The Secret to Blistered Green Beans with Garlic Sauce: Step-by-Step Instructions
- Tips for Success When Making Wok Fried Green Beans
- Serving Suggestions for Your Chinese Green Beans with Garlic Sauce
- Storage and Reheating for Leftover Garlic Green Beans
- Frequently Asked Questions About Chinese Green Beans
- Estimating Nutrition for this Garlic Sauce Recipe
- Share Your Experience Making Chinese Green Beans with Garlic Sauce
- Estimating Nutrition for this Garlic Sauce Recipe
- Share Your Experience Making Chinese Green Beans with Garlic Sauce
Why You Will Make These Chinese Green Beans with Garlic Sauce Every Week
Seriously, once you master this technique, you won’t even bother calling for takeout on a Tuesday night. This recipe checks every single box for a perfect weeknight side dish. It’s honest food that tastes impressive without needing complex steps or weird ingredients. Here’s what I guarantee you’ll love:
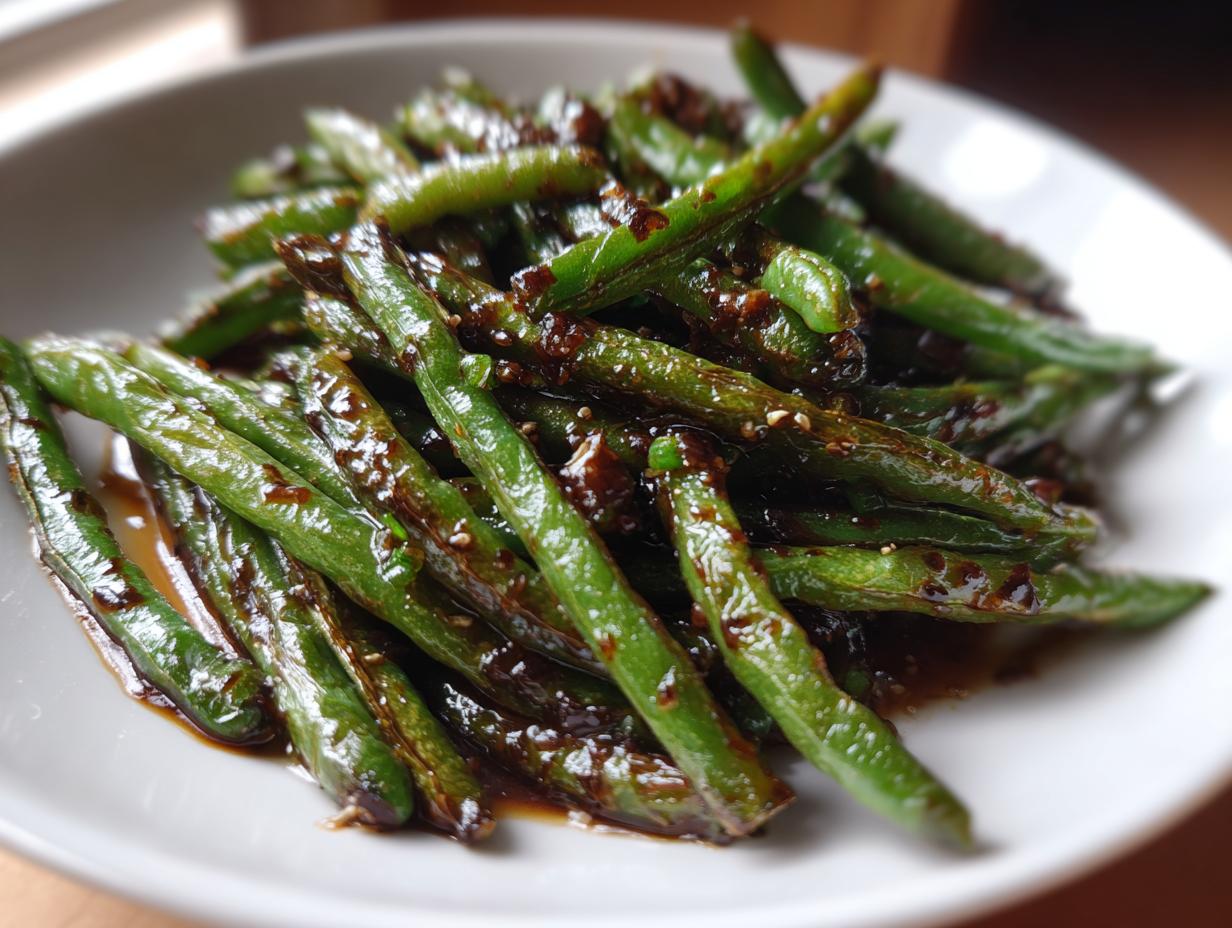
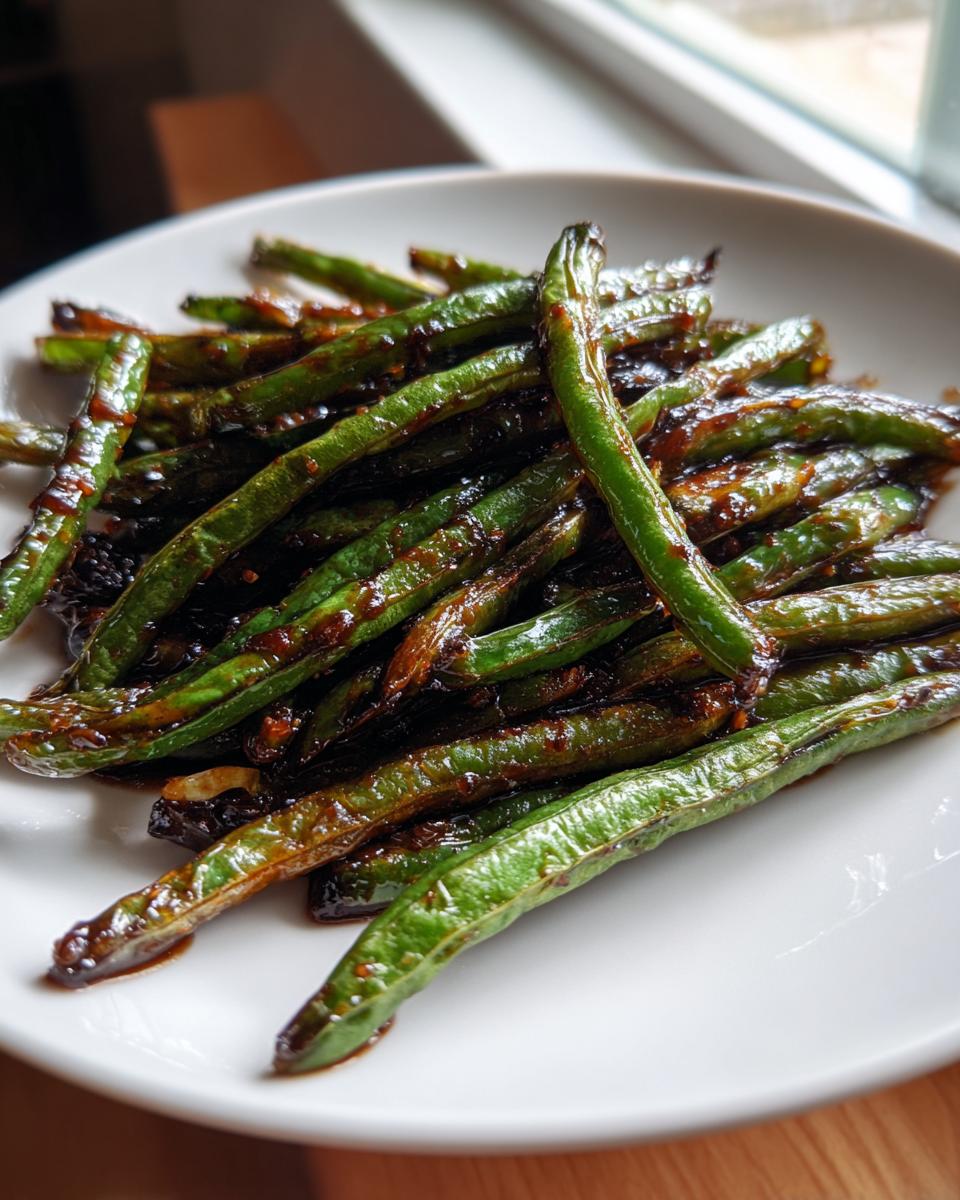
- That Signature Char: We’re not just steaming beans here! The high heat creates those beautiful, dark **blistered green beans** that absorb the sauce perfectly. It’s the texture that makes restaurant dishes addictive, and we nail it every time.
- Punchy and Garlicky Flavor: The sauce is minimalist but mighty. You get a bright, savory kick from fresh garlic, a touch of soy, and just enough sugar to balance everything out. It cuts through richer main courses like nothing else.
- Lightning Fast Prep: I promised you takeout speed, and I meant it! From trimming the beans to serving them coated in sauce, this entire affair takes around 20 minutes, flat. It’s faster than waiting for the delivery driver to find your apartment!
- Simple Cleanup: Since we are working mostly in one pan or a wok fried green beans setup, cleanup is ridiculously easy. You’re focused on eating, not scrubbing mountains of pots.
It’s the ultimate chinese green beans with garlic sauce that proves home cooking can absolutely beat the local spot when you know the right high-heat trick. Trust me on this one; they’ll become a staple.
Essential Ingredients for Perfect Chinese Green Beans with Garlic Sauce
Okay, let’s talk about what goes into this magic. You don’t need a specialty trip to an Asian market for this! Most of this you probably have right now. The key here is focusing on the freshness and preparation of the garlic and beans, since that’s where all the flavor lives. A great sauce needs a perfect base, and for us, that starts with super dry beans.
Here is what you’ll need for about 4 servings of these incredible chinese green beans with garlic sauce:
- 1 pound fresh green beans, trimmed (no woody ends allowed!)
- 3 tablespoons neutral oil (I lean toward canola or vegetable oil because they handle high heat, but avocado oil works great too)
- 4 cloves garlic, minced (Don’t skimp! This is a garlic dish!)
- 1 teaspoon fresh ginger, minced (Fresh only, please. That powdery stuff just doesn’t cut it here.)
- 1/4 cup low-sodium soy sauce (or tamari for gluten-free)
- 1 tablespoon rice vinegar
- 1 teaspoon sugar
- 1/2 teaspoon toasted sesame oil (This goes in at the very end!)
- Pinch of red pepper flakes (if you like a little kick!)
Remember, before anything hits that super-hot wok, you have to blanch the beans briefly and then—this is the absolutely non-negotiable step—pat them bone dry. Water and high heat do NOT mix when you’re trying to char something. Seriously, use a couple of paper towels and make sure those beans are dry before they go in the oil!
Ingredient Notes and Substitutions for Garlic Green Beans
I developed this recipe to be super flexible for real-life kitchens. Sometimes you’re missing one thing, and that’s totally fine!
If you need to make these **garlic green beans** gluten-free, just swap the regular soy sauce for tamari. It offers the exact same rich, salty flavor profile. No difference in taste, promise!
Now, let’s talk pans. If you don’t own a wok—don’t panic! My original test batches were done in a giant, heavy-bottomed cast iron skillet, and they came out nearly identical. The goal isn’t the shape of the pan, it’s maintaining that blistering high heat. If your skillet isn’t huge, just cook the beans in two batches. It’s better to work in two smaller, screaming-hot batches than one crowded, steaming batch, right?
The Secret to Blistered Green Beans with Garlic Sauce: Step-by-Step Instructions
This is where the magic happens, and honestly, it all boils down to temperature control. If you respect the heat, these chinese green beans with garlic sauce will be done before you can even decide what movie to watch tonight! We need to move quickly through the steps, but patience during the drying and charring phases is key. Read through these steps, get your ingredients prepped (that’s called *mise en place*, which makes life way easier!), and then let’s get cooking!
- Blanch, Plunge, and Dry: First things first, happiness requires bright green beans. Bring water to a boil, toss the trimmed beans in for just 2 or 3 minutes until they look vibrant, then immediately shock them in ice water. This stops the cooking process dead in its tracks! Drain them incredibly well, and then PAT THEM DRY. I mean, really dry. If you’re heading over to my home to see how I do it, you can read a little more about my cooking philosophy while you wait for the water to boil.
- Heat Explosion: Get your wok or biggest skillet screaming hot—we want high heat, period. Pour in your neutral oil and wait until it shimmers. It should look hot, almost wavy.
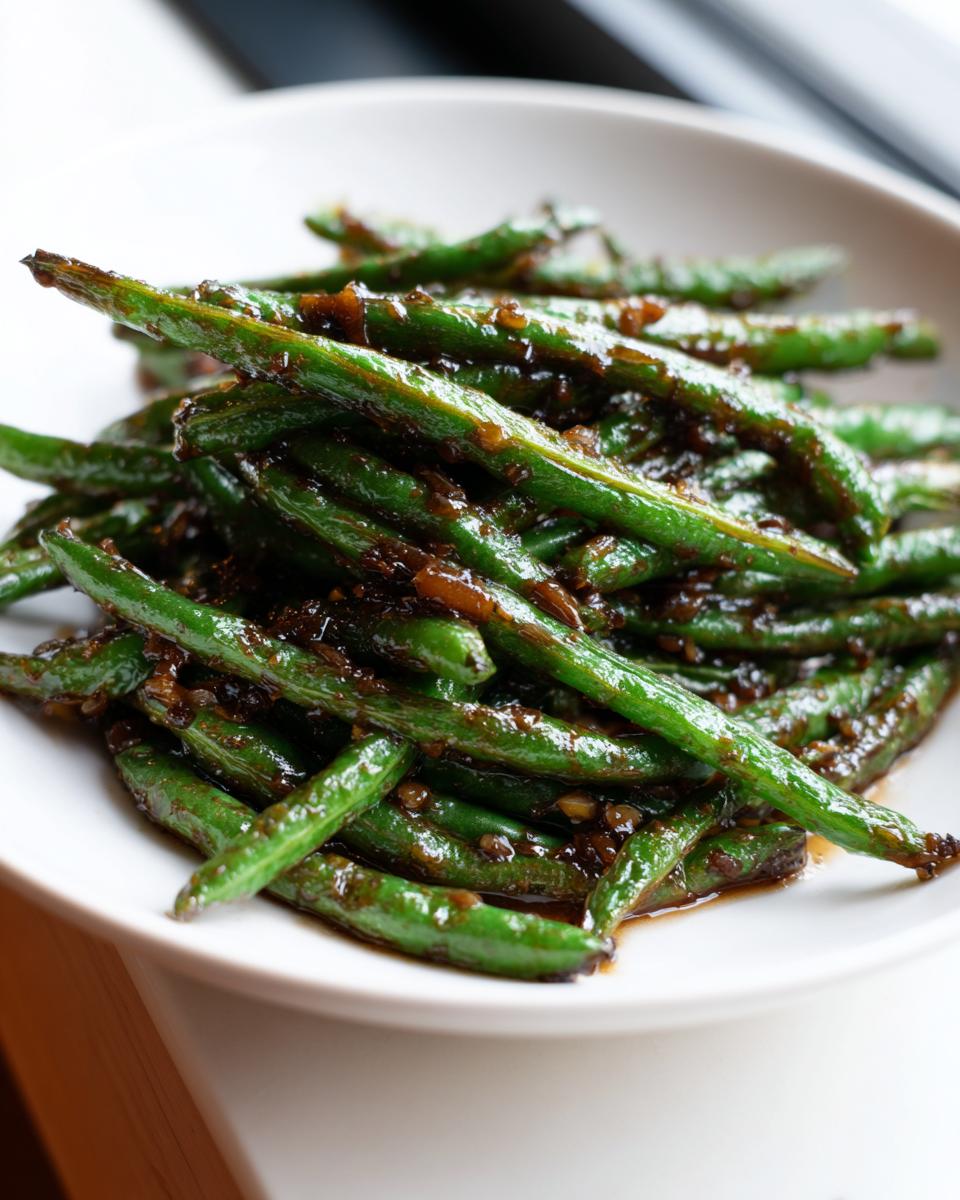
- The Charring Phase (Added Step for Clarity): Once the oil is shimmering, add the dry beans. Spread them out in a single layer as much as possible and LET THEM SIT UNDISTURBED for 2-3 minutes to develop char. Gently toss and repeat this process until they are blistered to your liking.
- The Sauce Build: Once the beans are charred nicely, pull them out. Turn the heat down just a tiny bit, and toss in that minced garlic and ginger. Stir constantly for about 30 seconds. If you hear sizzling, you’re good! If you smell burning, you’ve gone too far, so pull the pan off the heat!
- Finish Line: Whisk your sauce ingredients together separately. Pour that mixture in, let it bubble for just a moment until it looks slightly syrupy, and then toss those gorgeous, charred beans right back in. Drizzle with sesame oil and serve immediately!
Achieving the Char: Wok Frying Techniques for Chinese Green Beans
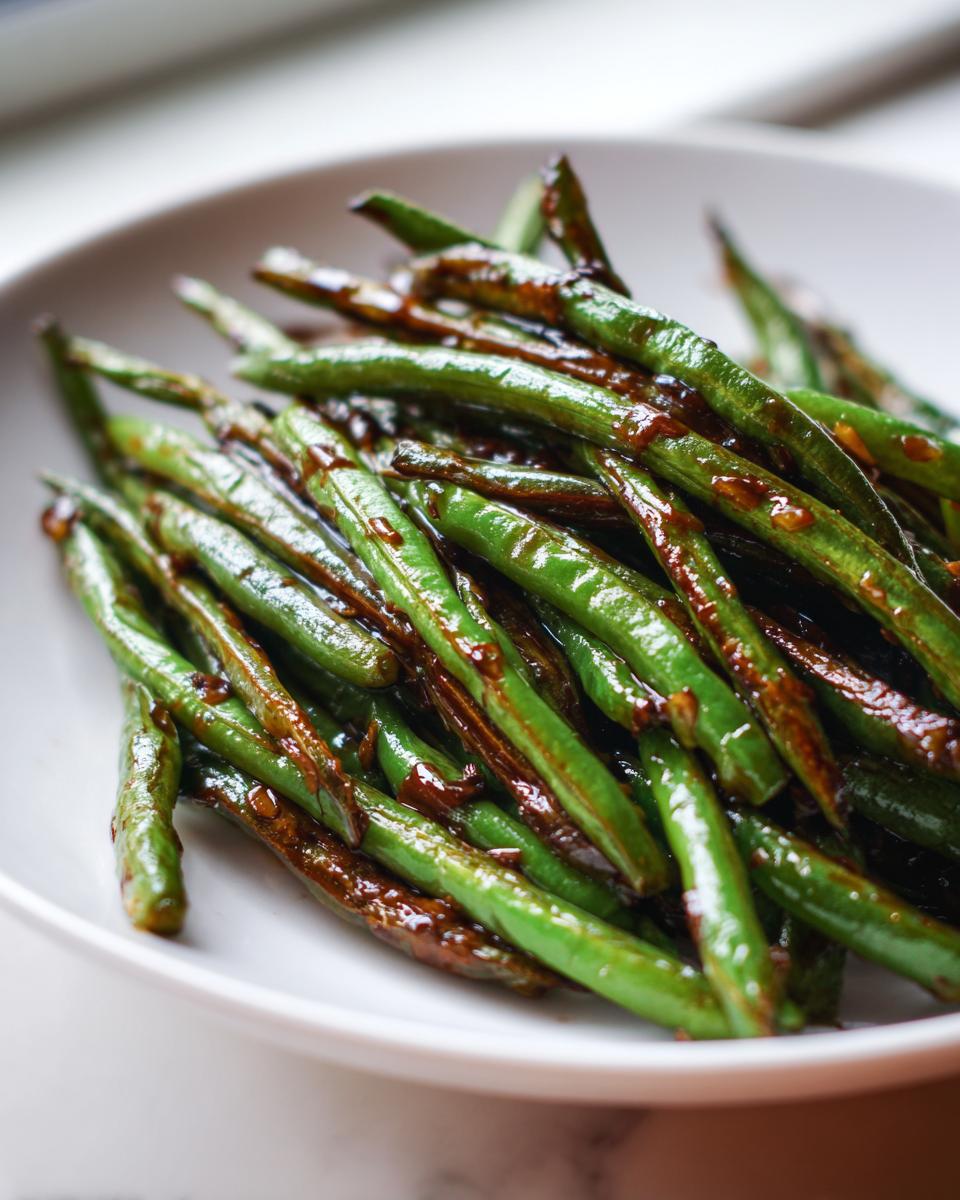
This step—the dry fry—is what separates sad, sweaty green beans from amazing, restaurant-quality ones. When you add those bone-dry, blanched beans to the shimmering hot oil, you want them to sizzle immediately. This is critical: Let them sit! Don’t touch them for a solid 2 to 3 minutes on one side. This undisturbed moment allows the natural sugars in the beans to caramelize and create those dark, wrinkly spots we call char.
If you try to stir them right away, all you’ll do is steam them, and then you’ll end up with mushy sichuan green beans instead of what we want! If you are using a smaller skillet, you MUST cook these in batches. If you dump a whole pound into a regular pan, the temperature plummets instantly, and BAM—you’re steaming again. If you notice the pan isn’t scorching hot anymore between batches, just wait 30 seconds for it to come back up before you add the next set. That high heat investment pays off in every single bite!
Tips for Success When Making Wok Fried Green Beans
I want you to succeed wildly with these, because once you get this technique down, you’ll use it for all sorts of wok fried green beans dishes! It’s not hard, but there are three common mistakes I see people make that stop them from getting that perfect restaurant texture. Pay attention to these three things, and you’ll have no trouble at all.
First and foremost, the drying process cannot be rushed. I mentioned it before, but I’m saying it again because it’s the truth: the beans must be entirely dry after blanching. If you think they’re dry, pat them one more time! Moisture is the enemy of char. Water hitting that hot oil causes steam, and steam means your beans will sweat instead of sizzle.
Second, resist the urge to stir everything all at once in the pan. If you’re used to tossing ingredients constantly in a skillet, you need to fight that instinct here. When you add the beans to the hot oil, let them rest. Give them real surface contact with the hot metal for a minute or two before you gently stir or toss them. This is how you get those beautiful, blackened spots that give these chinese green beans their incredible depth of flavor.
Finally, watch your garlic like a hawk once you introduce it to the pot after the beans come out. Garlic cooks fast, especially in residual high heat. We want it golden and fragrant—that amazing smell that signals dinner is imminent! If it turns dark brown, it quickly turns bitter, and that bitterness will stick to your whole sauce. Pull the pan off the burner if the garlic starts looking stressed before you add the liquid. A quick switch of heat settings saves the whole dish!
Serving Suggestions for Your Chinese Green Beans with Garlic Sauce
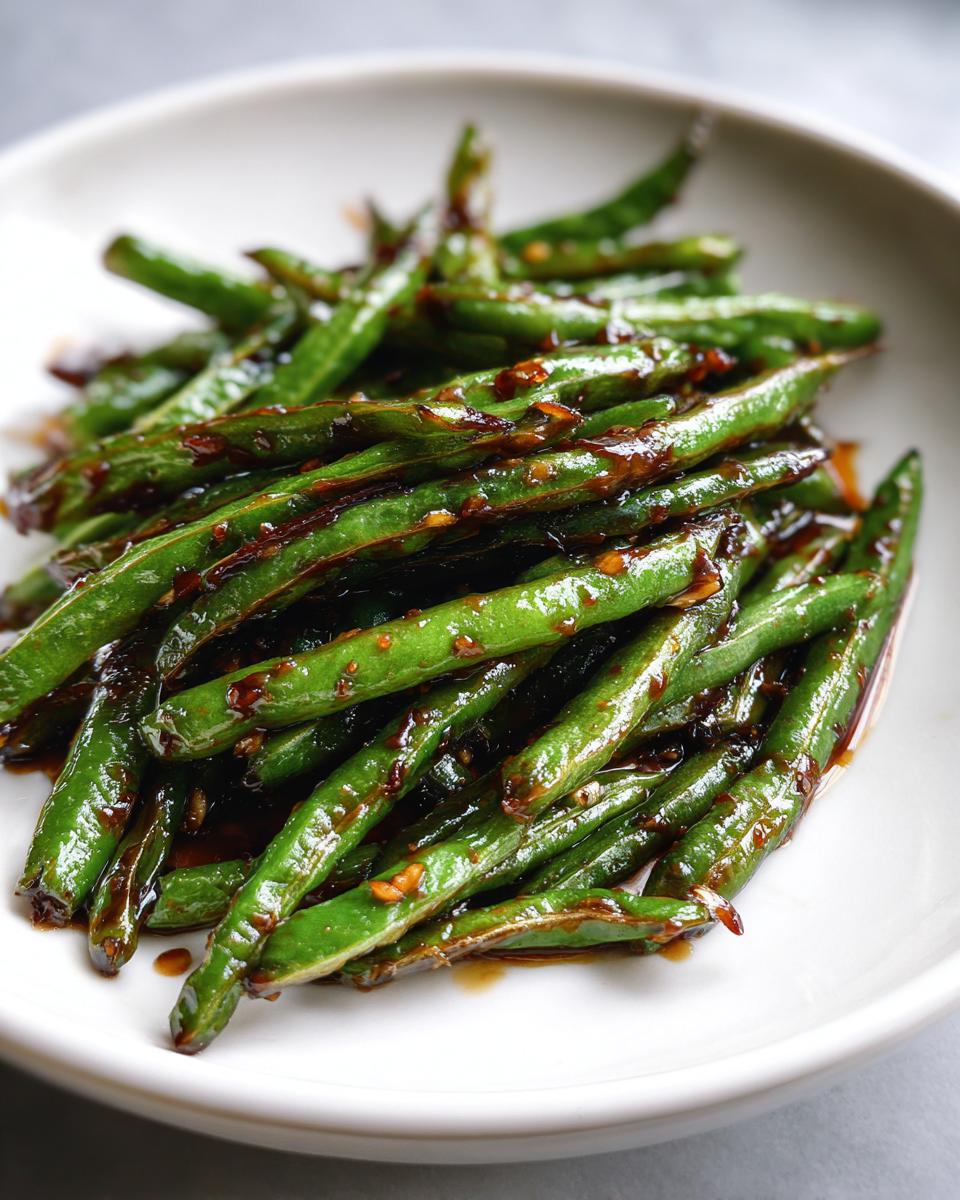
So, you’ve got these intensely flavorful, slightly spicy, and beautifully charred green beans. Awesome! What goes with them? Since these **chinese green beans with garlic sauce** bring such a bright, savory punch, they pair perfectly with heavier, comforting mains. Think of them as the necessary fresh, crispy counterpoint to your main course.
For a classic takeout night vibe, you absolutely need a starch underneath to soak up any leftover sauce that escapes the beans! I always make a big batch of steamed white rice, but honestly, fried rice is even better—it makes the whole meal feel more official. If you’re keeping it simple, even tossing these with some plain stir-fried noodles works wonderfully.
When it comes to the main event, these **chinese side dishes** are versatile. They are brilliant alongside just about any protein. My personal favorite combination right now is pairing them with sticky honey garlic chicken; the sweetness of the chicken is perfectly balanced by the saltiness of the garlic sauce on the beans. If you’re leaning vegetarian, these are fantastic with crispy sesame tofu or a big bowl of savory vegetable lo mein.
Basically, anything that could use a fresh, garlicky vegetable component is a winner. They are simple enough that they won’t fight with the flavor of your main dish, but powerful enough that they won’t get lost either. Enjoy that home-cooked takeout feast!
Storage and Reheating for Leftover Garlic Green Beans
Listen, I know these **garlic green beans** are almost impossible to have leftovers of, but your restraint is admirable if you managed to save some! They are truly best right out of the wok when they still have that tiny bit of internal crispness from the blistering. But if you have extras, we absolutely need to handle them carefully so they don’t turn mushy the next day.
The first step for storage is cooling them completely. Don’t put a hot pan of beans straight into the fridge; that creates condensation, which defeats the entire purpose of getting them dry in the first place! Let them cool on the counter for about 30 minutes until they reach room temperature.
Once cool, transfer the **garlic green beans** to a shallow, airtight container. You want to avoid using a deep container where the beans will just pile up on each other. Keeping them in a single uncrowded layer helps maintain texture slightly better overnight. They will last perfectly fine in the refrigerator for about three days, maybe four if you’re lucky.
Now, for reheating—this is crucial. Please, dear cook, do not—I repeat, do NOT—reach for the microwave. Microwaving introduces steam, and steam equals soggy beans. We want to resurrect that charred texture we worked so hard for.
The absolute best way to reheat these is back in the skillet. You don’t need much, maybe just half a teaspoon of fresh oil over medium-high heat. Toss the beans in quickly, cooking them for just 1 to 2 minutes, stirring constantly. You’re not cooking them further; you’re just warming them through and evaporating any surface moisture.
If you happen to have leftover sauce lying around after serving, you can add a tiny teaspoon of that along with the beans to help re-coat them and revitalize the flavor while they heat up quickly. It only takes a minute or two to get them vibrant and warm again, and they’ll taste almost as good as fresh!
Frequently Asked Questions About Chinese Green Beans
I get so many questions about these savory **garlic green beans** pop up in my inbox, which tells me you all are making them a lot—and that makes me so happy! It’s great that you’re thinking about adjustments and tweaks. Here are the common things I hear people asking when they are trying to nail that perfect takeout flavor profile at home.
Can I skip blanching when making chinese green beans?
That’s a great question about speed! Yes, in a pinch, you absolutely can skip the blanching step entirely. Blanching and chilling really help lock in that bright green color and ensure they cook quickly and stay tender-crisp when they hit the hot pan. If you skip it, you need to manage your expectations a little bit.
If you go straight from raw to the wok with the oil, you’ll simply need to cook the beans longer—maybe 8 to 10 minutes total—until they soften up enough. The trade-off is that they might not stay quite as vibrantly green as the blanched ones, and they can be a little harder to get that deep char without risking the garlic burning later on. But hey, if you’re desperate for **chinese green beans** right now, it works! Just add them to the hot oil and cook them slower until they start to wrinkle.
How do I tailor the heat level in this recipe?
I always keep the red pepper flakes optional because I know some people like serious heat, and others find anything more than a hint of spice too much! If you want to level up the spice, the red pepper flakes are your easiest route to adding background warmth. But if you want strong heat, you need to add fresh ingredients!
Try adding a teaspoon of chili garlic sauce right along with your minced ginger and garlic in step 4. That gives you that beautiful red color and a real punch. For those who love that deep, warming heat associated with authentic flavor profiles, sometimes adding a pinch of Szechuan peppercorns to the oil with the garlic works wonders, but remember those can be tingly, not just hot!
What oil is best for blistering?
This is vital for achieving great **blistered green beans**! The key here is a high smoke point and a neutral flavor. I usually recommend canola or vegetable oil because they are inexpensive and can handle the intense, high heat necessary to get that char without smoking excessively or tasting bitter.
You can use peanut oil if you have it—it’s fantastic for stir-frying and adds a tiny bit of nutty flavor that works well with the sauce. Just avoid olive oil or butter, as their smoke points are too low. They will break down and burn before your beans even start to develop those appealing dark spots. Remember, the oil needs to be hot enough that the beans sizzle aggressively the second they contact the pan!
Are these considered vegan chinese sides?
Absolutely! This recipe is naturally vegetarian and easily converts to fully vegan **vegan chinese sides**. We aren’t using any animal products—no oyster sauce, no chicken broth, nothing! The sauce base is just soy sauce, vinegar, and sugar.
Unless you are dealing with an intolerance, regular low-sodium soy sauce is totally fine for a vegan diet. If you are strictly gluten-free *and* vegan, just make sure you use tamari. We don’t use any eggs or dairy, so these beautiful **garlic green beans** are a perfect, safe addition to any plant-forward meal you’re planning.
For future reference, you can find our full policy on ingredients and guidelines here: our ingredients policy.
Estimating Nutrition for this Garlic Sauce Recipe
It’s always smart to have a rough idea of what’s in the food we eat, even when it’s a quick side dish like these **chinese green beans with garlic sauce**! Keep in mind these are just estimates based on the standard amounts listed in the ingredients, like using low-sodium soy sauce and the specified amount of oil. If you use more or less oil, those numbers will definitely shift!
Here’s what you can generally expect per serving (that’s 1/4 of the recipe when divided by four):
- Calories: Around 120
- Fat: About 8 grams (most of this comes from the oil we use for frying!)
- Saturated Fat: Very low, just about 1 gram
- Carbohydrates: 10 grams total
- Fiber: A nice boost of 4 grams from the green beans themselves
- Protein: 3 grams
- Sugar: 4 grams (mostly from the teaspoon of sugar we use to balance the salt)
- Sodium: 550 mg (This is due to the soy sauce, so using low-sodium makes a big difference here!)
It’s a really well-balanced side dish, providing fiber and flavor without loading you up on heavy calories!
Share Your Experience Making Chinese Green Beans with Garlic Sauce
I truly hope you loved making these **chinese green beans with garlic sauce** as much as I love making them! There’s nothing better than seeing you recreate that restaurant magic right at home. I put so much care into making sure the steps for achieving that blistered texture were crystal clear, and I’d love to hear how they turned out for you.
If you followed the instructions, especially that high-heat drying step, please leave a rating below! Five stars means you nailed that charred, garlicky goodness! If you made any tweaks—maybe you added fresh mushrooms or used lime instead of rice vinegar—please share those ideas in the comments. We all learn from each other’s creativity in the kitchen, and I love reading about your successes.
If you have any burning questions that I didn’t cover in the FAQ section, don’t hesitate to reach out to me directly via the contact page. Happy cooking, and I hope this becomes a fast favorite in your rotation!
You can always reach out here: Contact Maya.
Estimating Nutrition for this Garlic Sauce Recipe
It’s always smart to have a rough idea of what’s in the food we eat, even when it’s a quick side dish like these chinese green beans with garlic sauce! Keep in mind these are just estimates based on the standard amounts listed in the ingredients, like using low-sodium soy sauce and the specified amount of oil. If you use more or less oil, those numbers will definitely shift!
Here’s what you can generally expect per serving (that’s 1/4 of the recipe when divided by four):
- Calories: Around 120
- Fat: About 8 grams (most of this comes from the oil we use for frying!)
- Saturated Fat: Very low, just about 1 gram
- Carbohydrates: 10 grams total
- Fiber: A nice boost of 4 grams from the green beans themselves
- Protein: 3 grams
- Sugar: 4 grams (mostly from the teaspoon of sugar we use to balance the salt)
- Sodium: 550 mg (This is due to the soy sauce, so using low-sodium makes a big difference here!)
It’s a really well-balanced side dish, providing fiber and flavor without loading you up on heavy calories!
Share Your Experience Making Chinese Green Beans with Garlic Sauce
I truly hope you loved making these chinese green beans with garlic sauce as much as I love making them! There’s nothing better than seeing you recreate that restaurant magic right at home. I put so much care into making sure the steps for achieving that blistered texture were crystal clear, and I’d love to hear how they turned out for you.
If you followed the instructions, especially that high-heat drying step, please leave a rating below! Five stars means you nailed that charred, garlicky goodness! If you made any tweaks—maybe you added fresh mushrooms or used lime instead of rice vinegar—please share those ideas in the comments. We all learn from each other’s creativity in the kitchen, and I love reading about your successes.
If you have any burning questions that I didn’t cover in the FAQ section, don’t hesitate to reach out to me directly via the contact page. Happy cooking, and I hope this becomes a fast favorite in your rotation!
You can always reach out here: Contact Maya.
PrintRestaurant-Style Chinese Green Beans with Garlic Sauce
Make fast, flavorful garlic green beans with a charred texture using your wok or skillet. This recipe delivers the punchy flavor of your favorite takeout side dish.
- Prep Time: 10 min
- Cook Time: 10 min
- Total Time: 20 min
- Yield: 4 servings 1x
- Category: Side Dish
- Method: Stir-Frying
- Cuisine: Chinese
- Diet: Vegetarian
Ingredients
- 1 pound fresh green beans, trimmed
- 3 tablespoons neutral oil (like canola or vegetable)
- 4 cloves garlic, minced
- 1 teaspoon fresh ginger, minced
- 1/4 cup low-sodium soy sauce (or tamari for gluten-free)
- 1 tablespoon rice vinegar
- 1 teaspoon sugar
- 1/2 teaspoon toasted sesame oil
- Pinch of red pepper flakes (optional)
Instructions
- Blanch the green beans: Bring a medium pot of water to a boil. Add the green beans and cook for 2 to 3 minutes until bright green. Immediately drain and plunge them into a bowl of ice water to stop the cooking. Drain well and pat them completely dry with paper towels.
- Heat the oil: Place a wok or large, heavy skillet over high heat until it is very hot. Add the 3 tablespoons of neutral oil. Wait until the oil shimmers slightly.
- Dry fry the beans: Add the dried green beans to the hot wok in a single layer if possible. Let them cook undisturbed for 2 to 3 minutes to develop char marks (blistering). Stir and continue cooking for another 3 to 4 minutes until the beans are slightly wrinkled and tender-crisp. Remove the beans from the wok and set aside.
- Make the sauce: Reduce the heat to medium. Add the minced garlic and ginger to the wok and stir constantly for about 30 seconds until fragrant. Do not let the garlic burn.
- Combine the sauce ingredients: In a small bowl, whisk together the soy sauce, rice vinegar, sugar, and red pepper flakes (if using).
- Finish the dish: Pour the sauce mixture into the wok. Let it bubble for about 15 seconds until it thickens slightly. Return the green beans to the wok. Toss quickly to coat everything evenly.
- Serve immediately: Remove from heat and drizzle with the toasted sesame oil before serving.
Notes
- For a vegan alternative, this recipe works well with vegetable broth instead of water for blanching, though drying the beans thoroughly is key for blistering.
- If you do not have a wok, use the largest, heaviest skillet you own and work in batches if necessary to maintain high heat.
- Substitute tamari for soy sauce if you need a gluten-free option.
- Pair these garlic green beans with fried rice or a simple stir-fry for a complete takeout-style dinner at home.
Nutrition
- Serving Size: 1/4 of recipe
- Calories: 120
- Sugar: 4
- Sodium: 550
- Fat: 8
- Saturated Fat: 1
- Unsaturated Fat: 7
- Trans Fat: 0
- Carbohydrates: 10
- Fiber: 4
- Protein: 3
- Cholesterol: 0