
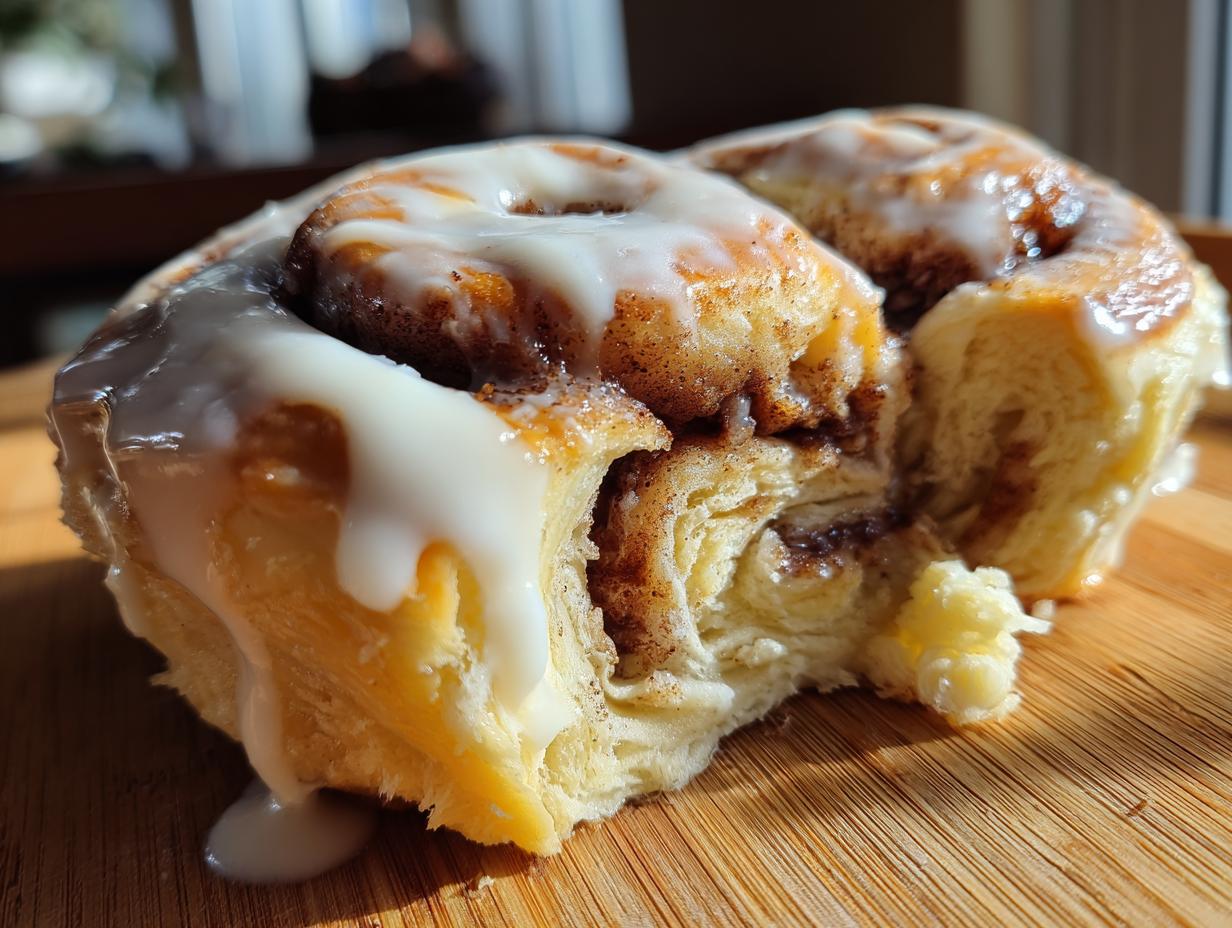
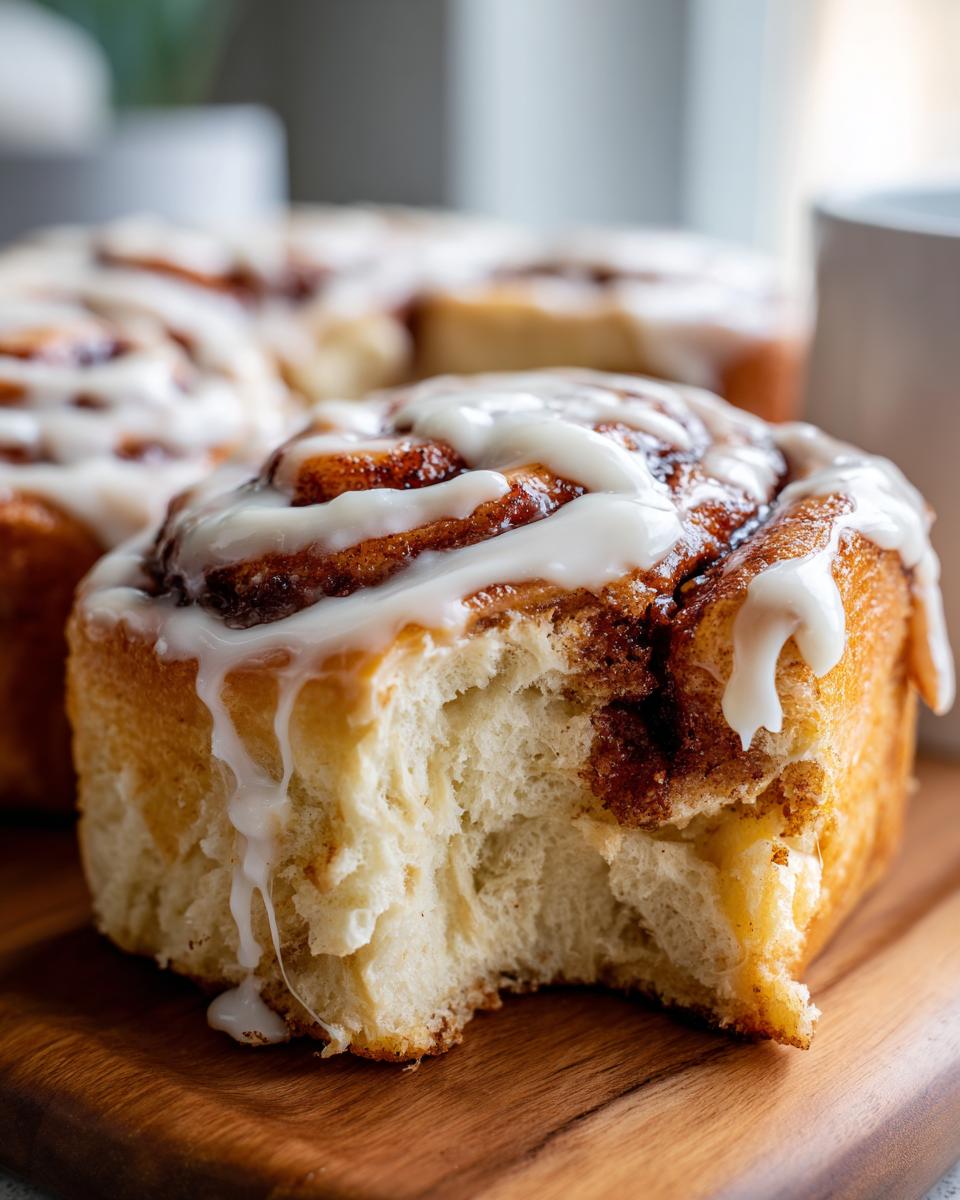
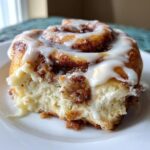
Oh, that smell! Seriously, there is nothing in the world quite like the warmth that fills the house when you have fresh **cinnamon rolls** bubbling in the oven. It’s the scent of comfort, right? Growing up in my grandmother’s kitchen in Chicago, the sweet, spicy air was always the backdrop to our happiest moments. That’s what I want for you here—that feeling, that connection. I’ve taken everything I learned about baking honest, joyful food and poured it into this recipe. Trust me when I say these aren’t just good; they are the softest, pull-apart, bakery-quality rolls you’ll ever whip up at home. Ready to make some magic?
- Why This is the Best Cinnamon Roll Recipe You Will Make
- Ingredients for Perfect Homemade Cinnamon Rolls
- Step-by-Step Instructions for Easy Cinnamon Rolls
- Crafting the Signature Cream Cheese Icing for Your Cinnamon Roll
- Tips for Success When Making Homemade Pastry Cinnamon Rolls
- Storage and Reheating Instructions for Leftover Cinnamon Roll
- Frequently Asked Questions About the Cinnamon Roll Recipe
- Estimated Nutritional Information for One Cinnamon Roll
- Share Your Experience Making This Cinnamon Roll
Why This is the Best Cinnamon Roll Recipe You Will Make
You’re looking for the best cinnamon roll, and I promise you’ve found it. I didn’t create this recipe for looks; I made it for ultimate taste and texture. When people ask me what makes these different, I tell them it’s the payoff. You put in the effort with the yeast, and the reward is unbelievable softness.
- The center stays incredibly gooey, even after cooling.
- The dough structure is sturdy enough for rolling but melts in your mouth.
- It’s completely foolproof—if you follow the timing, the rise is perfect every time.
Achieving Bakery-Quality Soft Rolls
The secret to that famous cloud-like texture really comes down to the fatty stuff—we use both butter *and* milk in the dough, which is more than most standard recipes call for. That extra enrichment slows down gluten development just a bit, giving you rolls that feel rich and tender. You want that little bit of stretch when you pull them apart, and that’s what this formula gives you. It’s simply decadent!
Ingredients for Perfect Homemade Cinnamon Rolls
Okay, now for the fun—or maybe slightly daunting—part: the ingredients! You can’t fake a truly phenomenal cinnamon roll, and that starts right here. I’ve laid out exactly what you need for the dough, the filling, and that dreamy icing. The most important thing I can tell you? Measure everything accurately. Baking with yeast demands precision, so grab your kitchen scale if you can, or be extra careful with those cups!
Look over this list and make sure everything is ready to go before you start mixing. As you can see, we’re using standard ingredients, but the ratios are what make this formula work so well. It’s worth getting the good stuff here!
Ingredient Notes and Substitutions for Your Cinnamon Roll
A couple of quick notes to make sure you nail this yeast roll recipe. First, your yeast must be active dry yeast, and it needs warm milk to wake up. If your milk is too hot, it kills the yeast—so test it with your finger; it should feel comfortably warm, not scalding hot! Room temperature eggs are also non-negotiable; cold eggs shock the dough and mess up the creaming process.
For the butter, please use unsalted butter! We control the salt content elsewhere. You can certainly use bread flour in a pinch, but all-purpose flour will give you that softer, melt-in-your-mouth texture we are aiming for. Don’t try to swap the whole milk for skim; the fat content really helps keep these rolls tender for days.
Step-by-Step Instructions for Easy Cinnamon Rolls
Alright, here is where we put it all together! Making this yeast roll recipe might seem intimidating, but you just need to trust the process and give the dough the time it needs to do its work. We start small—waking up the yeast until it foams nicely. That foamy top is your signal that the yeast is alive and ready to make magic!
Next, we bring everything together. Mix the liquid and dry ingredients until a shaggy dough forms, and then comes the kneading. You need to knead this dough by hand or stand mixer for a good eight to ten minutes. I know, it feels like forever, but you’re building the structure. When the dough is smooth, elastic, and bounces back when you poke it gently? That’s when you stop. Toss it into an oiled bowl, cover it up, and let it double. Patience is your best friend here!
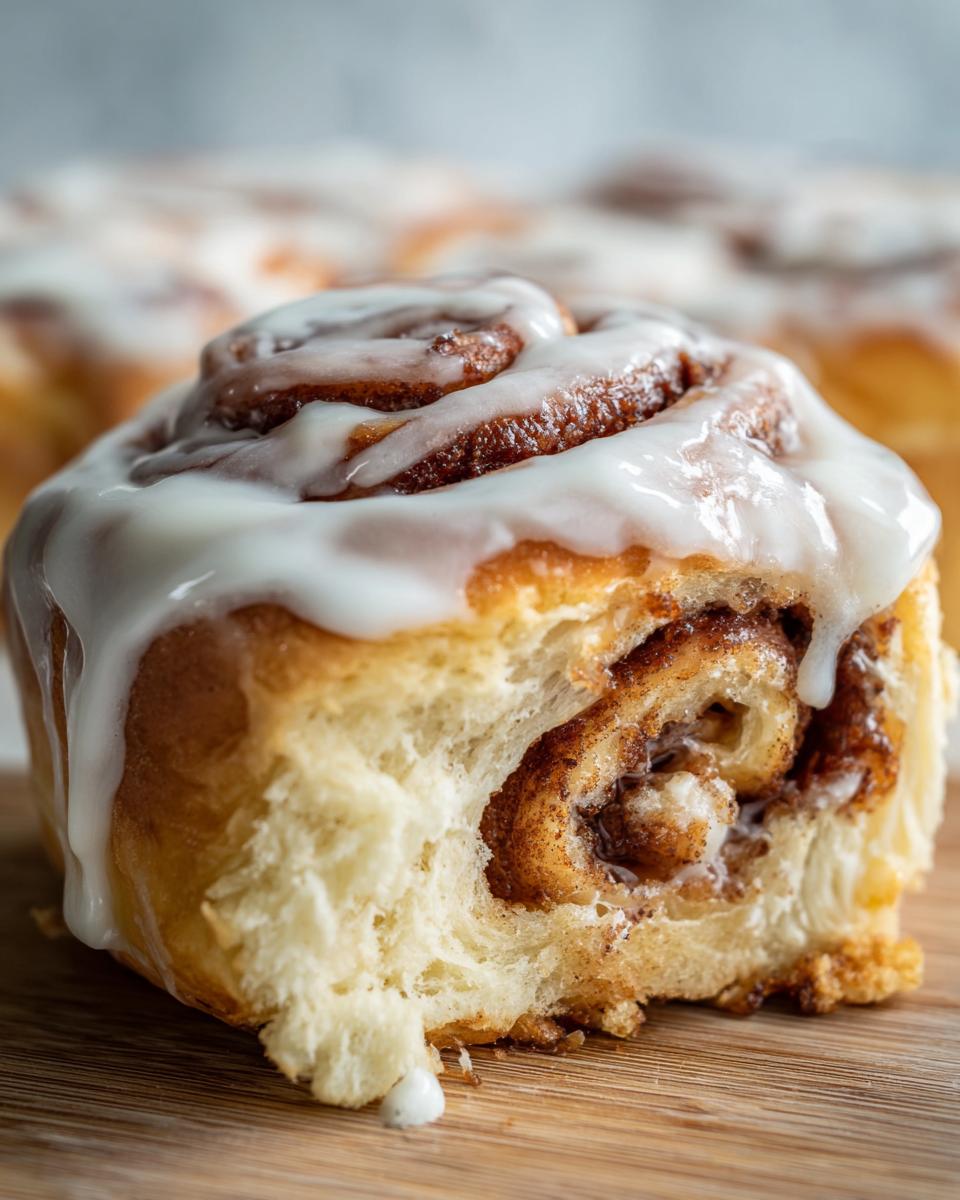
Once it punches down beautifully, we roll it out into that big 12 by 18 inch rectangle. This is where you slather it with the softened butter—don’t skimp! Then, sprinkle that glorious cinnamon-sugar mix right to the edges. You roll that log up as tightly as you can manage. Seriously, wrap it tight! Tightly rolled dough means beautiful, distinct swirls when we slice it later. Cut those 12 beauties, place them in that greased 9×13 pan, and let them nap for one more rise before they hit the oven. Remember to preheat that oven to 375 degrees while they’re taking their final rest!
Mastering the Dough Rise for Fluffy Cinnamon Rolls
The two rises are crucial for these soft treats. The first rise takes about an hour to an hour and a half until it’s doubled. The second rise, after you’ve sliced and panned them, is quicker—about 30 minutes. You’re looking for them to puff up and almost touch each other in the pan. If your kitchen is chilly, don’t just leave the bowl on the counter! I always turn my oven off, put the bowl inside, and place a mug of steaming hot water next to it. That warm, steamy environment is the perfect climate for happy yeast. Don’t let them over-proof, though; that’s when they collapse in the oven!
The Secret to Evenly Swirled Cinnamon Roll Filling
This is where so many people lose the battle! You need that half-cup of butter for the filling to be really soft, almost spreadable, but not melted. If it’s melted, it just pools at the bottom of the pan instead of creating an even layer across the dough surface. Use an offset spatula to press it out evenly all the way to the long edges. When you sprinkle that cinnamon-sugar mix, make sure it’s evenly distributed too, or you’ll end up with a huge clump of cinnamon in one roll and none in the next!
When rolling that long log, be firm and deliberate. Don’t worry if you hear a little crackle—that’s normal. The key is to keep it tight as you go. If you leave gaps, that wonderful filling leaks out during the second rise and burns on the bottom of your pan. When you cut them, grab a piece of unflavored dental floss or a sharp, thin knife. Floss works amazing because it presses straight down without squishing the fragile layers you just worked so hard to create. I know you can find our privacy policy details here if you need them: Privacy Policy.
Crafting the Signature Cream Cheese Icing for Your Cinnamon Roll
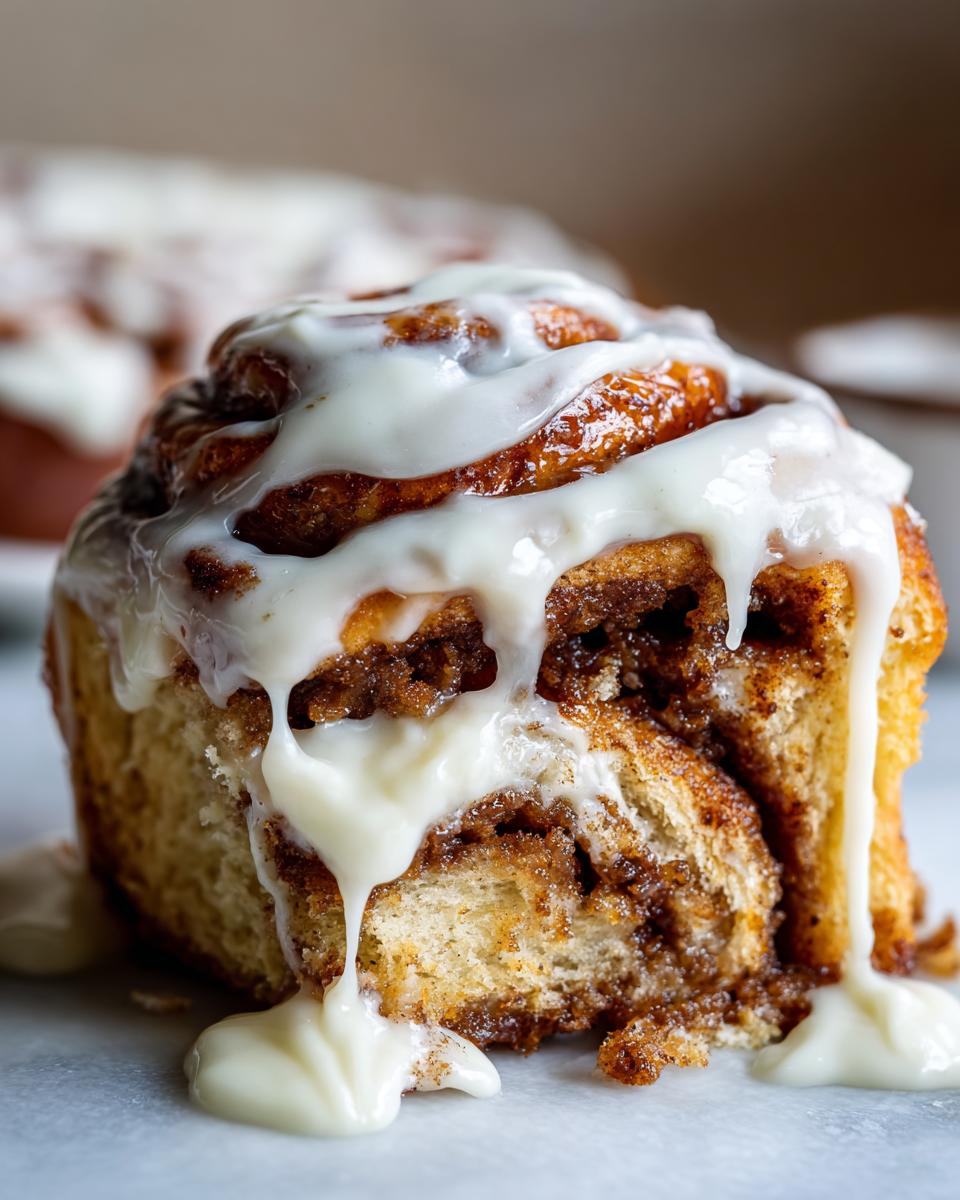
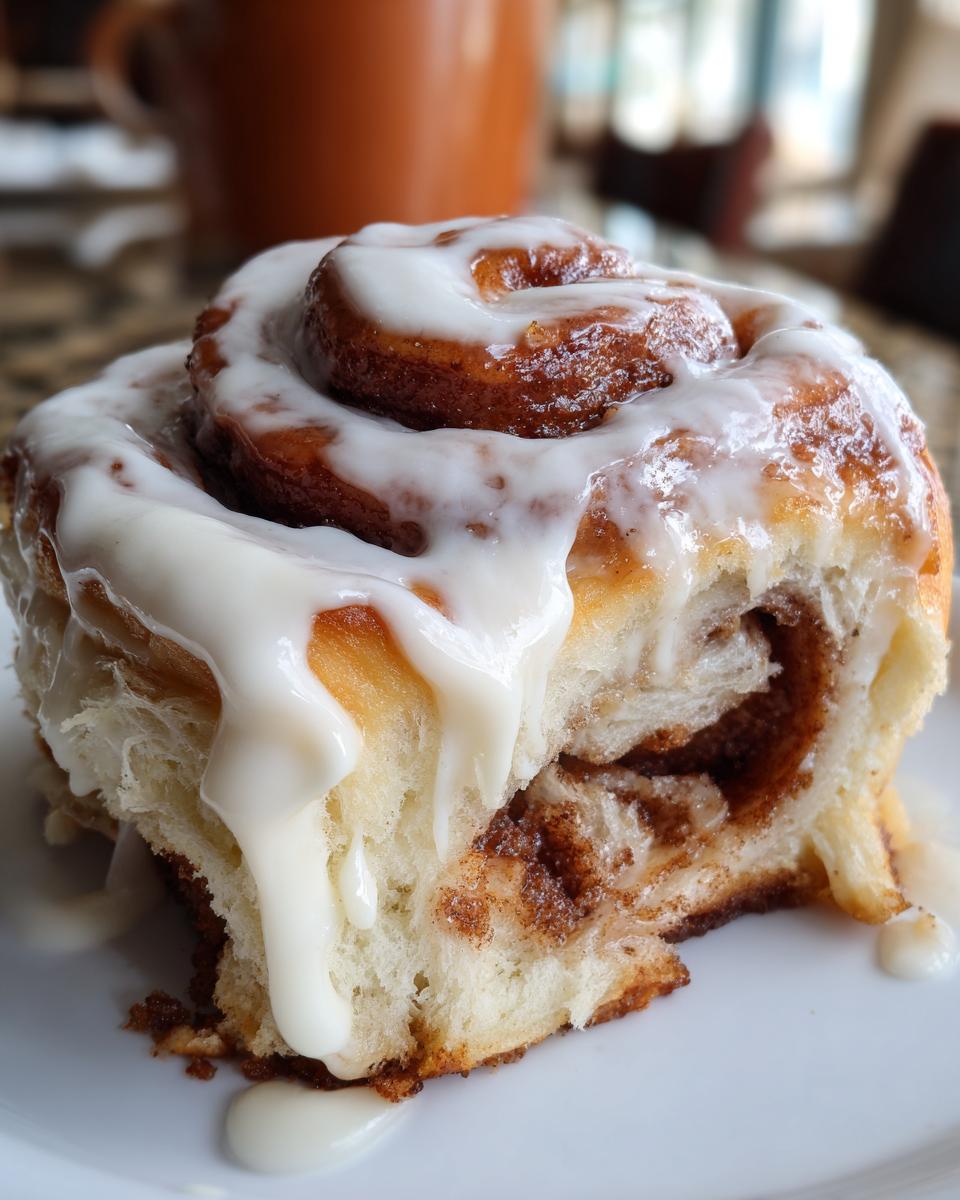
Listen, rolls this good deserve the best topping! We aren’t making a thin, watery glaze here; we are making the famously thick, slightly tangy cream cheese icing that makes people reach for seconds. This is the absolute marriage of sweet and tart perfection that truly completes this sweet breakfast recipe.
The biggest tip I can give you for lump-free icing is about temperature. You need your cream cheese *and* your butter to be thoroughly softened—think room temperature soft, where your finger leaves an indent, but they absolutely cannot be melted or greasy looking. If they’re too warm, the powdered sugar will dissolve too quickly and you’ll end up with soup. Beat those two together first until they are silky smooth and perfectly combined. Seriously, don’t rush this initial creaming!
Once you have a smooth base, gradually add in that powdered sugar. I mean gradually! If you dump it all in at once, you’re guaranteed a sugar cloud explosion that will coat your entire kitchen. After the sugar is incorporated—and you notice the mixture getting thick—start adding your vanilla and that single tablespoon of milk. This is where you play with consistency. If it looks like thick paste, add another half-teaspoon of milk. Keep adding tiny amounts until it starts to look slightly pourable, but still has enough body to sit nicely on top of the warm roll without immediately running off the sides. You want it thick enough to hold its shape but creamy enough to spread easily while still warm. That perfect texture is what separates the good rolls from the legendary ones!
Tips for Success When Making Homemade Pastry Cinnamon Rolls
Even with the best recipe, sometimes simple mistakes can trip you up when you’re making intricate homemade pastry like this. I want you to avoid the minor setbacks that turn a perfect morning into a sticky mess! These little pieces of advice are the things I only learned after burning a few batches or slicing into a squashed roll. These tips are gold, trust me.
First, let’s talk about the rolling surface. If you’re tempted to just dump flour everywhere so the dough won’t stick, don’t! Too much flour gets incorporated into the dough during the roll-up, leading to dry, heavy rings instead of fluffy layers. Use just enough flour to keep the rolling pin from sticking initially, maybe a light dusting. If the dough starts sticking as you roll, gently use a bench scraper to lift the edge and add just a whisper of flour underneath. We want supple dough, not tough dough.
Second, remember what I said about slicing? Don’t use a big chef’s knife and press down like you’re chopping wood! That crushes the delicate air pockets you worked so hard to create during the proofing stage. Grab that unflavored dental floss or, if you have one, a thin piece of wire. Slide it under the log and cross the ends over the top to cut cleanly. If you cut cleanly, the rolls retain their beautiful spiral shape and rise higher in the pan after that second rest.
My third major tip revolves around the icing application. Wait just a moment longer than your instinct tells you! If you dump the thick cream cheese icing on when the rolls are scalding hot right out of the oven, it will melt into a sugary puddle that runs down the sides. You want them to be warm—like, pleasantly warm to the touch—but not piping hot. That slight cooling allows the icing to set just enough so it stays thick, gooey, and glorious right on top, ready for that perfect pull-apart experience. If you want to learn more about my philosophy on bringing joy to the table, you can read all about why I started this site here: About Bring Dish.
Storage and Reheating Instructions for Leftover Cinnamon Roll
Oh, the tragedy! If you actually have leftovers, you’ve done something amazing because these things usually disappear instantly. But when you do manage to save a couple for later—maybe breakfast tomorrow—you need to store them correctly so they don’t turn into little hockey pucks. The goal is resurrection; we want them tasting like they just came out of the oven!
For short-term storage—meaning if you plan on eating them the next day, which I highly recommend—just keep them right there in that 9×13 pan, covered tightly with plastic wrap or aluminum foil. Pop the whole thing on the counter at room temperature. They actually hold their softness really well for about 24 hours this way because the moisture from the icing helps keep things happy.
If you know you won’t get to them for several days, then the fridge is your friend. Cover them tightly, place them in the fridge, and they should be fine for up to four days. Don’t freeze them if you can avoid it! While you technically *can* freeze them once they’ve cooled completely (wrapped individually in plastic, then foil), the texture never seems quite as soft when thawed later on.
The Best Way to Reheat for That Freshly Baked Gooeyness
Okay, so they’re cold, maybe a little firm. Don’t even think about eating them cold! Reheating is essential for bringing back that melted icing and that fluffy interior. My absolute favorite way, the one that makes the house smell amazing again, is using the oven.
Wrap the roll or a small section tightly in aluminum foil. Pop that foil packet into a 350-degree oven for about 8 to 10 minutes. The foil traps the steam and gently warms everything through, making the cinnamon filling warm and gooey again. When you unwrap it, it’s perfect!
If you’re in a rush and only have a single roll, the microwave works in a pinch. But here’s the trick: place the roll on a microwave-safe plate and set a tiny, damp paper towel right on top of it—almost touching the icing. Microwave it on medium power for about 15 to 25 seconds. That damp towel creates necessary steam, preventing the bread from seizing up and turning firm, while the roller reheats quickly. Just watch it closely, because 5 extra seconds can turn wonderful into rubbery!
Frequently Asked Questions About the Cinnamon Roll Recipe
I know when you’re tackling a recipe like this, especially one involving yeast, you’re going to have a few burning questions. That’s totally normal, and honestly, I welcome them! Having your questions answered upfront makes this whole process feel much more like easy cinnamon rolls and less like a complicated science experiment.
Can I use instant yeast instead of active dry yeast?
Yes, you absolutely can! Many people prefer instant yeast because you don’t have to proof it separately in the warm milk first. If you’re using instant yeast, you can skip Step 1 completely and just stir the instant yeast directly into your dry ingredients (the flour, salt, sugar). The dough will still rise beautifully during that first proofing time. It just saves you a five-minute waiting period!
Why did my cinnamon roll dough get really hard when I kneaded it?
That usually means you added too much flour, which is a really common mistake when rolling out the big rectangle. If the dough feels stiff or tears easily when you try to stretch it, it means you developed the gluten too much, often from adding flour to stop sticking. Remember what I said about using floss to cut? Use that floss or a gentle scraper instead of adding flour! Stiffer dough makes for tough rolls, and we need fluffy here.
Can I make these cinnamon rolls completely ahead of time? The refrigerator dough sounds great!
Oh, yes, that slow, overnight rise in the fridge is my secret weapon for stress-free weekends! After you knead the dough in Step 3 and place it in the oiled bowl, instead of letting it rise on the counter, just cover it tightly with plastic wrap and stick it in the refrigerator overnight—for up to 24 hours. When you pull it out the next morning, let it sit on the counter for about an hour to warm up just enough to roll before you proceed with the filling and cutting steps. Instant breakfast glory!
Why should I add the icing when the rolls are only slightly warm?
If you ice them piping hot, the cream cheese and sugar melt right off, leaving a thin, sticky mess instead of that perfect, thick swirl we want. We want the rolls warm enough to melt the icing just a tiny bit so it sinks down into the crevices, but not so hot that it turns into liquid gold running all over the pan. A quick five-minute cooling time after they come out of the oven is the sweet spot before you get generous with that amazing topping. If you have other questions or want to reach out, feel free to use the contact form!
Estimated Nutritional Information for One Cinnamon Roll
I always feel a little awkward putting numbers next to something this delicious, but I know many of you like to see the breakdown of what you’re enjoying. Since we are making a rich, buttery, cream-cheese-iced pastry, this isn’t exactly a light snack! But that’s totally okay, because these are for celebrating, right?
Below is the estimated nutritional data for one of the 12 rolls, based on the ingredients listed in the recipe. Remember, these numbers are just a guide! If you use a lower-fat cream cheese or skip some of the icing, obviously those values will shift. My grandmother never worried about counting things like this; she just worried if everyone at the table was happy and full. Still, it’s helpful to have an idea!
- Serving Size: 1 roll
- Calories: 450
- Sugar: 45g
- Sodium: 350mg
- Fat: 22g
- Saturated Fat: 14g
- Protein: 6g
- Carbohydrates: 58g
Just a quick note: Since we are using room temperature butter, whole milk, and generously sized scoops of brown sugar, the fat and sugar content is naturally higher, which is exactly what guarantees that soft, homemade pastry texture we love so much. Enjoy every single decadent bite—you’ve earned it!
Share Your Experience Making This Cinnamon Roll
We’ve made it through the kneading, the rising, and the glorious moment of pulling them out of the oven dripping with icing! Food is all about connection, remember? That’s why I’d truly love to hear from you. Don’t just close the tab—come back and tell me how these turned out in your kitchen!
Did you go heavy on the cream cheese glaze? Were your swirls perfectly defined? Did the house smell like heaven? Please leave a rating right below this section and definitely drop a comment telling me what your favorite part was—was it the soft, pillowy dough, or the gooey center that sets these apart?
If you snapped a photo of your amazing batch, tag us on social media! Seeing your beautiful results lets me know that this simple recipe brought a little joy and connection to your table, which is why I do this in the first place. We are so glad you spent your time making these wonderful rolls with us. Before you run off to eat them all, take a peek at our Terms of Use, and keep checking back for more straightforward recipes meant for sharing!
PrintSoft and Gooey Homemade Cinnamon Rolls with Cream Cheese Icing
Follow this straightforward recipe for bakery-quality cinnamon rolls. This recipe yields soft, fluffy yeast rolls filled with a rich cinnamon-sugar mixture and topped with a sweet cream cheese glaze.
- Prep Time: 45 min
- Cook Time: 25 min
- Total Time: 135 min
- Yield: 12 servings 1x
- Category: Breakfast
- Method: Baking
- Cuisine: American
- Diet: Vegetarian
Ingredients
- 1 cup whole milk, warmed
- 2 1/4 teaspoons active dry yeast
- 1/2 cup granulated sugar, plus 1/4 cup for filling
- 1/2 cup unsalted butter, softened, plus 1/2 cup for filling
- 2 large eggs, room temperature
- 4 cups all-purpose flour, plus more for dusting
- 1 teaspoon salt
- 1/4 cup packed light brown sugar, for filling
- 2 tablespoons ground cinnamon
- For the Icing: 4 ounces cream cheese, softened
- 1/2 cup unsalted butter, softened
- 2 cups powdered sugar
- 1 teaspoon vanilla extract
- 1 tablespoon milk
Instructions
- Combine the warm milk and yeast in a large bowl. Let stand for 5 minutes until foamy.
- Stir in 1/2 cup granulated sugar, 1/2 cup softened butter, eggs, flour, and salt into the yeast mixture. Mix until a soft dough forms.
- Knead the dough on a lightly floured surface for 8 to 10 minutes until smooth and elastic. Place the dough in a lightly oiled bowl, turning to coat. Cover and let rise in a warm place for 1 to 1.5 hours, or until doubled in size.
- While the dough rises, prepare the filling. In a small bowl, mix the 1/4 cup granulated sugar, brown sugar, and ground cinnamon. Set aside.
- Punch down the risen dough. On a lightly floured surface, roll the dough into a 12×18 inch rectangle.
- Spread the remaining 1/2 cup softened butter evenly over the dough surface. Sprinkle the cinnamon-sugar mixture over the buttered dough.
- Starting from the long edge, tightly roll the dough into a log. Cut the log into 12 equal rolls.
- Place the rolls cut-side up in a greased 9×13 inch baking pan. Cover and let rise again for 30 minutes.
- Preheat your oven to 375 degrees Fahrenheit. Bake for 20 to 25 minutes, or until golden brown.
- While the rolls cool slightly, make the icing. Beat the softened cream cheese and butter together until smooth. Gradually beat in the powdered sugar, vanilla extract, and 1 tablespoon of milk until the icing is creamy.
- Spread the cream cheese icing generously over the warm cinnamon rolls before serving.
Notes
- For the softest rolls, use room temperature eggs and milk.
- If you want extra gooey rolls, use the full 1/2 cup of butter in the filling layer.
- You can make the dough ahead of time and let it rise slowly in the refrigerator overnight.
Nutrition
- Serving Size: 1 roll
- Calories: 450
- Sugar: 45g
- Sodium: 350mg
- Fat: 22g
- Saturated Fat: 14g
- Unsaturated Fat: 8g
- Trans Fat: 0.5g
- Carbohydrates: 58g
- Fiber: 2g
- Protein: 6g
- Cholesterol: 65mg