
There is honestly nothing better than the absolute comfort of pulling a warm loaf of homemade bread out of the oven. It just fills the house with the best aroma, right? But listen, I get it—sometimes you want that incredible homemade taste without waiting hours for yeast to do its thing. That’s why I have to share my absolute favorite **soda bread** recipe with you. It’s an easy, quick bread recipe that requires zero yeast, zero complicated steps, and it’s ready faster than ordering takeout!
This is pure, simple baking, the kind my grandmother taught me about—honest food made with minimal fuss. It’s about connecting with simple traditions, even when your own week is totally chaotic. If you’re looking for another one of those fuss-free loaves, check out my tips for making easy crusty homemade Italian bread, but today, we focus on this rustic beauty!
We’re keeping this classic Irish style front and center, focusing on the tangy buttermilk and that satisfying reaction between the baking soda and acid that makes the dough rise. Forget the long proofing times; this is bread for your real life.
- Why This Classic Irish Soda Bread Recipe Works Every Time
- Gathering Ingredients for Your Easy Soda Bread
- Step-by-Step Instructions for Perfect Soda Bread
- Tips for Success with Your Homemade Bread
- Serving Suggestions for Classic Soda Bread
- Storage and Reheating Instructions for Leftover Soda Bread
- Variations: Making Savory Soda Bread
- Frequently Asked Questions About Soda Bread Recipe
- Baking Connection: Share Your Homemade Soda Bread
Why This Classic Irish Soda Bread Recipe Works Every Time
When I first started baking bread, the long wait times for yeast breads drove me crazy. This **soda bread** recipe completely changed that for me! It’s my go-to when I need a satisfying, impressive-looking loaf but only have about an hour to spare. Trust me, this is the definition of a reliable **Quick Bread Recipe**.
What makes this method so foolproof, even for a **Beginner Bread Recipe** enthusiast? It all comes down to simplicity and reaction time. We rely on chemical leavening—baking soda reacting with buttermilk—which means no waiting for yeast activation. That’s why it’s so fast!
- Zero yeast means zero rising time—you mix it, shape it, and bake it!
- The buttermilk creates a beautiful tang that complements the simple flour base perfectly.
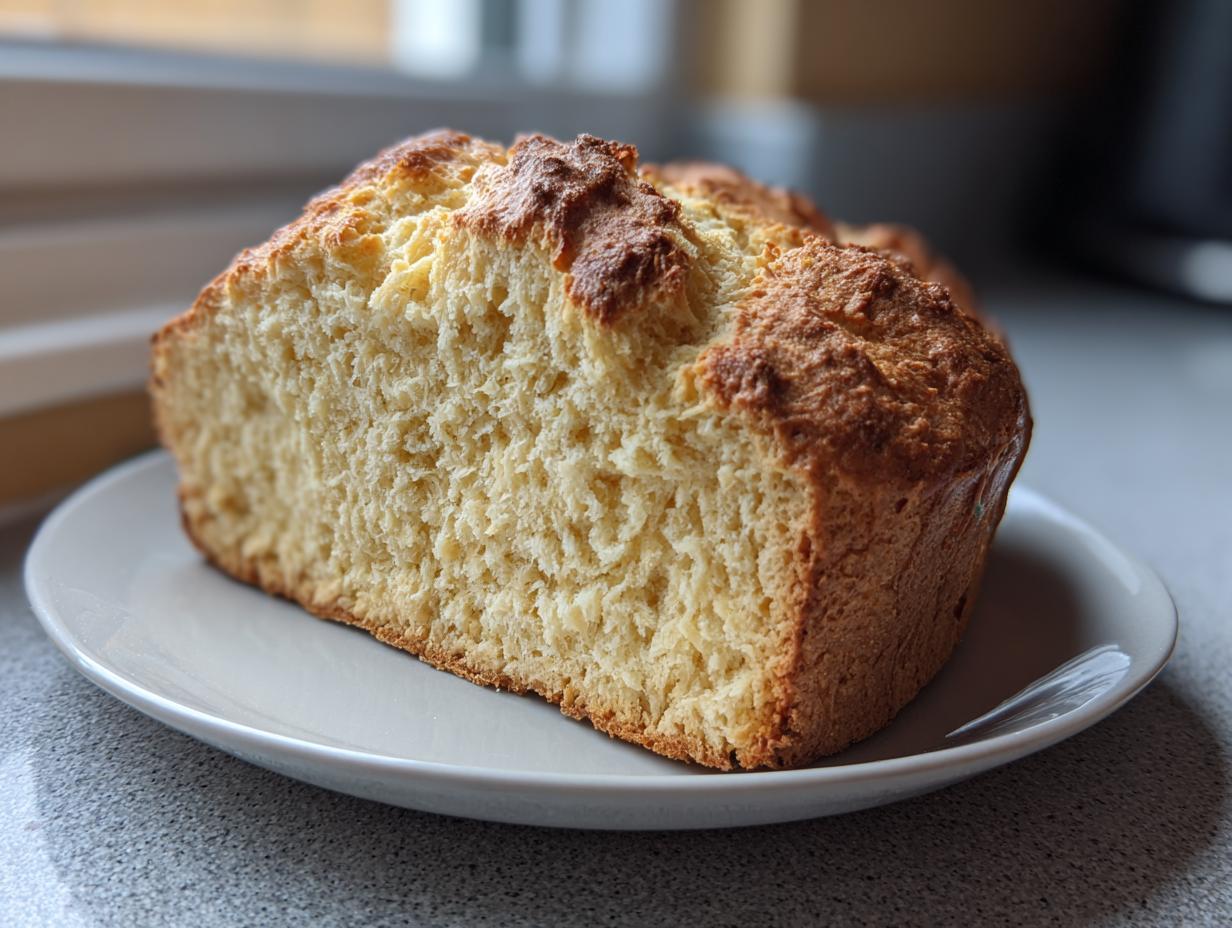
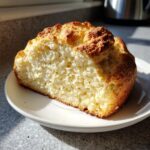
- It reliably delivers that incredible contrast: a sturdy, **crusty bread** exterior holding in a wonderfully **soft interior bread**.
If you’re looking for other no-fuss, reliable loaves, you should check out my tips for making soft fluffy bread, but honestly, nothing beats the rustic charm of this Irish classic.
Achieving That Perfect Crusty Bread Texture
The secret to that satisfying crackly crust isn’t complicated at all. First, we hit that oven temperature hard at 400°F (200°C). High heat sets the outside quickly! Second, don’t skip brushing the top with a tiny bit of melted butter right before it goes in. That little bit of fat helps create that gorgeous, golden, shatter-crisp exterior we all love.
Gathering Ingredients for Your Easy Soda Bread
The beauty of this **soda bread** is that it relies on pantry staples! Seriously, this is the kind of **Buttermilk Bread** you can whip up when the craving hits unexpectedly. There’s no special sourcing needed, which makes it such a fantastic, reliable recipe for everyday baking. Gather your measuring cups, because we are keeping this perfectly simple.
Because this is such a quick recipe, make sure everything is measured out before you even think about turning on the oven. The magic happens so fast once the wet and dry ingredients meet!
Essential Ingredients for Authentic Soda Bread
For a true, classic loaf, you don’t need much beyond these basics. Remember, we want that quick, honest flavor profile:
- 4 cups all-purpose flour
- 1 teaspoon baking soda (This is our lift, so don’t skimp!)
- 1 teaspoon salt
- 1 3/4 cups buttermilk (This is non-negotiable for the reaction!)
I also like to keep about a tablespoon of melted butter ready to brush on top for that gorgeous golden finish later on.
Optional Additions for Traditional Soda Bread
If you prefer a slightly sweeter loaf, or if you’re looking to honor older traditions where a little sweetness was often added, you can absolutely incorporate these extras. They mix in right along with the dry ingredients!
- 1 tablespoon sugar (optional, just for a hint of sweetness)
- 1/4 cup raisins or currants (optional, for that little burst of fruity chew)
If you are looking for another recipe featuring fruit and simple mixing, you absolutely have to try my easy, moist date nut bread next time!
Step-by-Step Instructions for Perfect Soda Bread
Okay, this is where the magic, and the speed, really happens! Because we are using baking soda and buttermilk, this **soda bread** is highly reactive. That means you cannot dawdle here. My biggest piece of advice for any **No Yeast Bread** is to treat the dough gently and move quickly. Precision matters as much as speed in these first few moments.
First things first: make sure your oven is already humming along at 400°F (200°C) and you have your baking sheet ready and lightly floured. We want that heat waiting for the loaf! If you want more ideas for quick cooking that really delights people, you should check out my tips for the best classic deviled eggs recipe!
Mixing the Soda Bread Dough Quickly
Start by whisking all your dry ingredients together well in a big bowl until they look uniform. Then, make a little dip right in the center and pour in ALL that buttermilk at once. Don’t mix it piece by piece! Grab a wooden spoon or just your hands—whichever feels faster—and just bring the mixture together. You are looking for a dough that is soft and a little sticky. If you work it too much, you’ll develop the gluten too much, and you’ll end up with a tough brick instead of tender bread. Stop mixing the absolute second you see no more dry flour pockets. Seriously, a few lumps are totally fine!
Shaping and Scoring Your Soda Bread Loaf
Lightly flour your workbench. Gently turn the sticky dough out. We are not kneading here; we are just coaxing it into shape! Use your hands to gently form one big, rustic round, about two inches high. Place it right onto your prepared baking sheet.
Now for the famous step! Take a really sharp knife and cut a deep cross right into the top. This cross needs to go almost all the way down to the bottom of the loaf. My grandmother always said this helps the bread cook evenly and lets the fairies out! After that, brush the top very lightly with your melted butter. Into the hot oven it goes for about 35 to 45 minutes.
Tips for Success with Your Homemade Bread
I really want you to nail this on your first try! This isn’t complicated baking, but because we rely on a chemical reaction instead of slow yeast growth, timing and ingredients are everything. Getting this recipe right is such a huge confidence booster for anyone new to **Simple Baking**; it proves you can make fantastic **Homemade Bread** without becoming a full-time baker!
The reaction between baking soda and buttermilk is critical here. If your buttermilk is old or weak, the soda won’t bubble up enough, and your loaf will be dense and flat. That’s why knowing your ingredients—and maybe having a backup plan—is my favorite part of teaching this **Beginner Bread Recipe**!
Buttermilk Substitutions for Soda Bread
Okay, what if you’re staring at your recipe card, ready to go, and realize you’re out of buttermilk? Don’t panic! This is a classic kitchen predicament, and luckily, my grandmother had a workaround for everything.
If you don’t have buttermilk on hand—and remember, this is essential for the lift—you can make a quick substitute right in your measuring cup. Just take 1 3/4 cups of regular whole or 2% milk and stir in about 1 tablespoon of white vinegar or fresh lemon juice. Let that mixture sit on the counter for about five minutes. You’ll see it start to curdle slightly—that’s the acid you need to activate the baking soda! Pour that right into the dry mix when you’re ready.
When is the Soda Bread Done Baking?
The visual cues are important—you want that lovely golden brown crust—but the true winner for testing doneness in **soda bread** is sound. You can’t fake the sound of a fully baked loaf!
Once the baking time is nearly up, carefully take the loaf out of the oven (use those good mitts!). Flip it over onto its side or bottom. Give it a good, solid tap with your knuckles. If it sounds wonderfully hollow, like tapping a wooden door, it’s done! If it sounds dull or dense, pop it back in the oven for another five minutes and test again. That hollow sound means the steam has cooked all the way through the center, giving you that perfect crumb.
If you’re looking for another comforting meal that pairs perfectly with this rustic loaf, you have to make my easy, creamy pumpkin curry. The combination is absolutely divine!
Serving Suggestions for Classic Soda Bread
You’ve done the hard part—you baked the loaf! Since this **soda bread** is best eaten the day it comes out of the oven, we need to talk about how to serve it immediately to maximize that crusty outside and soft interior. This bread shines brightest when it’s still warm, maybe even slightly steamy when you slice into it. It’s true comfort baking, and it deserves a spot right next to something warming and hearty!
The most traditional way is unbelievably simple: good quality, thick butter. Spread it on while the slice is still warm and watch it melt right in. It’s pure heaven. But honestly, because this is such a fantastic, reliable loaf, it pairs well with nearly anything!
For a truly cozy, Irish-inspired meal, you absolutely have to pair it with a thick, savory stew or soup. I always make a huge batch of my Philly Cheese Steak Soup when I have fresh soda bread ready. That crusty exterior is just designed to mop up every last bit of rich broth. You can also find some wonderful traditional inspiration over at this classic Irish recipe to see what else goes well!
If you’re serving it for breakfast or a lighter lunch, don’t forget the jams and preserves! The slight tang from the buttermilk in the bread is a perfect counterpoint to sweet raspberry jam or even some sharp marmalade. However you serve it, enjoy that quick, homemade goodness!
Storage and Reheating Instructions for Leftover Soda Bread
Now, here’s the honest truth about this **soda bread**: because we skip the yeast and rely on that quick chemical rise, it truly sings the loudest on the day it comes out of the oven. That lovely crust can soften overnight, and that’s just the nature of quick breads! But don’t toss it out if you have leftovers; we just need to treat it gently to bring back some of that magic.
The key to keeping it nice is getting it sealed up right away. I always let the loaf cool completely on a wire rack—seriously, wait until it’s just warm to the touch—and then wrap it tightly. I prefer wrapping it first in plastic wrap to seal out air, and then tucking that into an airtight container or a zipper-top bag. Storing it on the counter is fine for a day or two; I wouldn’t refrigerate it because that tends to dry out bread faster.
If you happen to have a half-eaten loaf after day one, don’t worry! Reheating is your best friend for reviving that crusty exterior. You can slice off what you need and pop those slices under the broiler for just a minute or two. Watch them like a hawk; they burn fast! If you’re reheating a whole half-loaf, wrapping it snugly in foil and heating it in a 350°F oven for about 10 minutes works wonders. It steams the inside back to softness while heating the outside again.

When you’re ready for a truly comforting meal that pairs unbelievably well with reheated slices, you have to make my bangers and mash recipe. It’s the perfect hearty pairing for a slice of day-old Irish **soda bread**!
Variations: Making Savory Soda Bread
While the classic recipe with optional raisins is divine, sometimes you just need something savory to stand up against a really hearty soup or stew, right? If you’ve mastered the basic **soda bread**, it’s time to start getting creative! The beauty of this quick bread is its adaptability. Since the base recipe is so simple, adding savory elements works like a charm.
I love experimenting with mix-ins because it turns this simple side dish into a whole new star of the meal. You don’t need a whole new recipe card, just a few fantastic additions swapped in when you mix the dry ingredients. Think about how incredible this would be dipped into a rich creamy homemade beer cheese dip!
The ultimate savory twist, in my opinion, is leaning into classic flavors like cheese and herbs. You’re essentially creating a heartier version of what people call **Cheddar Herb Bread**!
Here are my favorite ways to pivot this recipe toward the savory side:
- Cheese Power: Swap out the optional raisins for 1 cup of sharp, shredded cheddar cheese. Stir it in right when you add the buttermilk. The cheese melts slightly while baking, creating pockets of gooey heaven inside that soft interior.
- Herbal Infusion: Add about 2 tablespoons of chopped fresh herbs into the dry mix. Rosemary, thyme, and chives work incredibly well together and really amp up the farmhouse flavor.
- Spice Kick: A small pinch of black pepper or even a quarter teaspoon of cayenne pepper adds a lovely warmth without making it spicy hot.
If you want to see an amazing finished product using cheese and herbs, you should definitely peek at the inspiration on the Cheddar and Herb Soda Bread recipe I saw.
Remember, when you add wet ingredients like cheese, the dough might feel a little stickier than usual, so don’t panic! Just treat it gently when you turn it out to shape it. This savory **soda bread** is guaranteed to be a huge hit at your next dinner!
Frequently Asked Questions About Soda Bread Recipe
I know you’ve got questions, because when people hear how fast this **Soda Bread Recipe** is, they sometimes don’t believe it! I’ve gathered the most common things folks ask me when they’re trying this for the first time. It’s important to know the little details so you get that perfect, comforting loaf every time. Don’t worry if you think you messed up the technique—I have the answers!
I encourage you to try out my easy chicken fried rice recipe next week to keep that effortless cooking streak going, but for now, let’s talk bread!
Can I make this soda bread without buttermilk?
Yes, you absolutely can, but you must replace the *acid* that buttermilk provides! If you look back in the tips section, I explained the little vinegar or lemon juice trick. You just add 1 tablespoon of white vinegar or lemon juice per 1 3/4 cups of regular milk. Let it sit for about five minutes until it looks slightly sour, and then use that mixture exactly where the recipe calls for buttermilk. It makes for a wonderful **No Yeast Bread** alternative!
Is soda bread supposed to be dense?
That’s such a great question about texture! Yes, **Irish Soda Bread** is naturally denser than a fluffy, airy yeast bread like brioche. That density is part of its charm—it’s hearty, right? However, there’s a big difference between naturally dense and tough! If your bread turns out rock-hard, you overmixed the dough. Remember, we wanted it sticky and only mixed until *just* combined. Overmixing develops gluten, and gluten equals chewiness we don’t want in a **Quick Bread Recipe** unless we’re aiming for pavement!
Why is cutting the cross on top so important?
I mentioned this briefly, but people ask all the time! Tradition says you cut the cross to let the fairies out or bless the bread, which is sweet, but scientifically, it’s necessary for even cooking. Since this loaf is relatively thick and made without commercial yeast, the heat needs a clear path down to the center. If you skip that deep score, the outer crust sets too fast, and you’ll end up with a heavy, doughy middle section.
Is this bread better fresh or the next day?
Honestly, the single best moment to eat this **soda bread** is within about an hour of it coming out of the oven, cooled just enough that you can butter it without melting the butter right off the plate! It’s got that perfect juxtaposition of a really crisp crust against a soft, slightly steamy interior. That’s why this is the ultimate **Fast Dinner Side Dish**—it’s ready when you are!
Baking Connection: Share Your Homemade Soda Bread
Wow, you made it! You’ve successfully navigated the mixing, the scoring, and the waiting game to pull off a beautiful, rustic loaf of homemade **soda bread**. Isn’t that amazing? That’s exactly the kind of confidence I want you to feel every time you step into the kitchen.
At Bring Dish, our entire mission is about connection, and what connects us better than sharing the results of our creative efforts? I truly am so excited to see your rustic loaves!
When you get a chance, please come back right here and drop a comment below telling me how it turned out. Did you love the crust? Did you add anything spicy or savory? Tell me everything! If you took a photo of your finished **soda bread**—especially if you served it with a big bowl of stew—I’d absolutely love for you to share it with us by getting in touch through my contact page!
Your feedback helps me—and other bakers just starting out—know that this simple, no-fuss approach works in real kitchens across the country. Happy baking, friends, and thank you for sharing a piece of your table with ours!
PrintClassic Irish Soda Bread: Quick, Easy, No Yeast Recipe
Make this traditional Irish soda bread with simple pantry ingredients. It bakes quickly, resulting in a crusty outside and a soft interior, perfect served with butter or soup.
- Prep Time: 10 min
- Cook Time: 40 min
- Total Time: 50 min
- Yield: 8 servings 1x
- Category: Side Dish
- Method: Baking
- Cuisine: Irish
- Diet: Vegetarian
Ingredients
- 4 cups all-purpose flour
- 1 teaspoon baking soda
- 1 teaspoon salt
- 1 3/4 cups buttermilk
- 1 tablespoon sugar (optional, for slight sweetness)
- 1/4 cup raisins or currants (optional, for traditional touch)
- 1 tablespoon melted butter (for brushing top)
Instructions
- Preheat your oven to 400°F (200°C). Lightly flour a baking sheet.
- In a large bowl, whisk together the flour, baking soda, and salt. If using, mix in the sugar and raisins or currants.
- Make a well in the center of the dry ingredients and pour in the buttermilk all at once.
- Mix the ingredients quickly with a wooden spoon or your hands until just combined into a soft, sticky dough. Do not overmix.
- Turn the dough out onto a lightly floured surface. Gently shape it into a round loaf, about 2 inches high. Avoid heavy kneading.
- Place the loaf on the prepared baking sheet. Use a sharp knife to cut a deep cross into the top of the loaf, cutting almost to the bottom.
- Brush the top surface of the dough lightly with melted butter.
- Bake for 35 to 45 minutes, or until the loaf sounds hollow when tapped on the bottom.
- Transfer the soda bread to a wire rack to cool slightly before slicing and serving warm.
Notes
- If you do not have buttermilk, mix 1 3/4 cups of regular milk with 1 tablespoon of white vinegar or lemon juice and let it sit for 5 minutes before using.
- This bread is best eaten the day it is baked for the best texture.
- Serve this homemade bread alongside your favorite stew or soup for a comforting meal.
Nutrition
- Serving Size: 1 slice
- Calories: 250
- Sugar: 3
- Sodium: 350
- Fat: 3
- Saturated Fat: 2
- Unsaturated Fat: 1
- Trans Fat: 0
- Carbohydrates: 50
- Fiber: 2
- Protein: 7
- Cholesterol: 10