
You know those moments? When a serious craving hits for something deeply sweet, utterly rich, and unbelievably comforting, but the thought of turning on the oven makes you sigh? I totally get it. That’s exactly why these easy peanut butter bars have become my absolute go-to. They are the definition of simple indulgence. Back in my corporate marketing days, I needed fast fuel that tasted like childhood, and that’s what these no-bake wonders deliver every single time. They prove that the very best desserts are often the ones that require the least fuss.
If you’re looking for a quick sweet treat that tastes like a hug, stick with me. We’ll get this creamy, chocolate-topped magic sorted in about fifteen minutes of active time. I promise, once you try these, they’ll move right up to the top of your preferred peanut butter dessert recipes list!
- Why These Are the Best Easy Peanut Butter Bars (No Oven Required)
- Gathering Ingredients for Your Creamy Peanut Butter Bars
- Simple Steps to Make Perfect No Bake Peanut Butter Bars
- Tips for Success with Homemade Peanut Butter Squares
- Storing and Reheating Your Indulgent Dessert Bars
- Variations on Classic Peanut Butter Bars
- Frequently Asked Questions About These Peanut Butter Dessert Recipes
- Estimated Nutrition for Our Chocolate Peanut Butter Bars
- Share Your Experience Making These Simple Dessert Bars
Why These Are the Best Easy Peanut Butter Bars (No Oven Required)
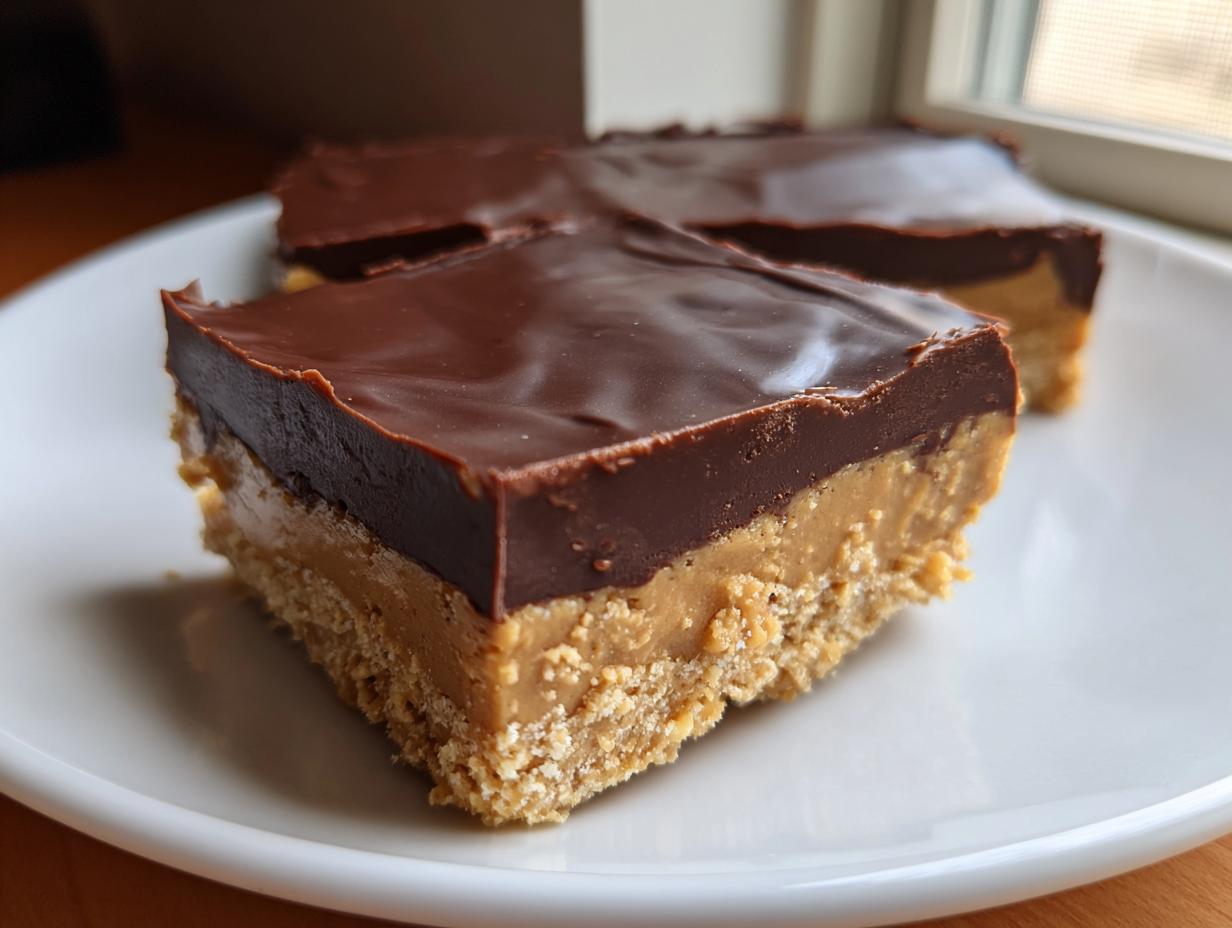
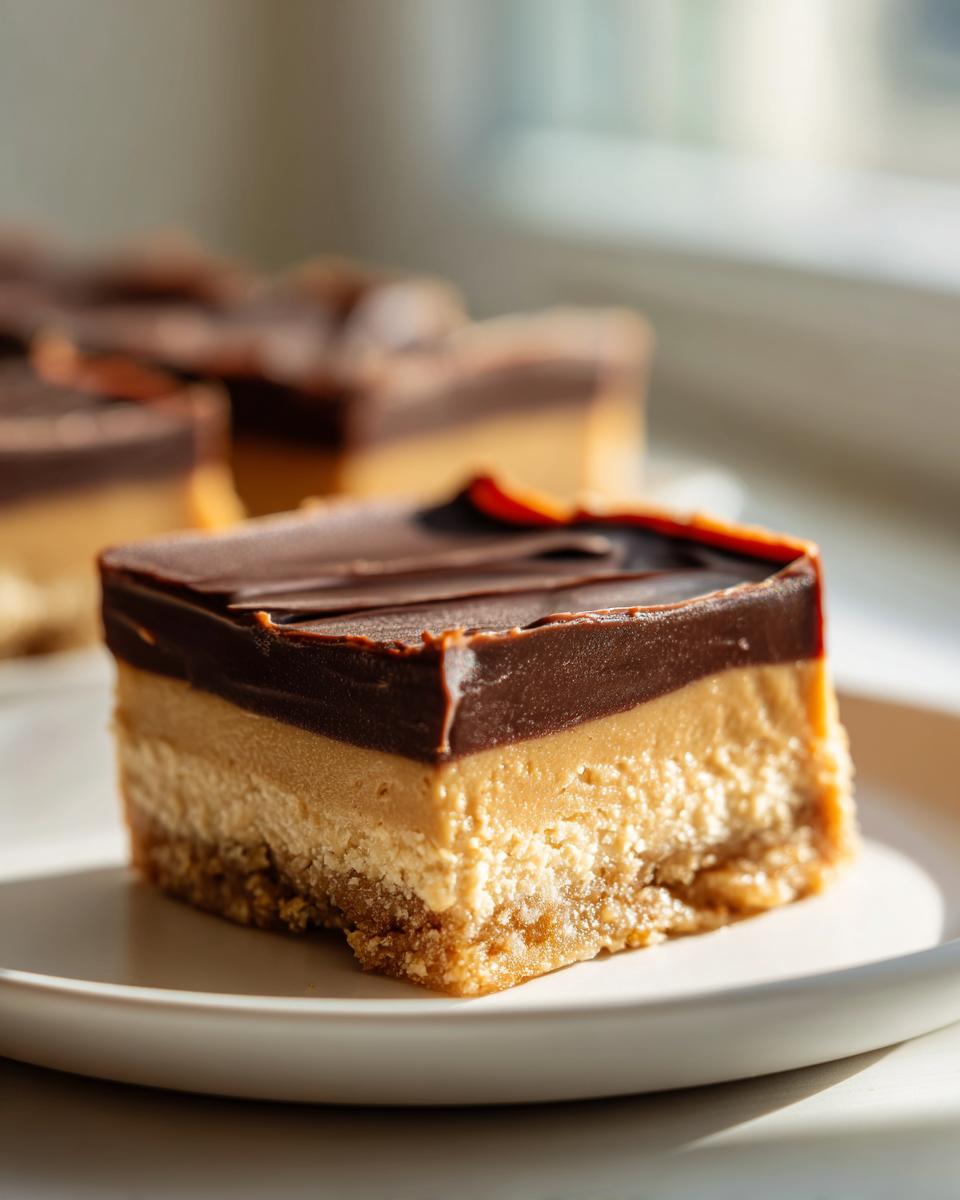
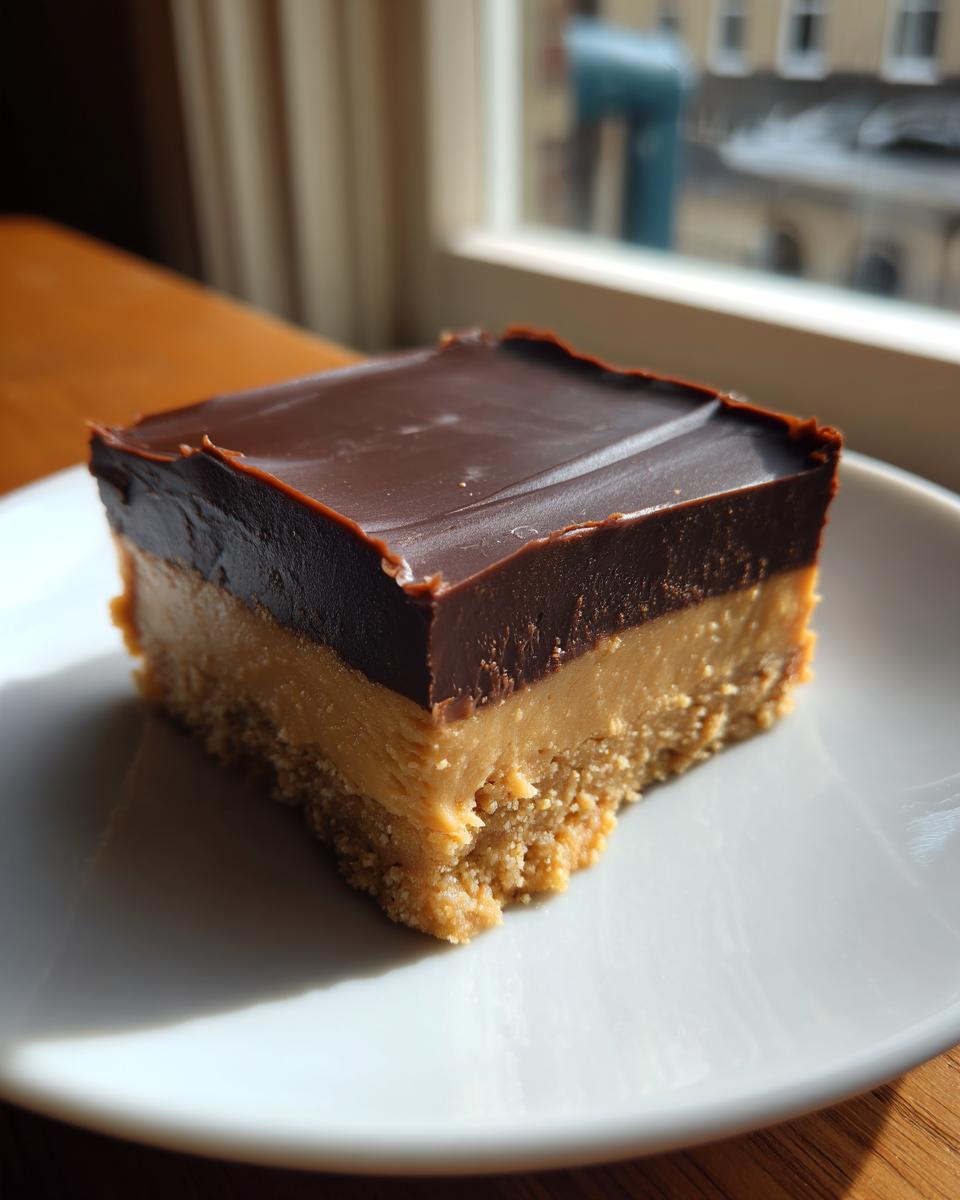
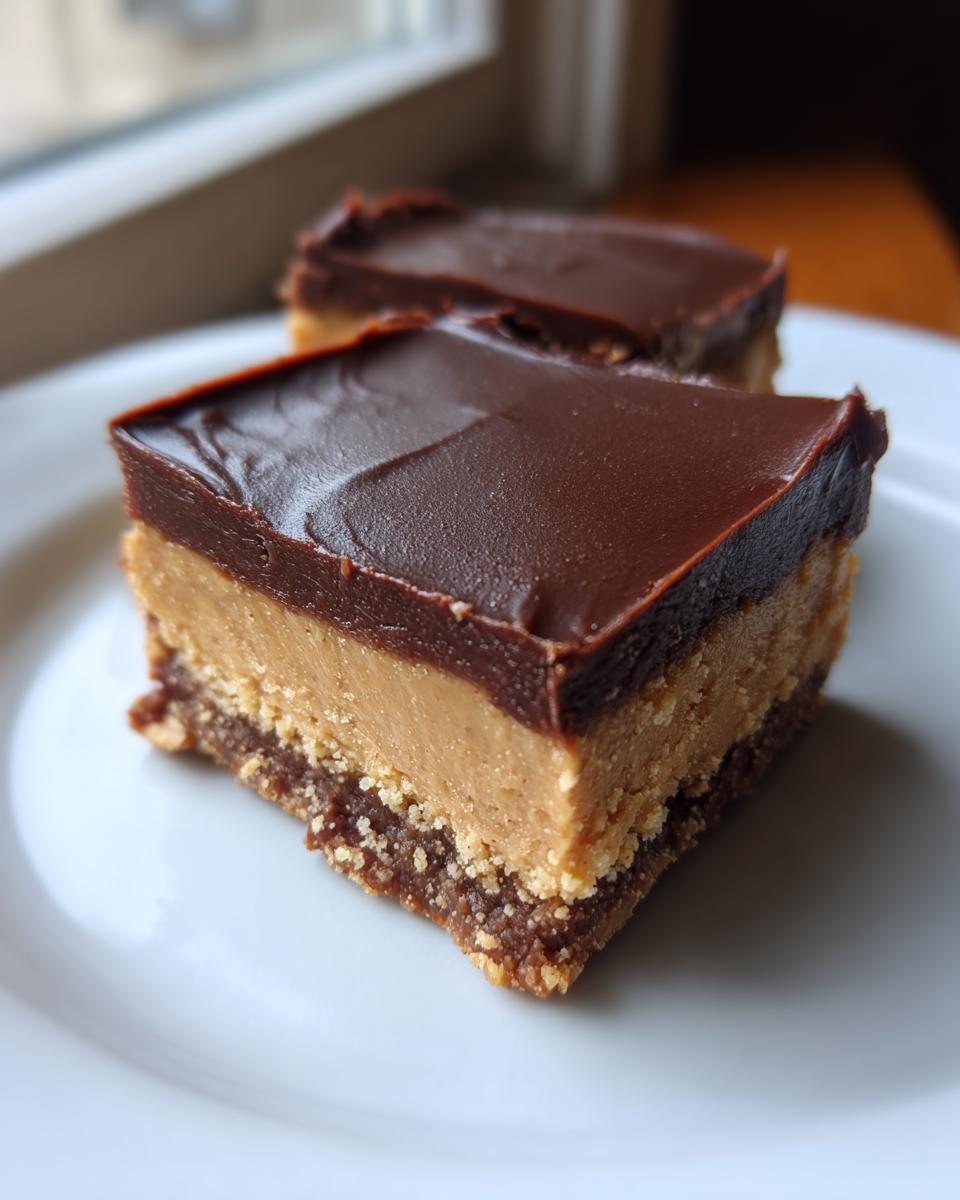
If you need chocolate peanut butter bars that yield maximum flavor for minimal effort, this is your winner! These homemade peanut butter squares require zero baking time, which is a lifesaver on hot days or when the energy just isn’t there. Honestly, they are the definition of simple dessert bars.
- They deliver that rich, creamy texture you crave.
- The base holds together perfectly—no crumbling disasters here!
- They satisfy serious sweet tooth urges instantly.
Quick Sweet Treats Ready Fast
We’re talking 15 minutes of actual hands-on time, folks! That’s it. Because these are no oven desserts, the only waiting time is chilling. This fits perfectly into my philosophy of making good food accessible for real life, even when you’re juggling a million things. These are my go-to quick dessert bars when company shows up unexpectedly!
Gathering Ingredients for Your Creamy Peanut Butter Bars
Okay, since these are no bake peanut butter bars, you won’t need your oven, but you absolutely need the right crew of ingredients to get that famous texture. I’ve listed everything out below. Keep in mind, we are aiming for that perfectly smooth, rich filling, so the quality of your spreads matters!
- 1 cup creamy peanut butter (for the base!)
- 1 cup powdered sugar
- 1/2 cup unsalted butter, softened (this is key—softened, not melted!)
- 1 1/2 cups graham cracker crumbs
- 1 cup semi-sweet chocolate chips
- 1/4 cup creamy peanut butter (reserved just for the top layer)
These simple ingredients come together fast. For those bigger chocolate needs, you can check out my recipe for easy homemade chocolate syrup, but for these bars, the chips work best for that firm top layer.
Ingredient Notes and Substitutions for Peanut Butter Bars
Let’s talk peanut butter for a minute, because this selection makes or breaks the smoothness of your peanut butter bars. You really want to stick with commercial creamy peanut butter here—think Jif or Skippy. Natural peanut butter often separates and has too much oil, which can make your base greasy and weak. We need that structure!
If you absolutely must change the texture, you can swap one of the peanut butter cups for crunchy peanut butter, but only in the bottom layer. Just know that it will change the level of smooth creaminess everyone expects from these indulgent dessert bars.
Simple Steps to Make Perfect No Bake Peanut Butter Bars
This is where the magic, and the lack of oven heat, really comes into play! Because we aren’t baking, technique is everything for these delicious peanut butter dessert recipes. Don’t rush the pressing part; that base needs to be sturdy enough to handle that glorious chocolate topcoat we are adding later. If you need inspiration for other simple layered bakes later on, check out my easy pizza pasta bake recipe—it’s all about building great layers!
Preparing the Creamy Peanut Butter Base Layer
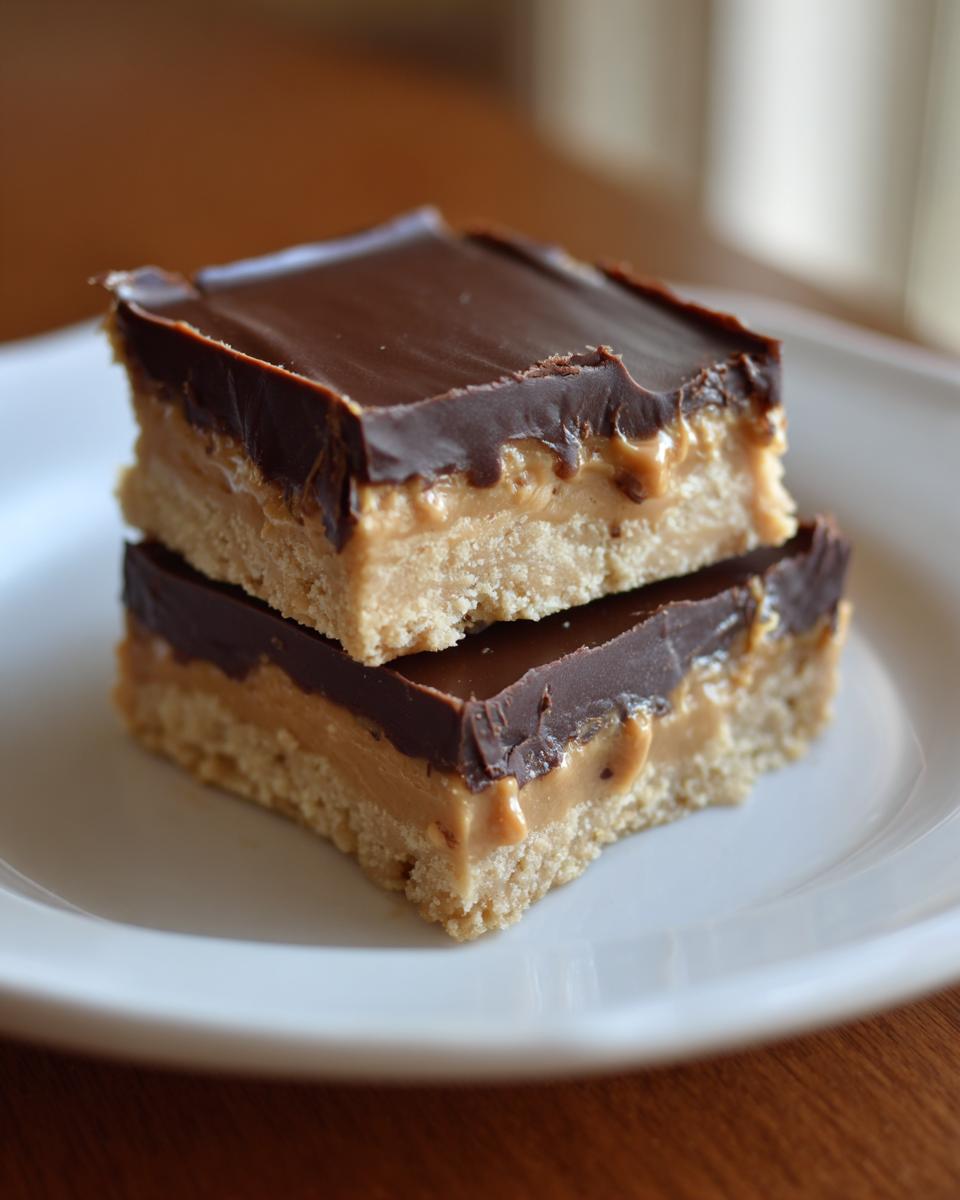
First things first: grab that 8×8 pan and line it with parchment paper. Make sure that paper sticks up over the sides—I mean like big handles sticking out! That overhang is your ticket to easily lifting these bars out cleanly later on. Trust me, trying to scoop these out is a recipe for disaster!
Next, mix your 1 cup of peanut butter, powdered sugar, softened butter, and graham cracker crumbs until it looks like glorious wet sand. Then, press it down into that prepared pan. And I mean *press*! Get a flat spatula or the bottom of a measuring cup and really compact that mixture. You want a rock-solid foundation for your peanut butter bars.
Creating and Applying the Chocolate Peanut Butter Topping
Now for the payoff! In a separate microwave-safe bowl, combine your chocolate chips and that reserved 1/4 cup of peanut butter. Here’s my big tip: microwave in short, 30-second bursts. Stir it thoroughly after every burst. If you just blast it for 60 seconds straight, you run the risk of seizing that chocolate, and nobody wants a grainy topping!
Once it’s totally smooth—silky, even—pour it right over that base layer and smooth it out quickly. Then, stick the whole pan into the fridge for at least two hours until that top coat is completely firm. These chilling times are non-negotiable if you want those clean, impressive slices!
Tips for Success with Homemade Peanut Butter Squares
I want everyone who makes these peanut butter bars to have total success. Because we aren’t baking them, temperature control and chilling are the two most important steps, believe it or not! You saw in the instructions, but I want to really stress the chilling time. You must chill the entire pan for a solid two hours before even thinking about cutting. This ensures those clean, professional-looking squares, not sad, smashed edges.
If you are looking for a slightly richer, even more fudgy topping—almost like a Buckeye consistency—try stirring in just one tiny teaspoon of coconut oil when you melt your chocolate and peanut butter together. It changes the texture beautifully, making the topping melt in your mouth. For more foundational baking secrets, check out my thoughts on classic butter cookie techniques—they apply here, too!
Storing and Reheating Your Indulgent Dessert Bars
The best part about these peanut butter bars is that they actually taste better the next day! Since they don’t have anything that tends to go stale fast, they last beautifully. My instruction from the recipe card says to store leftovers in an airtight container right in the refrigerator. They keep perfectly well for up to a week.
Make sure they are fully chilled before putting them away, as this keeps that chocolate topping nice and firm. Honestly though? I rarely have leftovers because they disappear so quickly at my house!
Variations on Classic Peanut Butter Bars
While this version of peanut butter bars is absolutely perfect as is—classic, creamy, and decadent—I love playing around with textures and flavors! Sometimes you want that salty crunch, and other times you want to lean into the pure nostalgic gooiness people look for in those old-school cafeteria treats. It’s fun to customize!
If you’re looking to make something closer to the famous one-pot creamy recipes you see everywhere, just know that texture is key. These easy bars are structurally sound, which means we have room to play!
Making Lunch Lady Peanut Butter Bars Style Layers
The original lunch lady peanut butter bars often featured a slightly softer, almost frosting-like top layer, sometimes made with buttercream or containing oats in the base for chewiness. If you want that vibe, skip the pure melted chocolate topping in my recipe. Instead, mix that leftover 1/4 cup peanut butter, a little more powdered sugar (maybe 1/2 cup), a dash of vanilla, and a tablespoon or two of milk until it’s perfectly spreadable.
Spread that tangy frosting on top of your chilled base layer, then immediately drizzle a thin layer of melted chocolate over that frosting before it sets. This gives you the layered look that screams nostalgia! You can also swap out those graham cracker crumbs for finely crushed oats if you want a chewier base in your homemade peanut butter squares.
Another easy way to elevate these into homemade Reese’s bars territory? Add a layer of crushed pretzels right on top of the peanut butter base, just before pouring on the chocolate. The saltiness cuts through the richness beautifully. It’s surprisingly addictive!
Frequently Asked Questions About These Peanut Butter Dessert Recipes
I always get asked the same few things when people first try making these creamy peanut butter bars. Since these are so easy, sometimes people worry about the small things, like if they can skip the chilling time or if different peanut butter brands will work. Great questions! Let’s clear up any confusion so your quick sweet treats turn out perfectly every time.
Can I use natural peanut butter instead of the regular creamy kind?
Oh, that’s a tough one! While I love natural peanut butter in some things, for these specific no bake peanut butter bars, I really advise against it. Natural peanut butter doesn’t have the stabilizers that keep the oils suspended. If you use it, your base is going to be runny and oily, and it won’t set correctly. We need that dense, almost fudge-like base, so stick to the standard creamy kind for consistency in your peanut butter dessert recipes.
What’s the secret to getting really clean cuts on these bars?
This is all about temperature! Like I mentioned before in my tips section, chilling is your best friend here. Don’t just chill them until they feel set; chill them until they are firm all the way through, which usually means at least two hours—sometimes three if your kitchen is warm. Right before slicing your homemade peanut butter squares, use a very sharp, thin knife that you’ve briefly run under hot water and then dried off. Wipe the knife clean between every single cut. That hot blade slides right through the chocolate topping without cracking it!
Are these peanut butter bars safe to freeze for later?
Yes, absolutely! In fact, freeing them can be a great way to keep them fresh longer, which is perfect if you’re making a huge batch for a party. Wrap the whole block, pre-cut or not, tightly in plastic wrap, and then wrap that again in aluminum foil to protect them from freezer burn. They freeze beautifully for up to three months and don’t really need any special reheating—just let them thaw on the counter for about 20 minutes before serving. These make fantastic grab-and-go dessert bars for parties!
Can I substitute the graham cracker crumbs with something else?
You certainly can experiment if you’re feeling adventurous! If you’re going for that nostalgic feel, you could try crushing vanilla wafers instead; they work almost identically. For a tangier twist, you could even use crushed shortbread cookies! However, if you’re trying to make something closer to my Pizzelle cookie recipe, I’d stick to fine dry crumbs and skip things with heavy sugar or filling.
Estimated Nutrition for Our Chocolate Peanut Butter Bars
Because we are committed to honesty here at Bring Dish, I have to point out that the nutrition facts for these chocolate peanut butter bars are based on the standard measurements and ingredients I used in my kitchen during testing. Since we changed nothing about the structure of these bars—they are rich, they have the peanut butter, the sugar, and the chocolate—they definitely fall into the ‘indulgent’ category!
These numbers are just estimates, so please remember that your specific brand of peanut butter or chocolate chips might change things slightly. We cut these into 16 nice squares, which is a reasonable serving size for a truly satisfying treat!
- Serving Size: 1 bar
- Calories: 250
- Sugar: 20g
- Sodium: 150mg
- Fat: 16g
- Saturated Fat: 5g
- Unsaturated Fat: 11g
- Trans Fat: 0g
- Carbohydrates: 24g
- Fiber: 1g
- Protein: 6g
- Cholesterol: 10mg
As you can see, these quick dessert bars pack a flavorful punch! They are meant to be enjoyed as a special treat, not an everyday snack, so enjoy every bite without worrying too much about the exact numbers.
Share Your Experience Making These Simple Dessert Bars
That’s it—you have officially mastered the easiest, creamiest, no-bake peanut butter bars recipe out there! Now that you’ve got this incredible treat in your rotation, I genuinely can’t wait to hear what you think. Did you stick exactly to the recipe, or did you try adding a secret ingredient? Did you manage to get those perfect clean slices I talked about?
This community thrives on shared experiences, so please take a moment and drop a comment below! Let me know how many stars you’d give these quick dessert bars. Seeing your feedback, especially when you mention how much your family loved them, keeps me excited to share more simple, connecting recipes from my kitchen to yours.
If you ran into an issue or want to suggest a tweak for the next time, please use the contact page—I read every single note. Happy baking—or, well, happy chilling!
PrintEasy No-Bake Chocolate Peanut Butter Bars
Make dessert simple with these easy no-bake peanut butter bars. They are creamy, rich, and ready quickly for a sweet treat everyone enjoys.
- Prep Time: 15 min
- Cook Time: 0 min
- Total Time: 2 hr 15 min
- Yield: 16 servings 1x
- Category: Dessert
- Method: No-Bake
- Cuisine: American
- Diet: Vegetarian
Ingredients
- 1 cup creamy peanut butter
- 1 cup powdered sugar
- 1/2 cup unsalted butter, softened
- 1 1/2 cups graham cracker crumbs
- 1 cup semi-sweet chocolate chips
- 1/4 cup creamy peanut butter (for topping)
Instructions
- Line an 8×8 inch baking pan with parchment paper, leaving an overhang for easy removal.
- In a medium bowl, combine the 1 cup of peanut butter, powdered sugar, softened butter, and graham cracker crumbs. Mix until fully combined and the mixture resembles wet sand.
- Press this mixture firmly and evenly into the bottom of the prepared pan. This forms your base layer.
- In a microwave-safe bowl, combine the chocolate chips and the remaining 1/4 cup of peanut butter. Microwave in 30-second intervals, stirring well after each, until smooth and melted.
- Pour the melted chocolate mixture over the peanut butter base. Spread it evenly to cover the entire surface.
- Refrigerate the bars for at least 2 hours, or until the chocolate topping is firm.
- Use the parchment paper overhang to lift the bars from the pan. Cut into squares before serving.
Notes
- Chill the bars completely before slicing to get clean cuts.
- If you prefer a fudgier topping, add 1 teaspoon of coconut oil to the chocolate and peanut butter mixture before melting.
- These homemade Reese’s bars store well in an airtight container in the refrigerator for up to one week.
Nutrition
- Serving Size: 1 bar
- Calories: 250
- Sugar: 20g
- Sodium: 150mg
- Fat: 16g
- Saturated Fat: 5g
- Unsaturated Fat: 11g
- Trans Fat: 0g
- Carbohydrates: 24g
- Fiber: 1g
- Protein: 6g
- Cholesterol: 10mg