
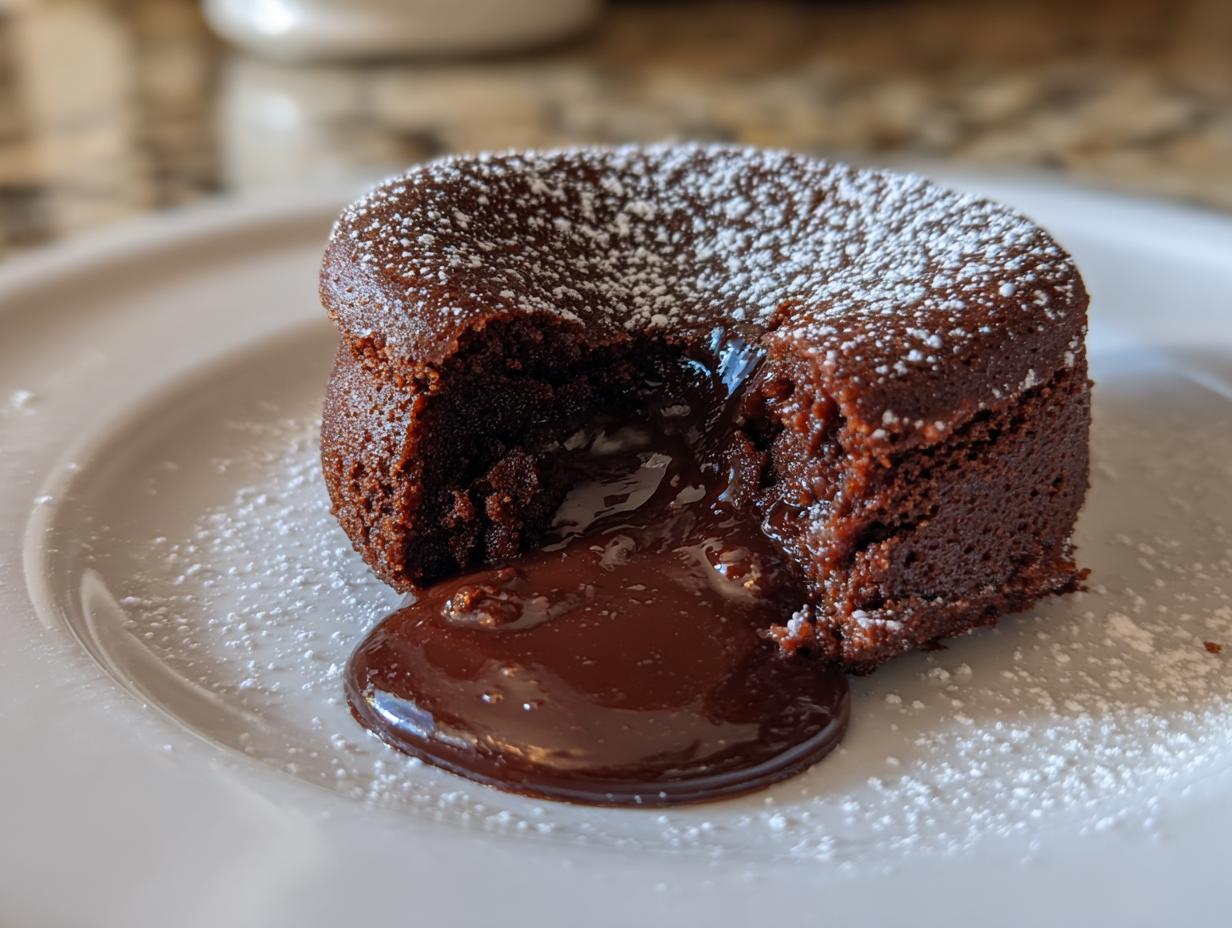
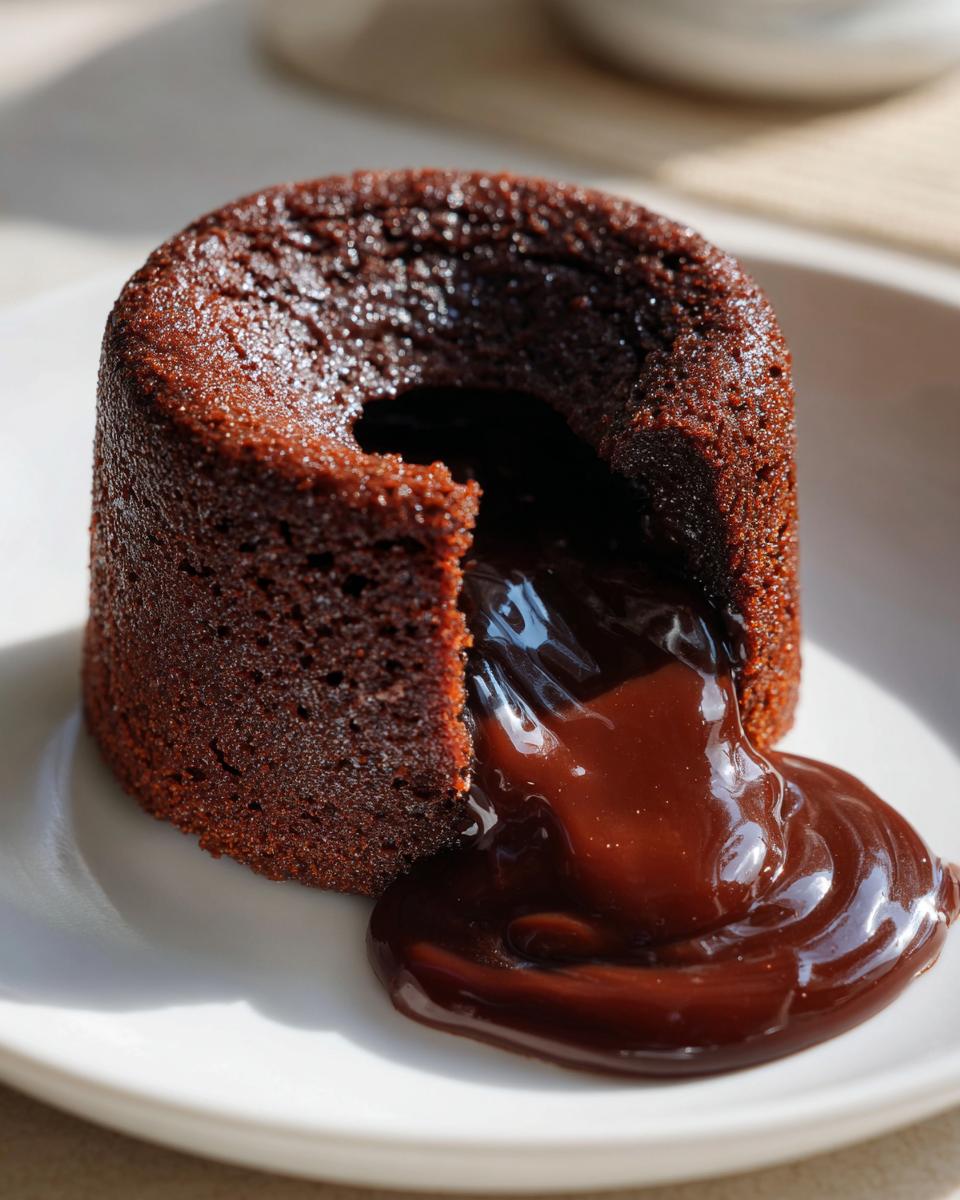
If there’s one dessert that makes people stop talking the moment their fork breaks through the outside, it has to be the molten chocolate center. Seriously, that rich, warm flow of chocolate is pure magic! Forget fancy dinner parties; this lava cake is what I focus on when I want something incredibly decadent but totally achievable, even on a Tuesday night. That’s why I’m sharing The Ultimate Foolproof Classic Chocolate Lava Cake recipe. It embodies everything I strive for here at Bring Dish: turning classic, impressive desserts into something practical that fits right into your real, busy life. You get those crisp edges and that silky center, every single time.
- Why This Classic Chocolate Lava Cake Recipe Works Every Time
- Ingredients for the Ultimate Foolproof Classic Chocolate Lava Cake
- How to Make Lava Cake: Step-by-Step Instructions
- Tips for the Best Chocolate Lava Cake Success
- Variations on the Classic Lava Cake
- Serving Suggestions for Your Warm Chocolate Dessert
- Storage and Reheating Instructions for Leftover Lava Cake
- Frequently Asked Questions About Making Chocolate Lava Cake
- Serving Suggestions for Your Warm Chocolate Dessert
- Storage and Reheating Instructions for Leftover Lava Cake
- Sharing Your Homemade Lava Cake Experience
- Sharing Your Homemade Lava Cake Experience
Why This Classic Chocolate Lava Cake Recipe Works Every Time
I know you’ve probably seen a million recipes claiming to be the *best* molten chocolate cake, but honestly, this one delivers. It’s my go-to for sudden cravings or last-minute date night desserts because it’s truly foolproof. The secret to that perfect, oozing center is really down to the oven temperature and precise timing. We hit that 425°F mark hard and fast. If the oven isn’t hot enough, you just end up with a nice little chocolate cupcake, and where’s the fun in that? This classic lava cake proves that stunning desserts don’t need hours of work.
Quick Prep for Your Decadent Chocolate Treats
Wow, the speed on this is amazing! You can have this entire batter mixed up in under 10 minutes! That’s why these qualify as true quick dessert recipes for when you need something decadent but can’t spend hours in the kitchen. Seriously, gather your ingredients, melt the chocolate, whisk the eggs, fold, and you’re done! Minimal fuss, maximum payoff for your decadent chocolate treats.
Ingredients for the Ultimate Foolproof Classic Chocolate Lava Cake
You only need a few things for this recipe, but the quality really matters, especially when it comes to chocolate. We aren’t messing around here; we want that pure, rich chocolate flavor to shine! For the best flow possible in your lava cake, make sure you use good quality bittersweet chocolate. I recommend something around 60-70% cocoa content.
Here is exactly what you’ll need to get your gorgeous little individual chocolate cakes ready for the oven:
- 4 oz bittersweet chocolate, chopped (Trust me, the better the chocolate, the silkier your melt!)
- 4 oz unsalted butter
- 2 large eggs
- 2 large egg yolks (These extra yolks really help with richness!)
- 1/4 cup granulated sugar
- 2 tablespoons all-purpose flour
- Pinch of salt
- Unsweetened cocoa powder, for dusting ramekins
- Butter, for greasing ramekins
See? It’s ridiculously simple. Gather these up, and we are practically halfway to dessert heaven!
How to Make Lava Cake: Step-by-Step Instructions
Okay, now for the fun part! Making the batter for the perfect lava cake is surprisingly straightforward, but we need to treat our ingredients with respect. First things first: get that oven cranked up to 425 degrees Fahrenheit. That high heat is non-negotiable! As it heats, grab those ramekins. We are setting the stage for one of the most impressive homemade desserts you can make.
Next, we melt the chocolate and butter together until they look smooth as velvet. Then, in a separate bowl, we get the eggs and sugar nice and fluffy—you want to whisk until they lighten up a bit. Gently fold the chocolate into the eggs. Don’t beat it like you’re angry at it! Then, just delicately sift in that flour and salt and fold it together until you see no more white streaks. That’s it for mixing! Divide that rich batter evenly into your prepared cups and get them into that hot oven.
Preparing the Ramekins for Perfect Release
This step is absolutely critical, promise me you won’t skip it! If this lava cake sticks, it’s going to be a disaster when you try to flip it out. Generously butter every single nook and cranny of your 6-ounce ramekins. Then, take your cocoa powder and dust the inside, tapping out all the extra. The cocoa powder acts like a non-stick layer that won’t leave a white flour residue on your beautiful, dark cake when you invert it. Handle this tender batter with care when pouring it in!
Baking Time: The Secret to a Gooey Chocolate Dessert Center
This timing is why people think this dessert is scary, but it’s not! We bake these individual chocolate cakes for just 12 to 14 minutes. Seriously, watch them through the oven door. When they’re done, the edges should look firm and set, but the very center should still look soft and have a little jiggly wobble when you gently tap the baking sheet. That jiggle means you’ve captured the perfectly molten core. If you bake it until it’s solid, you’re just making a fancy cupcake!
Tips for the Best Chocolate Lava Cake Success
Look, even when making these amazing easy chocolate cakes, things can go a little sideways if you aren’t paying attention. I’m going to share the biggest lesson I learned the hard way! Early on, when I was trying to replicate my grandmother’s focus on precision in my own kitchen, I once served these to friends thinking my oven was running true. Well, it was running hot, and those beautiful lava cakes came out fully set! It was embarrassing, but I learned my lesson about equipment reliability. That’s why my number one tip is always to check your oven temperature!
For guaranteed success with the molten center, you must trust the visual cues over the timer sometimes. If you need to make these ahead—and you absolutely can—fill your buttered ramekins and pop them in the fridge for up to a whole day. Just remember, if you bake them straight from the fridge, you need to add about 2 or 3 extra minutes to that baking time we talked about. Nobody likes a cold center when they expect hot goo!
Oh, and if you want to deepen that flavor profile a bit? Try swapping one tablespoon of that flour for instant espresso powder. It brings out the dark chocolate flavor so beautifully; it’s a small trick for a truly rich experience.
Variations on the Classic Lava Cake
While this classic recipe hits all the right notes for a traditional, stunning lava cake, I absolutely love mixing it up when I get comfortable with the base! Once you master getting that perfect ooze time, feel free to experiment. It’s all about customizing your chocolate experience.
The most popular swap I get asked about is definitely the Nutella lava cake variation. And let me tell you, it is divine! If you want to swap in that rich hazelnut flavor, it’s super easy. You can substitute about half of the chopped bittersweet chocolate with an equal amount of Nutella. You might need to slightly decrease the sugar by a teaspoon or two since Nutella is already sweet, but mostly, you just fold that glorious spread right in with the melted chocolate and butter. It creates such a wonderfully gooey dessert!
Another fun way to play is adjusting the chocolate base itself. If bittersweet feels a little intense for you or your guests, try swapping it out for high-quality milk chocolate. Just be warned—milk chocolate melts faster, so keep a super close eye on those baking times; you might shave off a minute or two right at the end. Or, if you’re feeling brave and want something intensely dark, use an 80% cacao bar! No matter which way you go, this base recipe is your jumping-off point for so many delicious, warm chocolate desserts.
Serving Suggestions for Your Warm Chocolate Dessert
You’ve done the hard part—you have this perfect, individual chocolate cake sitting warm on the counter. Now we make it look as stunning as it tastes! Plating is key, especially if you’re making these amazing lava cakes for a special occasion or a romantic evening. The goal is to show off that molten center right away.
The classic presentation that always wows people is pairing the warm lava cake with contrasting temperatures and textures. Forget the plate looking bare! Grab a scoop—vanilla bean is my absolute favorite, but mint chocolate chip is fantastic too—and nestle the warm cake right beside it. The contrast in temperature makes the ice cream melt just slightly down the sides of the cake, which is just beautiful.
If you want something brighter, fresh raspberries or sliced strawberries are unbeatable. Their tartness cuts right through the richness of this gooey chocolate dessert. You can arrange them artfully around the plate, maybe drizzled with a little of that homemade chocolate syrup we talked about earlier if you’re feeling ambitious!
And for that final touch, it needs just one more flourish. A simple dusting of powdered sugar using a fine-mesh sieve makes everything look professional. Don’t overthink it; just a light, snowy coat over the whole dish finishes your impressive homemade dessert perfectly. This presentation makes it feel like you pulled it straight from a high-end bakery!
Storage and Reheating Instructions for Leftover Lava Cake
Now, I’m going to be honest with you: the very best way to enjoy this lava cake is fresh from the oven because that molten center flows best when it’s just baked. But let’s be real, sometimes we just can’t finish all four servings, or maybe you made a batch ahead of time! Storing and reheating is where precision really comes back into play.
If you have leftovers that you didn’t quite finish, cover those ramekins tightly with plastic wrap—really seal them up! You can keep them in the fridge for about two days. When you’re ready for round two, here is my pro tip: you need to reheat them hot and fast to reactivate that gooey core. Pop the covered ramekin back into that 400°F oven (a little lower than the original bake temp) for about 6 to 8 minutes. You want the edges to look warm and the center to just start getting loose again.
What if you baked them all the way through by accident? Oops! That’s okay, they turn into rich little chocolate cakes. You can totally reheat a fully baked lava cake, but it won’t flow like lava. Reheat those at about 350°F for 10 minutes. They are delicious served warm with a dollop of whipped cream; you just won’t get that famous chocolate eruption!
If you made them ahead of time and put the *batter* in the fridge (which I mentioned is totally fine!), remember you need to add a couple of minutes to the initial bake time. That cold batter needs that extra heat to get cooking properly. Always use that ‘jiggle test’ we talked about to know when it’s done, not just the clock!
Frequently Asked Questions About Making Chocolate Lava Cake
I get tons of emails about this recipe, which totally makes sense because when you’re aiming for a perfect gooey chocolate dessert, I know precision matters! Here are a few things folks often ask me about creating the ultimate lava cake experience at home.
Can I skip the ramekins and just use a muffin tin?
You absolutely *can* try using a standard muffin tin, but honestly, I really discourage it for your first time making this! The muffin tin doesn’t hold the heat the same way a ceramic ramekin does, and they are much shallower. This almost always results in the cake baking too quickly and turning into a full-blown cupcake rather than a center melting cake. If you must use a muffin tin, you’ll need to drastically reduce your bake time—maybe try 9 or 10 minutes max—and use the jiggle test religiously!
How do I know for sure when the lava cake is done?
This is the million-dollar question! Forget what the timer says initially; you have to rely on what you see. When you look inside the oven, the edges of your little cakes should look totally set, maybe a little dry looking. But the absolute key is the center: it should still look slightly soft and visibly *jiggle* when you gently bump the baking sheet. If it’s firm or doesn’t move at all, it’s overbaked. That jiggle means you have that beautiful, liquid, warm chocolate dessert waiting for you!
Can I bake this ahead of time for a dinner party?
Yes! This is one of the secrets to keeping your cool when hosting. You can prepare the batter, pour it into those buttered and cocoa-dusted ramekins, cover them tightly with plastic wrap, and store them in the fridge for up to 24 hours. When your guests arrive, you just pop them straight into the preheated 425°F oven. Just remember what I mentioned earlier: you need to add about 2 to 3 extra minutes to the baking time since you’re baking cold batter instead of room-temperature batter. It’s a lifesaver for serving up these rich chocolate baking treats without last-minute scrambling!
What kind of chocolate is best for that true lava flow?
I always recommend using a bittersweet or semi-sweet baking bar, not chocolate chips! Chips have stabilizers in them specifically designed to help them *hold* their shape during baking, which is the exact opposite of what we want for a successful molten chocolate cake. Chopped bar chocolate melts down beautifully into that silky liquid that flows out when you cut into it. High-quality chocolate makes all the difference here!
Serving Suggestions for Your Warm Chocolate Dessert
You’ve pulled the perfect lava cake out of the oven, and now it’s time to make it look as special as it tastes. This is where you turn a simple home bake into one of those date night desserts that feels like five stars!
The best thing you can do is play up that temperature contrast. Immediately after the one-minute rest and careful flip onto the plate, put a scoop of cold vanilla bean ice cream right next to it. The slight warmth of the cake will start melting the ice cream just a tiny bit, creating this delicious, creamy sauce. It’s just heavenly.
For something lighter, fresh fruit is magnificent. Raspberries or even some tart cherries cut through the intense richness of the chocolate so well. Arrange them visually around the plate—it’s all about making that first impression count!
If you want a little extra drama, a light, snowy dusting of powdered sugar right over the top of the warm cake is all you need. Use a fine mesh sieve for the prettiest effect. If you really want to go over the top, a drizzle of high-quality chocolate syrup or raspberry sauce finishes the dish off with a flourish!
Storage and Reheating Instructions for Leftover Lava Cake
I really wish leftover lava cake wasn’t a thing, because these are definitely meant to be eaten warm right away! But life happens, and if you have leftovers, don’t fret. You can’t quite get that fresh-from-the-oven molten flow back exactly, but we can get really close!
If you didn’t finish a whole serving, leave it in the ramekin, cover it tightly with plastic wrap—I mean sealed tight!—and put it in the fridge for up to two days. When you’re ready to try and resurrect that lava, preheat your oven to about 400°F. Place the covered ramekin in the oven for about 7 to 9 minutes. You want to heat it just long enough for the center to soften up again. Check it frequently; if you leave it too long, you’ll lose the flow entirely.
If you find that your lava cake baked through completely (oops!), don’t try to force it to flow again. Just treat it like a rich chocolate pudding cake. Warm it at 350°F for about 10 minutes. It’s still delicious with whipped cream, just less of an eruption!
Sharing Your Homemade Lava Cake Experience
Now that you have the secret to making that perfect, velvety center every single time, I want to hear all about it! Honestly, seeing your successes is what makes all the testing and perfecting worth it for me here at Bring Dish.
Did you serve this decadent chocolate treat for an anniversary? Did it save your weeknight dessert game? Head over to the comments section below and give this recipe a star rating—I’d love to know if it earned that five-star rating for being your go-to easy chocolate cake!
And please, if you snap a photo of that glorious molten center oozing out, tag us! We love following along on your culinary journeys and seeing how you incorporate this show-stopping dessert into your own celebrations. Happy baking, and I hope this recipe brings as much joy to your table as it does to mine!
PrintThe Ultimate Foolproof Classic Chocolate Lava Cake
This recipe delivers a reliably rich, decadent chocolate lava cake with crisp edges and a silky molten center every time. It is a quick dessert perfect for date nights or impressing guests.
- Prep Time: 10 min
- Cook Time: 14 min
- Total Time: 24 min
- Yield: 4 servings 1x
- Category: Dessert
- Method: Baking
- Cuisine: American
- Diet: Vegetarian
Ingredients
- 4 oz bittersweet chocolate, chopped
- 4 oz unsalted butter
- 2 large eggs
- 2 large egg yolks
- 1/4 cup granulated sugar
- 2 tablespoons all-purpose flour
- Pinch of salt
- Unsweetened cocoa powder, for dusting ramekins
- Butter, for greasing ramekins
Instructions
- Preheat your oven to 425 degrees Fahrenheit (220 degrees Celsius). Generously butter four 6-ounce ramekins. Dust the inside of each buttered ramekin with cocoa powder, tapping out any excess. Place the prepared ramekins on a baking sheet.
- Place the chopped chocolate and butter in a heatproof bowl set over a saucepan of simmering water (a double boiler). Stir occasionally until the mixture is completely melted and smooth. Remove from heat and let it cool slightly.
- In a separate medium bowl, whisk together the whole eggs, egg yolks, and granulated sugar until the mixture is pale and slightly thickened, about 2 minutes.
- Gently whisk the slightly cooled chocolate mixture into the egg mixture until just combined.
- Sift the flour and salt over the chocolate mixture. Fold the dry ingredients into the wet ingredients using a spatula until no streaks of flour remain. Do not overmix.
- Divide the batter evenly among the four prepared ramekins.
- Bake for 12 to 14 minutes. The edges should look set, but the center should still look soft and jiggly. This timing is key for the gooey center.
- Let the lava cakes cool in the ramekins for exactly 1 minute. Run a thin knife around the edge of each cake.
- Carefully invert each cake onto a serving plate. Serve immediately with ice cream or fresh berries for a truly impressive homemade dessert.
Notes
- For guaranteed success, ensure your oven temperature is accurate. An oven that is too cool will result in fully baked cakes, not molten centers.
- If you are making these ahead of time, you can refrigerate the filled ramekins for up to 24 hours. Add 2-3 minutes to the baking time if baking from cold.
- For a variation, substitute 1 tablespoon of the flour with 1 tablespoon of instant espresso powder for a deeper chocolate flavor.
Nutrition
- Serving Size: 1 cake
- Calories: 410
- Sugar: 25g
- Sodium: 150mg
- Fat: 28g
- Saturated Fat: 17g
- Unsaturated Fat: 11g
- Trans Fat: 0g
- Carbohydrates: 30g
- Fiber: 2g
- Protein: 8g
- Cholesterol: 160mg