
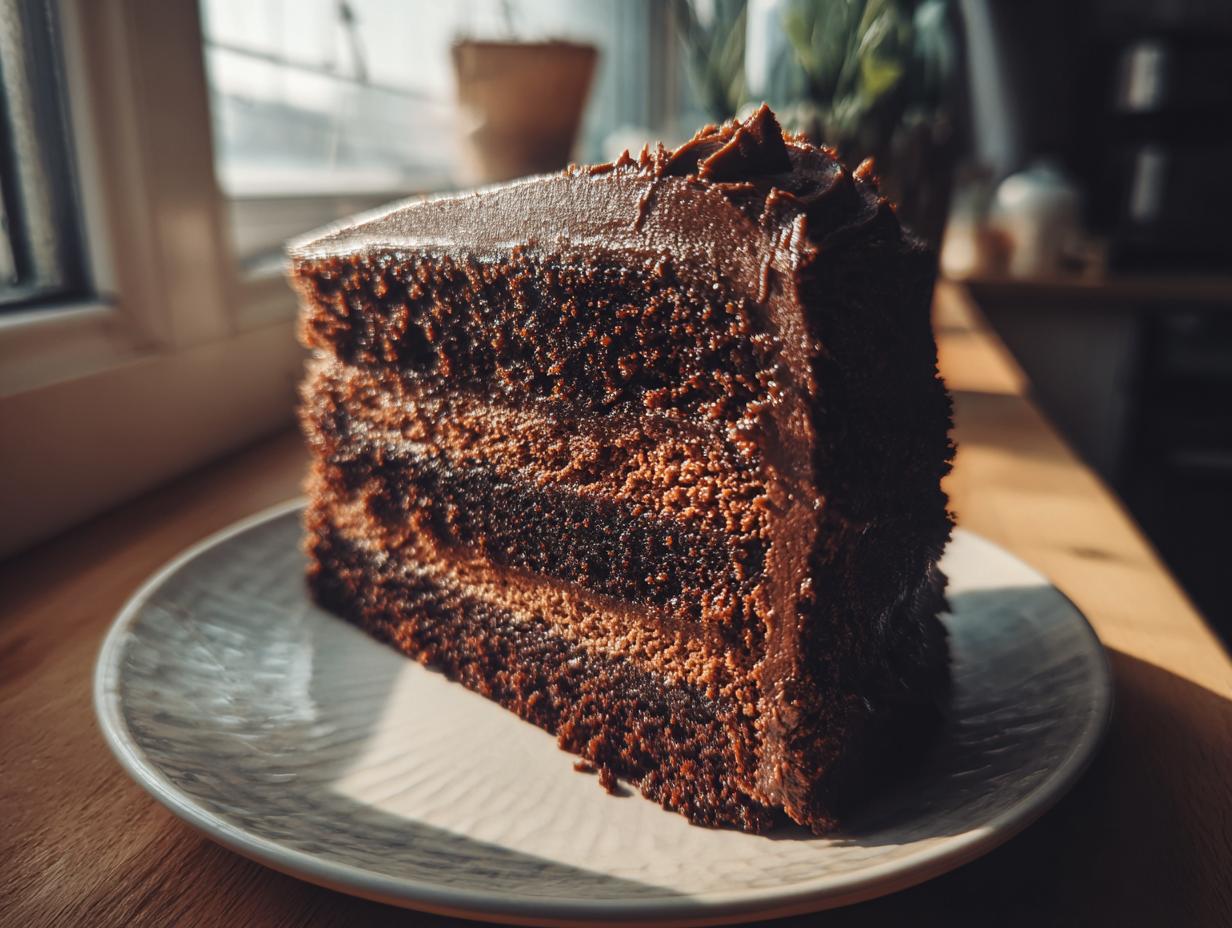
Oh, I know the search. You’ve been looking everywhere for that one cake—the one that proves chocolate doesn’t have to be dry or crumbly to be rich. We all deserve a truly fantastic, deep chocolate experience, right? That’s why I’m so excited to share what I genuinely believe is the Ultimate Rich and Moist Chocolate Cake recipe. This isn’t just another recipe; it’s been rigorously tested here in my kitchen because, just like my grandmother taught me, the food we share is how we connect. You can read more about that philosophy on our About Page. If you want that bakery-style texture with an intensely satisfying, deep chocolate flavor that stays tender even the next day, you’ve landed in the right spot, friend. Get ready for your new go-to moist chocolate cake!
- Why This is the Ultimate Moist Chocolate Cake Recipe
- Gathering Ingredients for Your Moist Chocolate Cake
- Step-by-Step Instructions for a No Fail Moist Chocolate Cake
- Expert Tips for the Best Rich Chocolate Cake Texture
- Variations on This Moist Chocolate Cake Recipe
- Storage and Make Ahead Chocolate Cake Instructions
- Frequently Asked Questions About This Classic Chocolate Cake Recipe
- Nutritional Estimate for This Homemade Chocolate Dessert
- Share Your Ultimate Moist Chocolate Cake Experience
Why This is the Ultimate Moist Chocolate Cake Recipe
Listen, I know how many recipes promise the world and deliver a dry disappointment. That’s why I stand by this one—it’s truly dependable. We’ve focused only on what gets you that perfect texture every single time.
- It delivers an intense, deep chocolate flavor that serious cocoa lovers crave.
- This is a genuine no-fail chocolate cake process. Seriously, it works!
- You get that incredibly tender crumb, which is the magic behind any truly satisfying moist chocolate cake.
We aim for bakery-style results without the fuss, so you can spend less time worrying and more time enjoying your delicious homemade chocolate dessert. If you love reliable baking, you’ll want to check out my tips for fluffy muffins too, like these blueberry ones. But first, let’s talk ingredients!
Gathering Ingredients for Your Moist Chocolate Cake
Now, let’s get down to business. Getting the right ingredients ready first is half the battle won. I always lay everything out on the counter. It keeps me sane, especially when I’m whipping up a big recipe like this moist chocolate cake recipe. Trust me, scrambling for buttermilk when the oven is already hot is never fun.
The beauty of this cake is that it uses simple pantry staples to achieve that intensely fudgy result, but the combination is what makes it special. If you want some other reliable, simple baking ideas, I have a great date nut bread that uses a similar straightforward method. Here are the exact measurements you’ll need for both your cake layers and that dreamy frosting.
For the Decadent Chocolate Cake Layers
- 1 3/4 cups all-purpose flour
- 1 3/4 cups granulated sugar
- 3/4 cup unsweetened cocoa powder
- 1 1/2 teaspoons baking soda
- 1 1/2 teaspoons baking powder
- 1 teaspoon salt
- 2 large eggs
- 1 cup buttermilk
- 1/2 cup vegetable oil
- 2 teaspoons vanilla extract
- 1 cup hot brewed coffee
For the Simple Chocolate Buttercream Frosting
- 1 cup (2 sticks) unsalted butter, softened
- 3 1/2 cups powdered sugar
- 1/2 cup unsweetened cocoa powder
- 1/2 cup heavy cream
- 1 teaspoon vanilla extract
- Pinch of salt
Step-by-Step Instructions for a No Fail Moist Chocolate Cake
Okay, this is where we turn those great ingredients into the moist chocolate cake everyone swoons over. Don’t let the thin batter scare you—that’s the secret sauce! Because we are aiming for foolproof baking, preparation is everything. First thing first: turn that oven to 350°F (175°C). While it heats up, make sure you grease and flour your two 9-inch round pans. If you prefer a 9×13 pan for easier serving, prepare that one too! If you want to see how I handle other reliable yet easy recipes, you absolutely have to check out my foolproof cinnamon roll recipe—it keeps the same no-fail energy! I’ve also got a great recipe for classic deviled eggs if you need an appetizer!
Mixing the Cake Batter
Start by taking your large bowl and whisking ALL the dry stuff together first—that’s the flour, sugar, the first measure of cocoa powder, baking soda, baking powder, and salt. Get that really well mixed up so there are no dry pockets of leavening agent hiding in there. Next, you add the eggs, buttermilk, oil, and the vanilla extract. You’ll want to beat this with your mixer on medium speed for a solid two minutes. Don’t skimp on that time; it helps build the structure! Now, for the magic: carefully stir in the hot brewed coffee. I know, it seems crazy, but this hot liquid blooms the cocoa and creates the thinnest batter you’ve ever seen. That thinness is your guarantee for a tender crumb! Just stir until it’s smooth. If you’re looking for more reassurance on the foolproof nature of this, you can check out why others love this recipe here.
Baking and Cooling
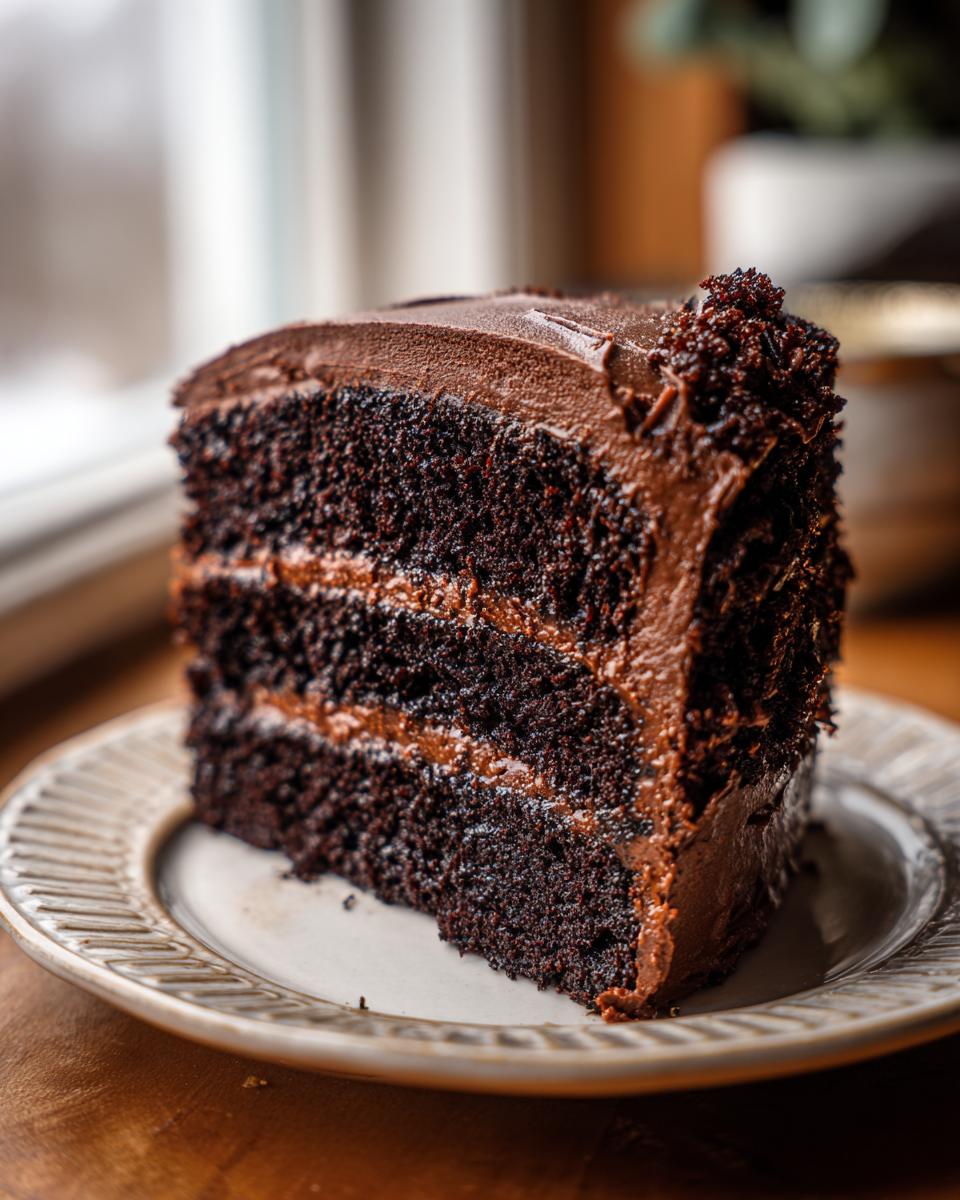
Pour that lovely liquid batter evenly between your prepared pans. If you’re using the round pans, plan on baking for about 30 to 35 minutes. If you went the 9×13 route, it’ll take just a touch longer, maybe 35 to 40 minutes. You’ll know it’s done when a wooden pick stuck right into the center comes out clean. Don’t overbake our beauty! Let the cakes hang out in the pans for 10 minutes—no peeking! Then, carefully flip them out onto a wire rack to cool completely. They must be totally cool before frosting, or we’ll end up with a chocolate puddle heartbreak, and nobody wants that.

Preparing the Bakery Style Chocolate Frosting
While the cakes chill out, we make the frosting, which feels just as decadent as any bakery-style creation. Grab your softened butter and beat it until it looks creamy and light. Then, you need to slowly sift in the powdered sugar and the second measure of cocoa powder—mixing slow at first is key, or you’ll wear your kitchen décor! Once that’s incorporated, add in the heavy cream, vanilla, and that pinch of salt. Now crank that mixer up to medium-high and whip it until it’s light and fluffy. If you feel like it’s too stiff to spread easily, just add in an extra splash of cream until you hit that perfect, dreamy consistency for layering. I love this step because it makes the final cake look like it came right from a fancy shop!
Expert Tips for the Best Rich Chocolate Cake Texture
Achieving that perfect tender crumb in a moist chocolate cake really comes down to how you treat the liquids, kind of like how I learned to handle delicate ingredients when I first started baking years ago. My biggest secret, which I always underline in my notes, is using that hot coffee! It doesn’t make the cake taste like a mocha; it just helps extract the maximum deep chocolate flavor from the cocoa powder. Wow, does it make a difference.
Also, please don’t skip the buttermilk. That little bit of acid reacts with the baking soda to create the most beautiful air pockets, giving us that classic, super soft texture. You can make a quick substitute if you’re out, but honestly, the real stuff just yields a better final product. Baking well is about respecting chemistry, and these little details ensure you get a consistently best rich chocolate cake result every time you bake it. If you’re into baking things that are incredibly tender, you absolutely must see my caramel cake recipe for inspiration!
Variations on This Moist Chocolate Cake Recipe
I love that this recipe is so adaptable! If you want to lean into a richer, darker version, you can absolutely turn this into a variation of a Devil’s Food Cake recipe. Try swapping out the vanilla for a teaspoon of almond extract instead—it adds such a wonderful background note that really complements the chocolate. For a more intense cocoa punch, substitute half of the regular cocoa powder with dark cocoa powder. You can explore a similar deep flavor profile in my wonderful Devil’s Food Cake recipe online, but this batter holds up great to these small tweaks. If you need a different kind of wonderful flavor swap, don’t forget to check out my favorite carrot cake recipe too!
Storage and Make Ahead Chocolate Cake Instructions
Planning ahead for your next event? Great choice! This recipe lets you make a fantastic moist chocolate cake ahead of time, which means less stress on party day. I store my fully frosted cakes right on the counter at room temperature, covered tightly, for about two days. Honestly, the frosting stays fluffy, and the cake stays perfectly moist!
If you need to go longer, or if your kitchen is just too warm, the fridge works too, but make sure it’s airtight so it doesn’t dry out. For freezing this beauty, always chill the cake layers completely first, then wrap them TIGHTLY in plastic wrap, maybe even put a layer of foil over that. You can freeze baked and unfrosted layers for up to a month. When you’re ready to use them, just thaw them on the counter while still wrapped. Everything you need to know about making food easy is right here on my fresh plum cake page; I use similar tricks there!
Frequently Asked Questions About This Classic Chocolate Cake Recipe
I get so many wonderful questions every time someone tries out this recipe for their first time! It’s usually all about locking in that incredible moisture or making sure it looks gorgeous for a big event. Here are a few things I hear most often about baking this classic chocolate cake recipe.
Can I substitute buttermilk in this moist chocolate cake recipe?
That’s a fair question! Buttermilk is the secret weapon here because its acidity reacts beautifully with the baking soda to give you that super soft, tender crumb chocolate cake we are aiming for. If you are completely out, you can make a quick substitute! Just take one cup of regular milk—any kind works—and stir in one tablespoon of white vinegar or lemon juice. Let it sit on the counter for about five or ten minutes until it looks slightly curdled. It works in a pinch, but honestly, the flavor and lift from real buttermilk are just a touch better for the best rich chocolate cake.
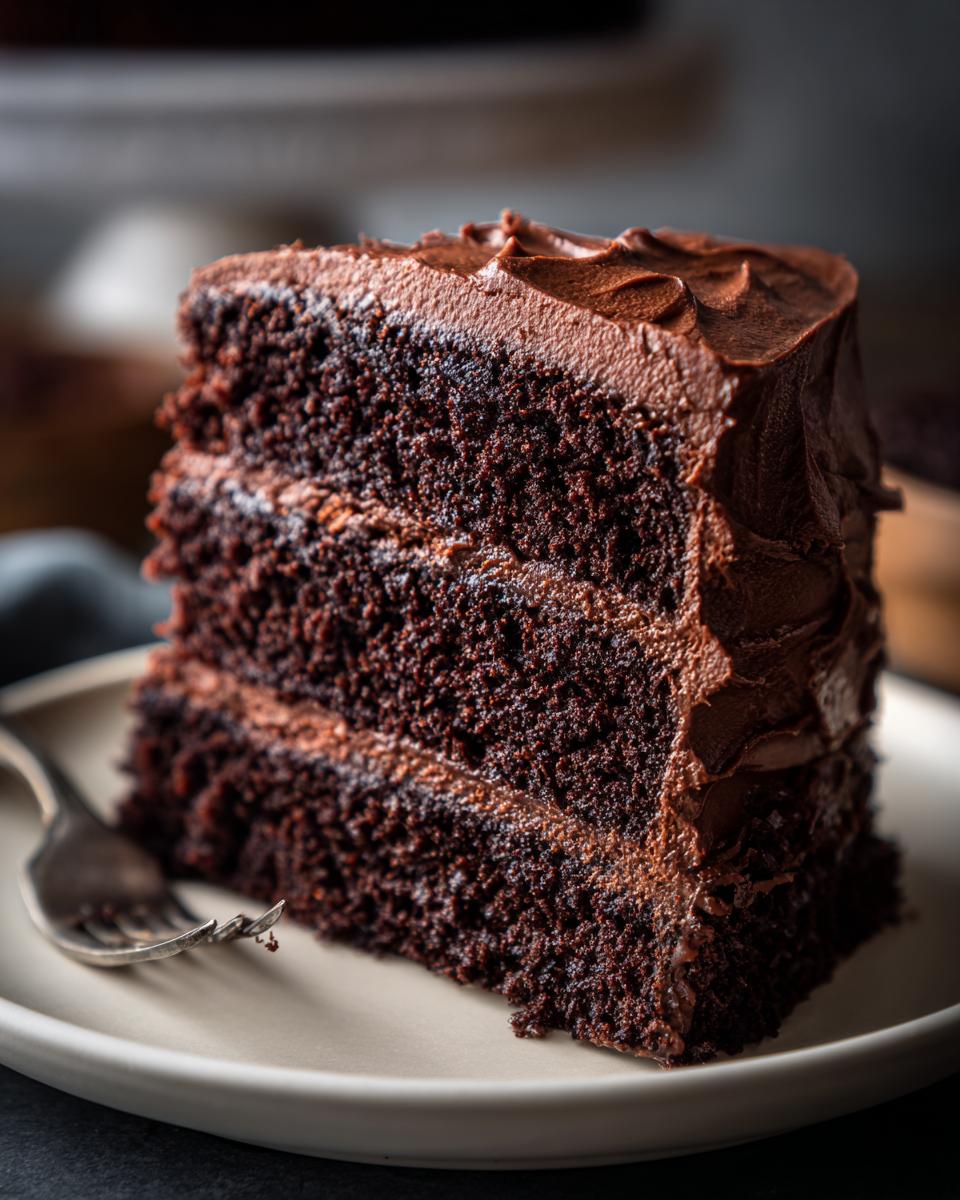
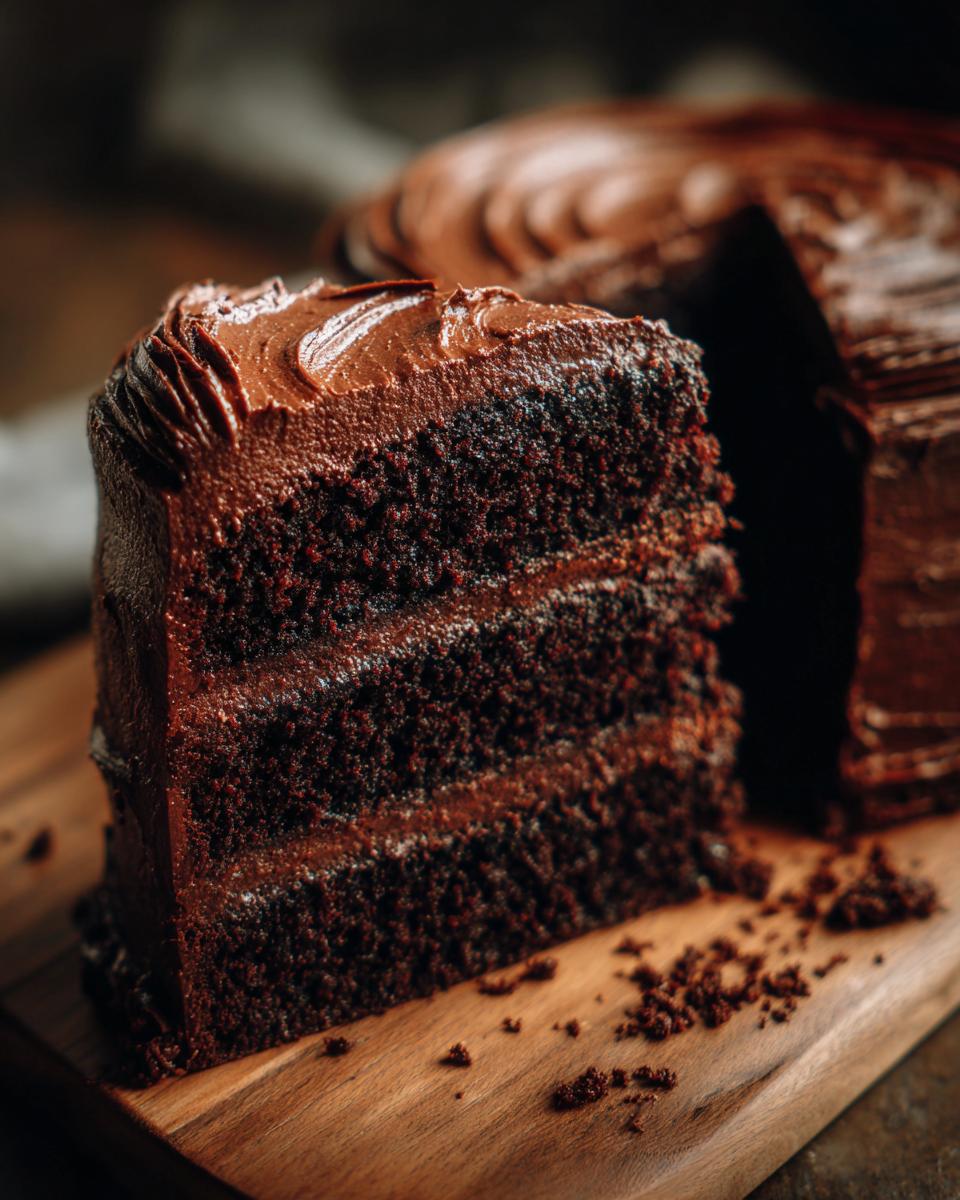
How do I achieve a bakery style chocolate cake look?
This is so much fun! If you have the time, my absolute favorite technique before applying the final layer of frosting is doing a quick crumb coat. After you frost the whole cake thinly—just a sheer layer that traps all those loose chocolate crumbs—you chill it in the fridge for about 20 minutes until that first layer hardens up. Then, you apply your final, thicker layer of that gorgeous frosting. It gives you such a smooth, professional finish! I love using my offset spatula for smoothing, but a simple star tip makes the frosting look instantly like a bakery style chocolate cake!
Is this recipe suitable for a chocolate cake for birthdays?
Oh, absolutely, yes! This is my number one go-to recipe anytime a celebration pops up. Because the layers are so sturdy yet wonderfully tender, they stack wonderfully for a proper two- or three-layer celebration cake. It’s definitely a decadent chocolate layer cake that tastes like something really special, but it’s easy enough to whip up when you need a spectacular homemade chocolate dessert on short notice. My own kids always request this one for their birthdays!
If you’ve tried it, don’t forget to leave a rating below, or better yet, send me a picture! I love seeing the wonderful meals you all bring to your tables. We have so many favorites here once you perfect this one, like our amazing chocolate chip cheesecake!
Nutritional Estimate for This Homemade Chocolate Dessert
I always try to keep track of what’s in the good stuff, though I often don’t dwell on it too much when there’s cake involved! Remember, for something this decadent, sometimes you just have to dive in. The numbers truly depend on how big your slices are—and let’s be honest, cutting a slice of this moist chocolate cake can be tricky because everyone always wants a bigger piece!
The following is an *estimate* based on standard ingredient measurements for one slice. Take these figures as a rough guide for your homemade chocolate dessert, not a strict laboratory breakdown. If you’re looking for something easier to track, check out my recipe for easy homemade pizza!
- Serving Size: 1 slice
- Calories: 450
- Sugar: 55g
- Fat: 25g
- Carbohydrates: 58g
- Protein: 5g
These estimates cover the cake and the frosting combined, so keep that in mind when you look at those numbers. It’s a rich treat meant for special occasions, just like it should be!
Share Your Ultimate Moist Chocolate Cake Experience
Now that you’ve baked this incredible rich and moist chocolate cake, I really want to hear all about it! Did it impress the crowd at your latest gathering? Was it the star of a birthday party? I pour my heart into making sure these recipes work for you in your kitchen, and honestly, seeing your successes is the best part of my job here at Bring Dish.
Please don’t be shy! Jump down into the comments section below and let me know how it turned out. Did you use the hot coffee? Did you stack it high with frosting? A rating really helps other bakers feel confident trying this recipe out, so five stars if you loved it!
And if you snapped a picture of your beautiful, chocolatey creation—maybe drizzled with that lovely buttercream—I would absolutely love to see it! You can always reach out to me directly through our contact page if you have specific questions or want to share a special moment centered around this homemade chocolate dessert. Happy baking, everyone!
PrintUltimate Rich and Moist Chocolate Cake with Chocolate Buttercream
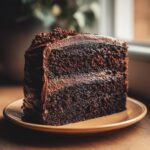
This recipe delivers an intensely rich, bakery-style chocolate cake that stays incredibly moist. It is a foolproof, classic dessert perfect for birthdays and celebrations.
- Prep Time: 20 min
- Cook Time: 35 min
- Total Time: 55 min
- Yield: 12 servings 1x
- Category: Dessert
- Method: Baking
- Cuisine: American
- Diet: Vegetarian
Ingredients
- 1 3/4 cups all-purpose flour
- 1 3/4 cups granulated sugar
- 3/4 cup unsweetened cocoa powder
- 1 1/2 teaspoons baking soda
- 1 1/2 teaspoons baking powder
- 1 teaspoon salt
- 2 large eggs
- 1 cup buttermilk
- 1/2 cup vegetable oil
- 2 teaspoons vanilla extract
- 1 cup hot brewed coffee
- 1 cup (2 sticks) unsalted butter, softened
- 3 1/2 cups powdered sugar
- 1/2 cup unsweetened cocoa powder
- 1/2 cup heavy cream
- 1 teaspoon vanilla extract
- Pinch of salt
Instructions
- Preheat your oven to 350°F (175°C). Grease and flour two 9-inch round cake pans or one 9×13 inch pan.
- In a large bowl, whisk together the flour, sugar, 3/4 cup cocoa powder, baking soda, baking powder, and salt for the cake layers.
- Add the eggs, buttermilk, oil, and 2 teaspoons of vanilla extract to the dry ingredients. Beat with an electric mixer on medium speed for two minutes.
- Carefully stir in the hot coffee until the batter is smooth. The batter will be thin.
- Pour the batter evenly into your prepared pans.
- Bake for 30 to 35 minutes for round pans, or 35 to 40 minutes for a 9×13 pan, or until a wooden pick inserted into the center comes out clean.
- Let the cakes cool in the pans for 10 minutes before inverting them onto a wire rack to cool completely.
- To make the frosting, beat the softened butter in a large bowl until creamy.
- Sift in the powdered sugar and 1/2 cup cocoa powder. Mix on low speed until combined.
- Add the heavy cream, 1 teaspoon vanilla extract, and a pinch of salt. Beat on medium-high speed until the frosting is light and fluffy. Add more cream if needed for desired consistency.
- Once the cakes are completely cool, frost and assemble the layers or spread frosting over the 9×13 cake.
Notes
- Using hot coffee deepens the chocolate flavor without making the cake taste like coffee. This is key for an intensely fudgy cake.
- Buttermilk reacts with the baking soda to give you that tender crumb you want in a moist chocolate cake recipe.
- You can make this a make ahead chocolate cake by wrapping cooled layers tightly in plastic wrap and freezing them for up to one month.
Nutrition
- Serving Size: 1 slice
- Calories: 450
- Sugar: 55g
- Sodium: 320mg
- Fat: 25g
- Saturated Fat: 14g
- Unsaturated Fat: 11g
- Trans Fat: 0.5g
- Carbohydrates: 58g
- Fiber: 3g
- Protein: 5g
- Cholesterol: 75mg